Showing posts with label Frogs. Show all posts

Friday, May 24, 2024

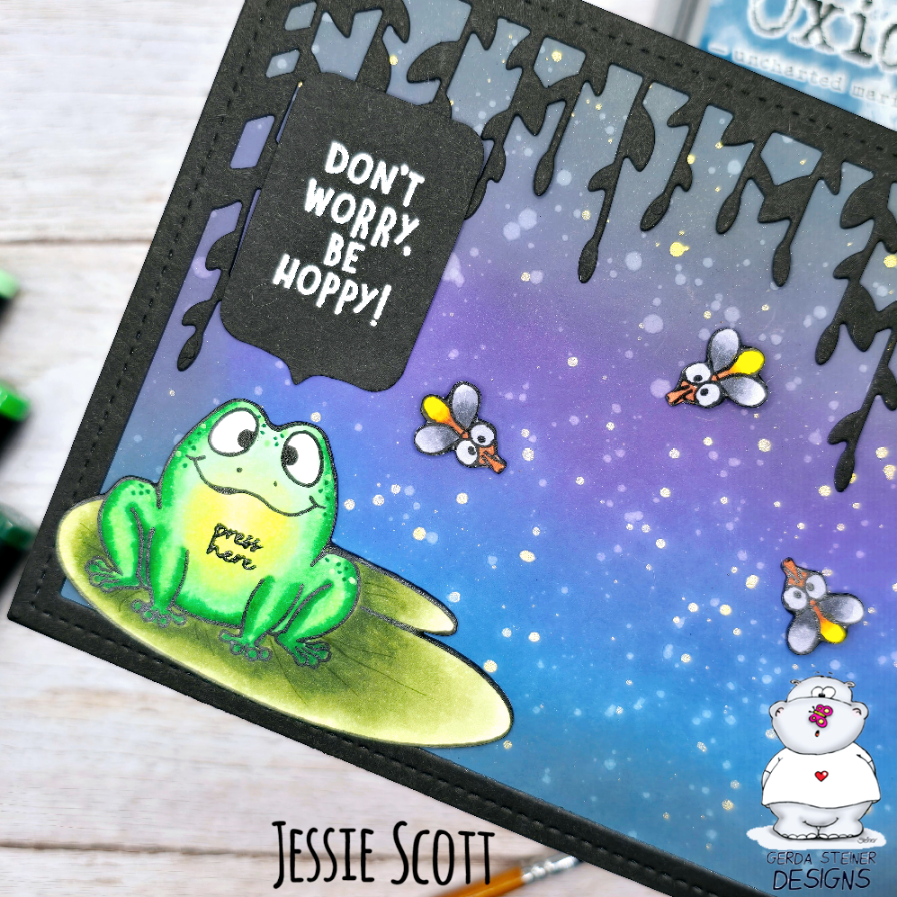
Frogtastic Fireflies Card!

 Greetings everyone! It's me again, Jessie Scott (@chevy.scott on IG) here to share a fun light up card with Gerda Steiner Designs products!

Today I have another fun collaboration with Pear Blossom Press products to share. I needed a summer swap for a card swap group I am in and the GSD Frogs stamp set gave me a fun idea for a bayou sunset with fireflies.


For the background, I used Villainous Potion, Uncharted Mariner, and Black Soot Distress Oxide Ink. For the fun look behind the fireflies I spritzed water and then splattered with gold Kuretake watercolor. 

Quick ink blending video here:

Did you realize yet that the GSD Frogs stamp set actually only has FLIES? not FIREFLIES? :-)
It's really easy to stretch your stamps by using a fineliner/multiliner pen to add extra features to a stamp. I just needed to add a little "bulb" bum to the flies and viola! FIREFLIES!


Last but not least.... COLORING! I used my OLO Markers to color these cuties. Here's a fun coloring video I made, including the frog on his lily pad. 


For more details on how to light up this card, head on over to my blog today for the companion post! I also have a full video linked there today if you want to see how to make this card in its entirety. 


Here's the finished project!


See you again soon!

Sunday, June 12, 2022

Scene Card - Frogs

Hi everyone! It’s Jeannie (InsideoutJeans) on the blog today with Gerda Steiner Design’s stamp set named, Frogs. I figured it was almost summertime and these frogs were fitting for a fun card.


I really found one of the frogs sprawled out to be hilarious and I could only imagine if he was up on a glass window but I also wanted to use the one who looks like he's peeking. Of course, as a result, I have to create a scene card for this. 

If you've seen my previous scene cards, I usually just create scenes by drawing lines, which is exactly what I do here to create this window sill with a planter outside. The idea is that the frog is on the glass window and the frog is peeking on the planter. 

I colored in the entire panel using copic markers, including a marble-esque pattern for the window sill. It was my first time playing with this idea and I think it looks pretty good! 

Thanks for stopping by today and I hope you get inspired to create. Come back again soon for more inspiration and ideas! Happy Crafting! 


Tuesday, August 3, 2021

Frogs - Hi! - Larissa


Hi everyone, I am Larissa from Car-d-elicious and today it is my turn again to post a card on the blog from Gerda Steiner designs. I have stamped on Aquarel papier smooth Wit 200 gram from Vaessen creative one of the frogs from the set Frogs from Gerda Steiner designs with Versafine clair nocturne ink and then I embossed the image with clear embossingpowder. I have coloured the image with Derwent inktense pencils and fussy cut it. 

With the Crea-nest-lies XXL 54 from Crealies I have cut a scalloped square from black cardstock and I glued it on a white card. From rainbow patterned paper from the Really rainbow petite paper pack from Lawn fawn I have cut a square with the Crea-nest-lies XXL 34 from Crealies and I used the same dies to cut a smaller square out of it. I glued the frog behind the square and tied a black ribbon around it and then I glued everything on the card. I have cut the sentiment from black cardstock with the Journaling alpha dies (retired) from Neat and tangled and glued it next to the image. The card is decorated with black hotfix gems.


*********************************************************************************
STAMP: Frogs from Gerda Steiner designs
COLORING MEDIUM: Polychromos pencils
PAPER: Aquarel papier smooth Wit 200 gram from Vaessen creative, White and black cs, Really rainbow petite paper pack from Lawn fawn
INK: Versafine clair nocturne
DIES: Crea-nest-lies XXL 34 & 54 from Crealies, Journaling alpha dies (retired) from Neat and tangled
ACCESSORIES: Clear embossingpowder, Black ribbon, Black hotfix gems

I am a participant in the Gerda Steiner designs Affiliate Programme. This means that if you click on one of my links and subsequently make a purchase, I will receive a small commission of store credit, at no extra cost to you. 

Tuesday, June 15, 2021

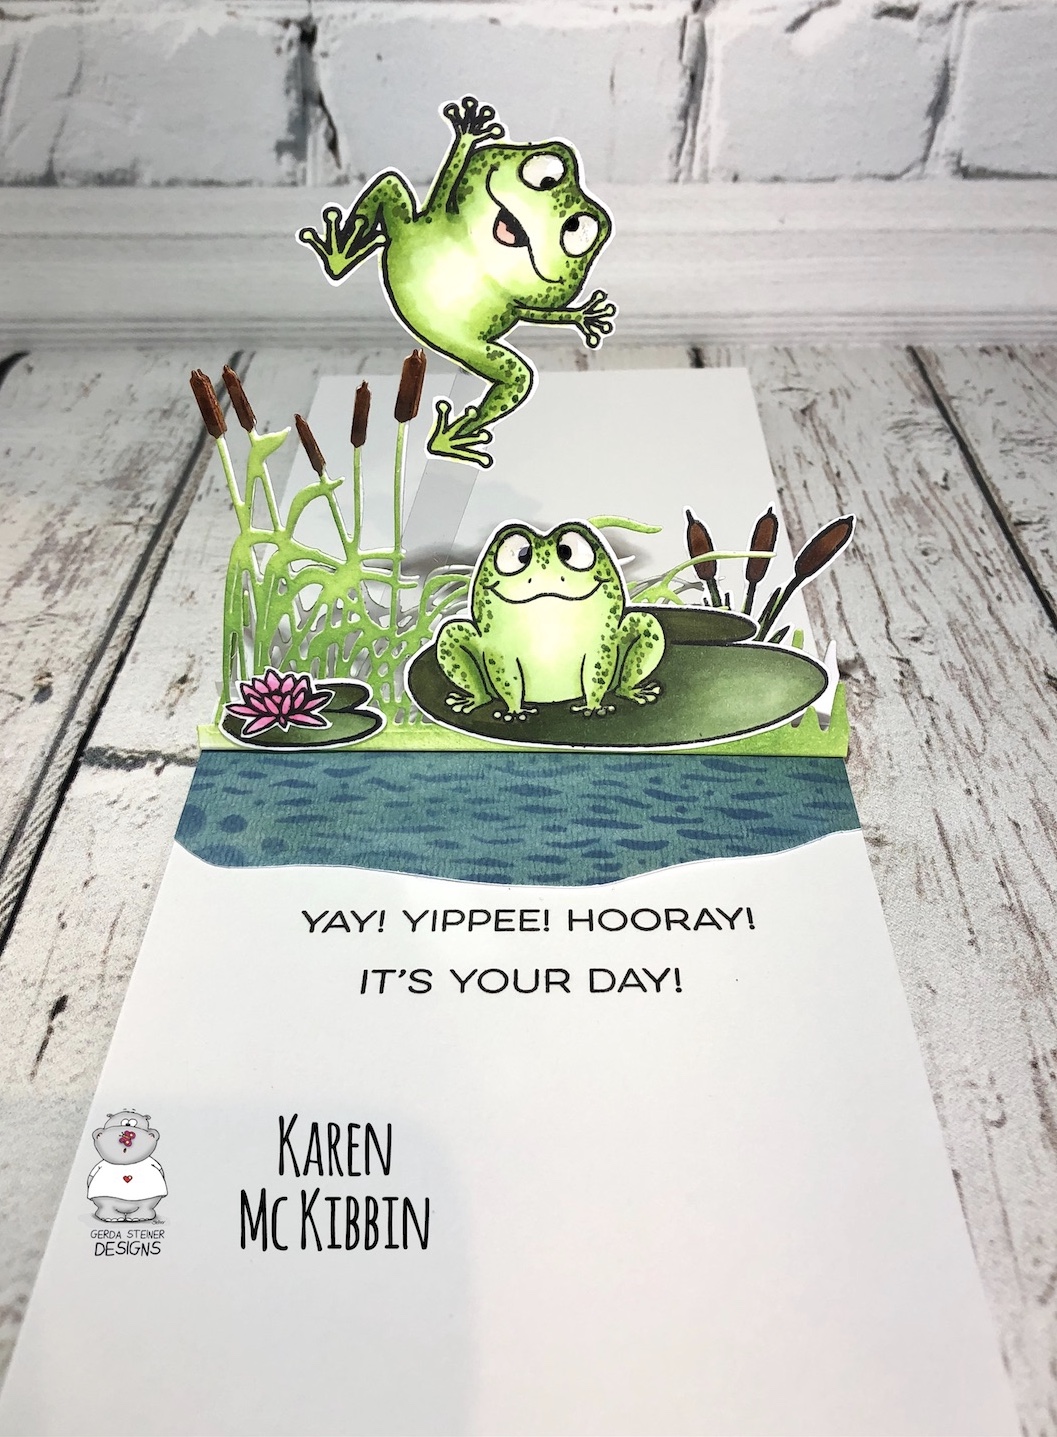
Interactive Birthday Frogs *Video*

Hi and welcome back, it's Karen here today. I'm really excited to share a new inexpensive, interactive die that I've just added to my collection.  It's the Lawn Fawn Swish 'N Pop Pull Tab die and I love how it adds such a fun interactive element to cards. Paired up with all the cute stamps from Gerda Steiner Designs, I see a lot of fun cards in my future 😁 !   I've made a frog themed card for today and here's a look at it.


You can see that when you pull the tab, the frog with the confetti leaps up from behind the frog on the lily pad.  How much fun is that!! Plus, it's really easy to make.  

I've made a video for you on how to create this card, so if you would like more details, PLEASE CLICK HERE.  There's also a second card that I share in the video, again made with Gerda Steiner Designs stamps, so check it out.  

Thanks for stopping by and I hope you're having a great day!


Tuesday, May 4, 2021

Frogs - Larissa


Hi everyone, I am Larissa from Car-d-elicious and today I am posting a new card on the blog from Gerda Steiner designs. I have stamped an image from the set Frogs clear stamps from Gerda Steiner designs with Versafine clair nocturne inkt on Aquarelpapier smooth Wit 200g A6 from Vaessen creative and then I embossed the image with clear embossingpowder. I have coloured the image with Distress inks and then I have fussy cut the image. 


I have made a mini slimline card and I glued patterned paper from the Tiny check paper pad from My favorite things on it, after I first cut a circle out of it with a die from the set Love2craft cutting dies from Action. I have wrapped white embroidery thread around the patterned paper. I have doodled lines on the patterned paper with a black fineliner I have glued the frog inside the circle with foamtape. With the Smile large sentiment dies (retired) from Stamping bella I have cut the word smile three times from black cardstock and after I glued the words on top of each other and then I glued them on the card. 


*********************************************************************************
STAMP: Frogs clear stamps from Gerda Steiner designs
COLORING MEDIUM: Distress inks
PAPER: Aquarelpapier smooth Wit 200g A6 from Vaessen creative, Tiny check paper pad from My favorite things, Black and white cs
INK: Versafine clair nocturne
DIES: Love2craft cutting dies from Action, Smile large sentiment dies (retired) from Stamping bella
ACCESSORIES: Clear embossingpowder, White embroidery thread

I am a participant in the Gerda Steiner designs Affiliate Programme. This means that if you click on one of my links and subsequently make a purchase, I will receive a small commission of store credit, at no extra cost to you.

Tuesday, April 20, 2021

Frogs clear stamps - Hoera - Larissa


Hi everyone, I am Larissa from Car-d-elicious and today it is my turn again to post a card on the blog from Gerda Steiner designs. I have made a card with the one of the sweet frogs from the set Frogs clear stamps from Gerda Steiner designs. I have stamped the image with Versafine clair nocturne inkt on Aquarelpapier smooth Wit 200g A6 from Vaessen creative and then I embossed the image with clear embossingpowder. I have coloured the image with my Derwent inktense pencils and then I have fussy cut the image. 

On a white card I have made paint splatters with the black Posca pen and then I doodled lines around the edges of the card with a black fineliner. With the Crea-nest-lies XXL 33 from Crealies I have die-cut a circle from orange patterned paper from the Take note paperpad from Doodlebug. I used the Crea-nest-lies XXL 92 from Crealies to cut a larger circle from black cardstock and then I glued the orange circle on top of it and then I glued them both on the card. With the Stitched alphabet die-namics from My favorite things I have die-cut the word Hoera (hurray) three times from black cardstock. I glued all the letters on top of each other and then I glued the word on the circle. I used foamtape to glue the image on the card. I have stamped a sentiment (congrats) from the set Stempels "Grote teksten 4" from Carlijn design under the word hoera. I have cut a couple of stars from black cardstock with the Star confetti die from Alexandra Renke and I added those on the card. 


*********************************************************************************
STAMP: Frogs clear stamps from Gerda Steiner designs, Stempels "Grote teksten 4" from Carlijn design
COLORING MEDIUM: Derwent inktense pencils
PAPER: White and black cs, Take note paperpad from Doodlebug, Aquarelpapier smooth Wit 200g A6 from Vaessen creative
INK: Versafine clair nocturne
DIES: Crea-nest-lies XXL 33 & 92 from Crealies, Stitched alphabet die-namics from My favorite things, Star confetti die from Alexandra Renke
ACCESSORIES: Clear embossingpowder, Black fineliner, Black Posca pen

I am a participant in the Gerda Steiner designs Affiliate Programme. This means that if you click on one of my links and subsequently make a purchase, I will receive a small commission of store credit, at no extra cost to you.

Tuesday, April 13, 2021

Frogs (Clear stamps) - Hugs tag - Larissa


Hi everyone, I am Larissa from Car-d-elicious and today I am posting a new project on the blog from Gerda Steiner designs. This time I am showing a tag that I have made.

On the tag I have used one of the frogs from the set Frogs clear stamps from Gerda Steiner designs. I have stamped the image with Versafine clair nocturne ink on Aquarelpapier smooth Wit 200g A6 from Vaessen creative and then I embossed the image with clear embossingpowder. I have coloured the image with my Distress inks and then I have fussy cut the image. 

The tag is cut from dark brown cardstock with the dies from the set Big labelzz & tagzz Rough edges (CLBigLT19) from Crealies. I have cut the layer on top of it from flower patterned paper from the Bundle of joy paperpad from Echo park. I used the die set to cut a little rectangle strip from the dark brown cardstock and glued it on the tag together with the frog. I have glued a little pink enamel heart on. With the Simply said hugs die (retired) from Avery elle I have cut the word Hugs three times from the darkbrown cardstock. I glued them on top of each other and the I glued the word on the tag. 


*********************************************************************************
STAMP: Frogs clear stamps from Gerda Steiner designs
COLORING MEDIUM: Distress inks
PAPER: Aquarelpapier smooth Wit 200g A6 from Vaessen creative, Dark brown cardstock, Bundle of joy paperpad from Echo park
INK: Versafine clair nocturne
DIES: Big labelzz & tagzz Rough edges (CLBigLT19) from Crealies, Simply said hugs die (retired) from Avery elle
ACCESSORIES: Clear embossingpowder, White embroidery thread, Pink enamel heart

I am a participant in the Gerda Steiner designs Affiliate Programme. This means that if you click on one of my links and subsequently make a purchase, I will receive a small commission of store credit, at no extra cost to you.

Tuesday, March 16, 2021

Frog Bookmark

Hi there,

it's Tanja here and I created this fun bookmark using the Gerda Steiner Designs Frogs stamp set:

  • stamp the peeking frog from the Gerda Steiner Designs Frog set with Lawn Fawn Jet Black at the top of a sturdy white paper strip
  • fuzzy cut the frog and adjust the width of the paper strip
  • color the frog with Spectrum Noir Triblend Markers and add extra shading with Faber-Castell Polychromos pencils
  • add color to the bookmark with Distress Ink (Old Paper, Bundled Sage, Shabby Shutters)
  • stamp the sentiment from the Clearly Besotted Stamps Bedtime Story set with Versamark and heat-emboss it with WOW! Bright White Super Fine embossing powder
  • ink up the edges with Distress Ink Black Soot


Have a wonderful day.

Hugs,


Tuesday, October 27, 2020

Frogs (clear stamps) - Larissa


Hi everyone, I am Larissa from Car-d-elicious and today I am posting a new card on the blog from Gerda Steiner designs. This time I have made a card with the clear stampset Frogs from Gerda Steiner designs. I have stamped the frog on Florence watercolour paper smooth from Vaessen creative with Versafine clair nocturne inkt and then I embossed the image with clear embossingpowder. I have coloured the image with my Distress inks and then I have fussy cut the image. 


On a white card I have made a background with the Mini cloud edges stencil from My favorite things and Tumbled glass distress ink. I have used the Tear away stencil from Clearly besotted with Broken china distress ink to add water on my card. I have glued the image with foamtape on the card. With the Crea-nest-lies XXL 110 from Crealies I have die-cut a frame from white cardstock and then I glued it on the card. Then I added a sentiment from the set Frogs from Gerda Steiner designs on the card. 


*********************************************************************************
STAMP: Frogs from Gerda Steiner designs
COLORING MEDIUM: Distress inks
PAPER: White cs, Florence watercolour paper smooth from Vaessen creative
INK: Versafine clair nocturne
DIES: Crea-nest-lies XXL 110 from Crealies
ACCESSORIES: Clear embossingpowder, Minin cloud edges stencil from My favorite things, Tear away stencil from Clearly besotted

I am a participant in the Gerda Steiner designs Affiliate Programme. This means that if you click on one of my links and subsequently make a purchase, I will receive a small commission of store credit, at no extra cost to you.

Wednesday, August 12, 2020

Leaping Frog Masculine Birthday Card

Hello again and welcome!  It’s Karen here today and I’ve got a card that I actually made a while ago, but have since made a video for it that I want to share with you.  I think of this card as being appropriate for a masculine card, so I’m going with that!  It features the adorable frogs from the “Frogs” stamp set from Gerda Steiner Designs  and I added a few images from the “Lucky Duck” stamp set as well.


If  you would like to see a video of how I made this card, I have it posted on my YouTube channel  and you can CLICK HERE to view it.


After copic colouring my images and cutting them out, I added glossy accents to all the frogs eyes and set them aside to dry. To create a shiny green cardstock for the happy birthday circles on the front, I combined some Nuvo glacier paste in Pineapple Delight and Sea Sprite to make a bright green, and spread that out on cardstock in a circle pattern. When it was dry, I used the Simon Says Stamp “Birthday Circle” die to cut it out. I also used this die to cut some circles from black cardstock. I stacked about 3 circles from white cardstock and added a final layer in the green for my center circle, then glued this in the center of my front panel. I glued down portions of circles around this in a mix of the black and green die cuts. I cut the hands from the front frog, trimmed his chest to fit in the circle, and then glued his hands down onto the center ring. Finally, I added dots with some of the copic markers I had used for the images, and added glossy accents to the dots.

For the inside of the card, I watercoloured a small piece of watercolour paper in a mix of blues and greens to make my pond. I used Distress Oxide Faded Jeans to stencil over the water with a stencil from The Crafters Workshop called Mini Sea Bubbles. I freestyle cut this piece to resemble a pond.

I die cut two grassy borders for the triangle pop up. You could use any straight grassy border in your supplies or even make your own border by cutting grass into 2 pieces of cardstock temporarily adhered together. I used a die from Paper Roses called Cattails and Grass border die. I then used brown copic markers to colour the cattails and Distress Oxide in Mowed Lawn for the grasses. I coloured both grassy borders, but for the one in back, remember that you actually colour the wrong side of the die cut. I creased both of these grassy die cuts at 1/4” from the straight edge, creased the folds and added double sided adhesive to the folds.

Next, I adhered the right leg of the leaping frog to a piece of scrap acetate with double sided tape and adhered him to the front grassy border with more double sided tape. Then I attached all my other images with glue, being careful not to get excess glue on the grassy areas.

I glued down my “pond” by positioning it 1/4” from the inside crease of my card. Now I could see where to stamp my inside sentiment and this is best done before adding the triangle pop up. I used a sentiment from MFT’S Yay for You set.

I glued together just the top portions of the grassy borders, to just about a quarter to a third of the way down. You need to leave the bottom of these borders unglued so they can form the triangle pop up. Then I removed the backing paper from the back grassy border, and lined it up along the crease on the inside of my card and pressed it down. Finally, I removed the backing paper on the front grassy border and folded my card base up and over the grassy borders and pressed it down. And that was the card done!

This is such a fun card to receive because the inside is so unexpected, and those frogs definitely make it a masculine card - always a bonus!!  I really hope you’ll give this one a try. Hope you have a great day!


Wednesday, July 17, 2019

Fall smooches

Hi everyone. Lise Mariann here agin to show my second and last card as this month's guest designer. I would like to thank Gerda so much for having me. Such an honour.

For this card I have chosen to make a fall smooch shaker card using several of Gerda's stamp sets.

I started by stamping the kissy-mice (from the "Fall in love" stamp set) and the mushroom and wreath (both from the "Foxes" stamp set).

I colored all the images using copic markers and gave them some details and highlights using a white gel pen. I then fussy cut the images.


I cut a circle from my card panel (cut to size using a stitched rectangle die), glued my wreath on top of the circle and glued a piece of acetate behind the panel. 

To create the shaker I doubled up foam tape around the hole on the back, filled the shaker with beautiful sequins that shifts in color between yellow, orange and green depending on the angle you look at them and to complete the shaker part of the card I glued a piece of cardstock to "close" the shaker.

I stamped the sentiment (from the "Frogs" stamp set) on the panel before I glued on the mice and the mushroom. I popped the mice up on foam tape to create dimension.

I attatched the card panel on a white card base and finished the whole thing with a drop of glossy accent on the noses of the mice.


Take a look at the video below to watch the shaker card "in action".


I wish you all a wonderful day.
x Lise Mariann

Wednesday, July 10, 2019

Fun Window Scene with FROGS


Hello and Happy Wednesday Crafty Friends!  Tina here from Cards & Coffee Time. Today I am sharing a window scene card with the Frogs Stamp Set by Gerda Steiner Designs.  Another Gerda Steiner Designs stamp set that just makes me smile:) There have been times when I have been doing dishes and I have a itty bitty green friend that has clung to the outside of the kitchen window:)  That has inspired today's card:) I hope you will love it as much as I do:)


Thanks so much for stopping by!  If you would like to see how I created this card check it out over on my YouTube Channel, JUST CLICK HERE🙂  Have a Fantastic and Crafty day!  Hugs, Tina

https://youtu.be/qbALr7OEW1w


Tuesday, June 11, 2019

Halli Hallo! - Hello!

Hi there,

it's Tanja here and Gerda Steiner has released the fabulous new Frogs stamp set with EnglishSpanish and German sentiments and over the next three weeks I will show you my creations with the Gerda Steiner Designs German Froesche set. This colorful lake scene is my third creation:

  • color one of the frogs and two flies from the Gerda Steiner Designs Frogs set with Alcohol Markers - add extra shading with Faber-Castell Polychromos Pencils
  • add highlights to the eyes and some freckles to the cheeks with a white gel pen
  • add shimmer to the wings of the flies with Wink of Stella Clear Glitter
  • stamp some fish and some reed from the Gerda Steiner Designs Lucky Duck set into the background - use masking fluid to mask them
  • add color to the background with the Derwent Inktense Paint Pan Set and a watercolor brush
  • remove the masking and color those images with the Derwent Inktense Paint Pan Set as well
  • adhere  the sentiment strip with double-sided foam adhesive
  • before gluing the panel down onto the cardbase add a strip of green cardstock and of striped patterned paper to the left side


Have a colorful day.

Hugs,


Tuesday, May 28, 2019

Herzlichen Glückwunsch - Happy Birthday

Hi there,

it's Tanja here Gerda Steiner has released the fabulous new Frogs stamp set with EnglishSpanish and German  sentiments and over the next three weeks I will show you my creations with the Gerda Steiner Designs German Froesche set. This joyful birthday card is my second creation:

  • create a - as I call it - controlled shaker panel with the help of smooth white cardstock, a frame die, a grass border die, a cloud border die, invisible thread, blue seed beads, double-sided foam adhesive and acetate
  • add color with Distress Oxide Ink (Salty Ocean, Lucky Clover) and a Blending Brush
  • color one of the frogs and the crown from the Gerda Steiner Designs Frogs set with Alcohol Markers - add extra shading with Faber-Castell Polychromos Pencils
  • use a white gel pen for highlights in the eyes and freckles on the cheeks
  • add the sentiment strip with a stitching detail on the left


I hope you got inspired.

Hugs,


Friday, May 24, 2019

SMOOCH!


Happy Friday everyone! Cathy here sharing a card today using the new Frogs stamp set again with what I think is the most adorable frog stamp I've ever seen!

I really love that this set included a little crown and the "smooch!" sentiment. It's so cute!


I created a little pond scene by stamping the frog on the lily pad several times and using just small portions of the lily pad around the outside. (I've Copic colored all of the images and fussy cut them out). 

For the main image, I stamped the crown first and masked it followed by the frog on the lily pad. To get the lily pad behind the frog, I masked the whole image and stamped the lily pad again upside down.

I've inked the background with Evergreen Bough and Broken China Distress inks and for the big lilies, I had to get creative since I don't own a large lily stamp or die. I used a palm tree die in my stash and layered up the fronds. After I colored them up with Copics, I think they pass for flowers pretty nicely. I really love that pop of bright color and he looks happy about it too!

Hope you have a great weekend and see you again soon!

Tuesday, May 21, 2019

Küsschen - Kisses

Hi there,

it's Tanja here and Gerda Steiner has released the fabulous new Frogs stamp set with English, Spanish and German sentiments and over the next three weeks I will show you my creations with the Gerda Steiner Designs German Froesche set. This little frog prince is my first creation:

  • color one of the frogs and the crown from the Gerda Steiner Designs Frogs set with Alcohol Markers - add extra shading with Faber-Castell Polychromos Pencils
  • use a white gel pen for highlights in the eyes and freckles on the cheeks
  • add Nuvo Aqua Shimmer Midas Touch for extra shimmer on the crown
  • color the sentiment strip with Distress Oxide Ink Lucky Clover
  • create a background on a stitched rectangular panel of smooth white cardstock using Distress Oxide Ink Salty Ocean, the Create a Smile Focal Point stencil and a Blending Brush
  • as final embellishment adhere three little Droplets Pool Hearts from Little Things from Lucy's Cards


Have a wonderful day.

Hugs,


Monday, May 20, 2019

He's a Prince!

Hi, there! Its Rebekah with you this evening with a another fun card using the Gerda Steiner Designs Frogs Stamp Set!


This would be a great card to give to a friend who is newly engaged...as a bit of a joke! 

This card came together super fast. All I did was lay out this simple scene in my MISTI. I was sure to use Copic safe ink because I knew I was going to be using my Copic markers. It's my favorite medium! I did stamp and fussy cut the crown. I just attached it to my finished image with a little liquid glue. Using liquid glue gave me a little time to get it positioned perfectly. 


I lined up my sentiment along the edge of the lily pad and stamped it in blue ink to mimic the color of water. Since this is a longer sentiment, it was very easy to bend the stamp to the shape I needed it to be.

 Once I was finished coloring, I used a rectangle die and cut it out. I then attached it to a blue card base. And DONE!

Thanks for checking out the blog today!