Thursday, February 28, 2019

Easter Bunnies Card using our FREE Digi Stamp!

Howdy everyone!  I'm Allison Cope and welcome to the last day of February! 

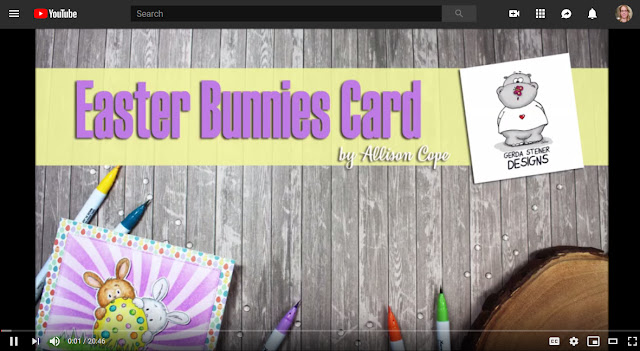
Today we're going to be doing some watercoloring with our adorable FREE digital stamp, Easter Bunnies today.  We are going to working with ZIG Clean Color Real Brush Markers on Strathmore's Bristol Smooth Surface Watercolor Paper.

So grab a cup of your favorite beverage and join me at my desk...

https://www.youtube.com/watch?v=rgkJ-Nij2Wo&feature=youtu.be

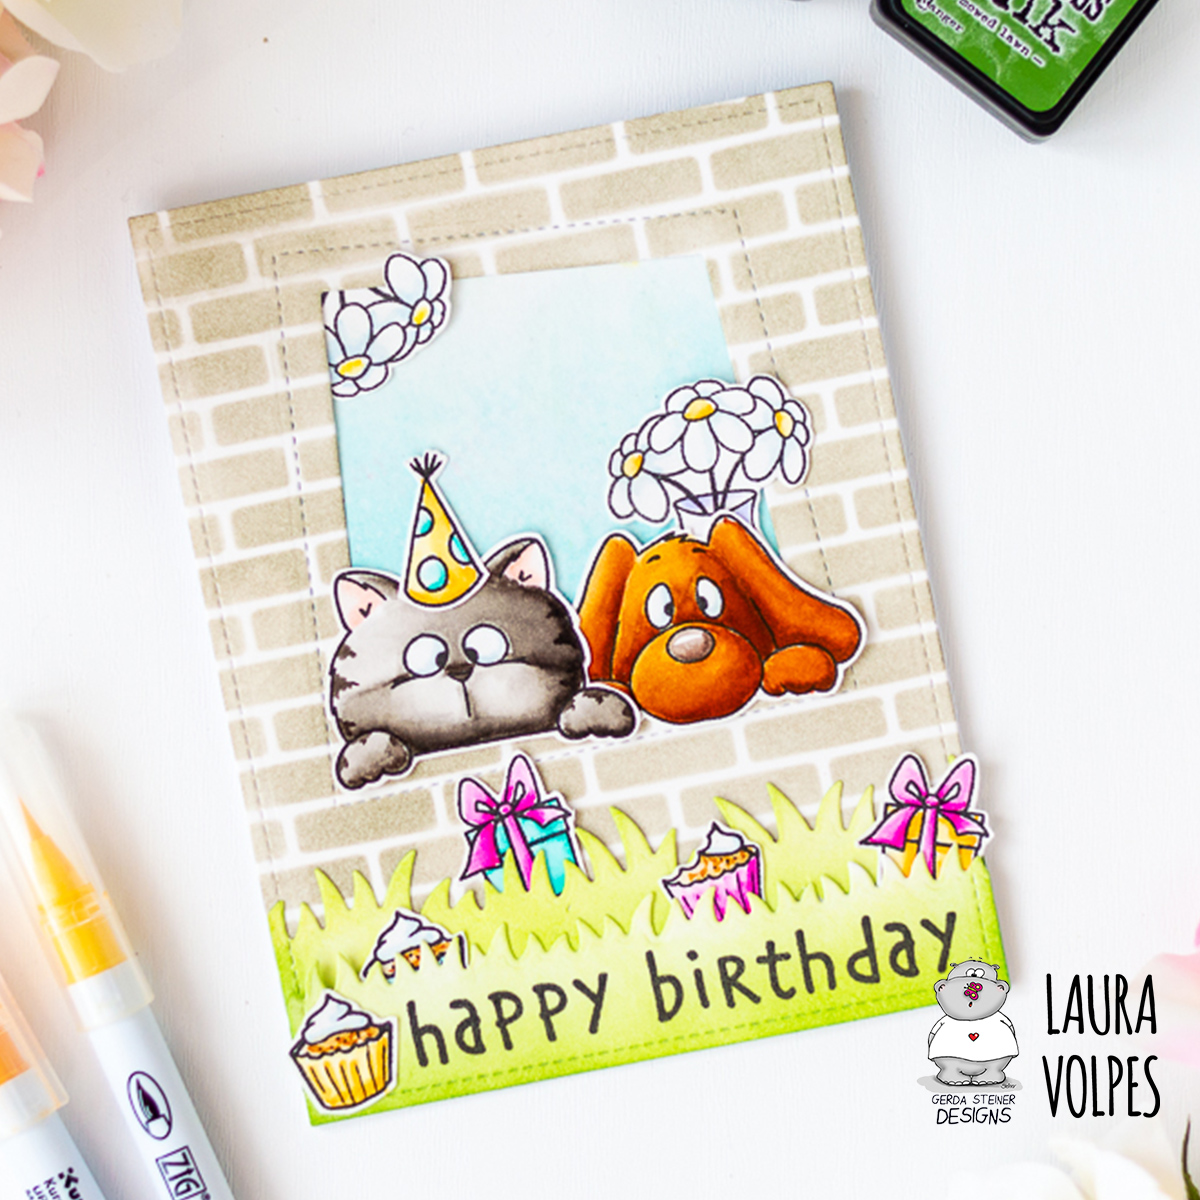
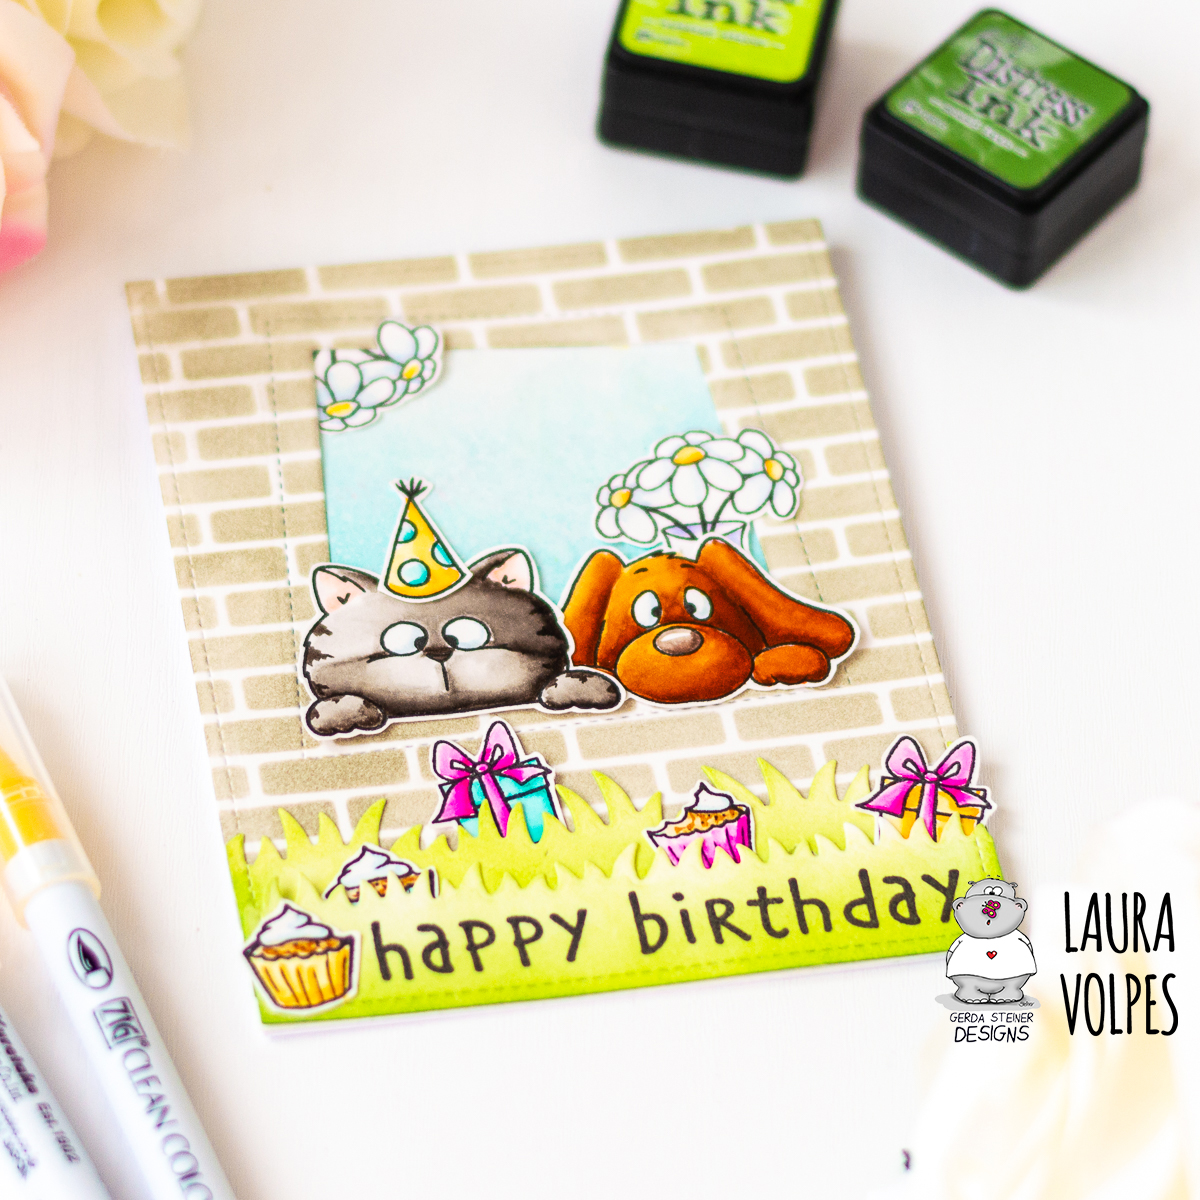
Once again, here is our fun Easter Bunnies card...


To download our FREE "Easter Bunnies" digital stamp, click HERE.

To check out all the fun digital images from Gerda Steiner Designs, visit HERE.  We always something new popping up in the shop!

I hope you too will give watercolouring and digital images a try!  See you again soon!

~ Ally ~

Tuesday, February 26, 2019

Thanks Cat

Hi there,

it's Tanja here and today I used one of my all time favorites the Gerda Steiner Designs Cat with Balloons on this card:

  • color the Gerda Steiner Designs Cat with Balloons with ZIG Clean Color Real Brush Pens and a damp watercolor brush
  • add highlights with a glass dip pen
  • create an accent strip on Lanavanguard Paper using Alcohol Inks (Cool Peri, Pink Sherbet, Aqua)
  • adhere the strip to a white cardbase, add the cat on top and cut out the thanks from the Lawn Fawn Gift Box die set from Tonic Luna Silver cardstock
  • add little dots to the right side of the cat using DIY Distress Gouache and a glass dip pen
  • round the top right corner with a 1'' corner rounder


I hope you got inspired.

Hugs,


Monday, February 25, 2019

I Like You 'Beary' Much with the Lovely Panda Stamp Set


Hello and Happy Monday Crafty Friends!  Tina here from Cards & Coffee Time.  I have a fun card to share with you today using the Oh My Goodness!! Cutest Ever!! Lovely Panda Stamp set.  This little guy will melt your heart, I love his tilted head laying on his arm:)


I hope your week is off to a great start!  I used Distress Oxide Inks and a Brick Stencil to create my background and just had to use 3 of these Lovely Pandas.  For more details you can watch the tutorial on how I created this card down below.  


Thank you so much for visiting!  Wishing you a lovely and crafty day!  Hugs


Sunday, February 24, 2019

Birthday Bear Rainbow Card with Karla


Hello friends! Karla back today with a sweet little birthday card full of brightly coloured rainbow details using the most adorable Birthday Bear Digital Stamp in the Gerda Steiner Designs Shop. We've had a long winter in Alberta, Canada, and the past month has been really cold, so I am totally ready for rainbows and sunshine! I started off by printing this guy onto white cardstock and then colouring him in with rainbow colours using Copic and Prismacolor Markers, both alcohol based.


I used some fun Heidi Swapp Color Fresh paper layered on my card base and added some diecut and ephemera details along with some pretty embellishments from Buttons Galore and More. A bit of Glossy Accents and Stickles add some great detail to this guy's yummy cake!


Thanks so much for stopping by today! I hope you have an awesome week, and don't forget to check out the Gerda Steiner Designs shop to see what catches your eye!

Hugs,
Karla

Saturday, February 23, 2019

I Just Miss You - Catherine

Hello friends,

Today I'm sharing a card using the new 'I Just Miss You Puppy' stamp set.

I love dogs so any stamp set with a puppy included is always a winner for me!

To create this card, I cut a light blue piece of card into a square for my base. I then die-cut a stitched square using kraft cardstock.

Using the sentiment included in the set, I stamped in black ink and then heat embossed with clear embossing powder over the top to add shine and dimension.
Next, I adhered the kraft piece onto the blue piece and adhered them onto a square card base.

I stamped and coloured the adorable puppy portion of the image using Copic markers. For his little bed, I used the paper piecing technique and added a little shading where the dog's shadow would be. 

The image was then attached to the card using foam tape and that completed the card. This was a nice simple card but I'm really pleased with how it turned out. I hope you like it!

Thank you for stopping by today, have a great weekend!

Catherine x

Owl in a heart with Kaja

Hi there,
It's Kaja from Kajcyika crafts and today I have prepared a cute card for you!

Take a look:
I decided to go with a clean and simple look, so I started out by inkblending a heart towards the left edge of the card. I used distress oxides since they are really reach in color.

Next, I stamped out the cute owl from the Foxes stamp set and color it in using alcohol markers. I used gray for the owl since I wanted to make it a snowy owl.
Then, I die cut a heart in white and cut the top part off. I stamped the sentiment that reads 'you are the best' and put the owl image at the top of white piece.

I popped the owl up using foam tape and then I added some black crystals to finish off the card.

Thank you so much for joining me!
Kaja

Friday, February 22, 2019

Dog and butterfly - Larissa


Hi everyone, I am Larissa from Car-d-elicious and today I am posting a new card on the blog from Gerda Steiner designs.


This time I have made a card with the digital stamp Dog and butterfly from Gerda Steiner designs. I have coloured the image with my Polychromos pencils. I used the Mini cloud edges stencil from My favorite things and a blue pencil to colour the clouds. I have die-cut the image with the Stitched wonky circle stax from My favorite things. I have die-cut a scalloped circle from black cardstock with the Crea-nest-lies XXL 53 from Crealies. I have stamped a sentiment from the set More essential sentiments from My favorite things on the circle. On a white card I glued a piece of red design paper from the Designer sheets - Tartan - Bright colours from Card deco after I tied a black ribbon around it. Then I glued the circle with foamtape on the card.


*********************************************************************************
STAMP: Dog and butterfly from Gerda Steiner designs, More essential sentiments from My favorite things
COLORING MEDIUM: Polychromos pencils
PAPER: White and black cs, Designer sheets - Tartan - Bright colours from Card deco 
INK: Versafine onyx black
DIES: Stitched wonky circle stax from My favorite things, Crea-nest-lies XXL 53 from Crealies
ACCESSORIES: Black ribbon, Mini cloud edges stencils from My favorite things

Thursday, February 21, 2019

Hello Spring!

It is still blowing snow where I live but it is not stopping me from thinking about Spring! Hello! Its Rebekah with you this evening sharing this card made using the Hello Spring Stamp set!


There are tons of great Spring images in this set but I chose to use just the chicken and the little chicks.


I used circle dies to create small frames and layered them to create this design. Super easy and I love the clean and simple look!


I colored all the images with copic markers and added a little detail with colored pencils.


Be sure to check out this set. There is something it it for every single Spring occasion you can think of!

Wednesday, February 20, 2019

Dog and Butterfly

Hi Everyone, Melissa here.


For today's card I have used the 'Dog and Butterfly' digital stamp.

The image has been printed onto Copic X-PressIt blending card and coloured with Copic Markers and watercolours for the background.  I have them cut this with a stitched rectangle die.  This is the base card.
Take a piece of white card and cut it using the same stitched rectangle die.  Then using the stitched cloud die, cut again on an angle.  Adhere this to the base card.
Stamp sentiment using black ink.

Apply glossy accents and glitter to the butterfly and allow to dry.


I hope you have a great day
xxx
Hello Spring...


Hi Lovelies..  

Today I'm Guest Designing for the wonderful Gerda Steiner Designs. and I've chosen to use this uber-cute bunny from the Hello Spring Stamp Set - as Spring (especially here in the UK) is just around the corner.

I used a cloud stencil and some Distress Inks to create the sky background - then used some post it tape to give a clear line so I could sponge the grass - again using Distress Inks.


Card Info:

Image and Sentiment - Gerda Steiner Designs Hello Spring

Die - MFT Stitched Rectangle

Paper - MFT

Colouring - Copics
Bunny - E50/51/53/55/57 R20
Butterfly R83/V05
Flower R81/83 YG17

Hope you like my make today and that you'll take a peek at the fabulous stamps available at Gerda Steiner Designs!

Big hugs


Umbrella mouse - Larissa


Hello, I am Larissa from Car-d-elicious and today I am posting a card on the blog from Gerda Steiner designs. I have made a card with the digital stamp Umbrella mouse from Gerda Steiner designs. I have coloured the mouse with my Polychromos pencils and the black glaze pen. With a white gelpen I have added dots on the scarf. I have fussy cut the mouse.


On a white card I added a strip of masking tape and then I made a floor for the image with Brushed corduroy and Gathered twigs Distress ink. With Broken china Distress ink I have added a sky for the image. In the sky I stamped a couple of raindrops from the set Chance of rain from Mama elephant with Broken china Distress ink. I glued the mouse with foamtape on the card. Next to the image I have stamped a sentiment from the set Chance of rain from Mama elephant.


*********************************************************************************
STAMP: Umbrella mouse from Gerda Steiner designs, Chance of rain from Mama elephant
COLORING MEDIUM: Polychromos pencils, Distress inks
PAPER: White cs
INK: Versafine onyx black, Broken china, Brushed corduroy and Gathered twigs Distress ink
ACCESSORIES: Black glaze pen, white gelpen

Tuesday, February 19, 2019

Under my Umbrella

Hi there,

it's Tanja here and you should really check out the adorable Gerda Steiner Designs Umbrella Mouse Digital Stamp:

  • color the Gerda Steiner Designs Umbrella Mouse with ZIG Clean Color Real Brush Pens and a damp watercolor brush
  • add highlights with a white gel pen
  • create a background on a stitched panel of watercolor paper using Distress Oxide Ink (Faded Jeans, Stormy Sky)
  • stamp some raindrops from the Create a Smile Your View set with Distress Oxide Ink Chipped Sapphire
  • mount the watercolor panel onto a piece of patterned paper from the Prima Marketing All about me 6x6 paper pad before adhering it to a grey cardbase
  • stamp the sentiment from the My Favorite Things Rain or Shine set with Distress Embossing Ink onto a strip of grey cardstock and heat-emboss it with WOW! Bright White Super Fine embossing powder


Have a sunny day.

Hugs,


On the Table | Pull Up Card


Hi everyone! It’s Jeannie (InsideoutJeans) here today with a card I made along with a video showing the process for creating this card. Today, I’m featuring Gerda Steiner Designs, On The Table along with the Hoppiness stamp set. 


I created a scene card a couple weeks ago featuring the kitty and the puppy peering over a table at some cookies. While creating that card, I thought about the fence in the Hoppiness set. It's one of my favorite accessory pieces in a stamp set since it is super versatile. It's no different for this card as I used it for the dog to peer into a backyard during a cupcake party. 

The best part of this card is that the two sets work so well together. The only added piece was that I had to draw in the table for the cupcakes to sit but the scene creates itself. 

My original idea behind this card was that the dog would pop up peering over the fence and to create this I needed to mask off the dog so that I have just his two paws over the fence as well as stamping out the dog and drawing in the rest of his face without the paws. 


If you are curious about how I created it, I'm including the video link. You'll see that I encounter some issues creating the slider channel for the pull up card but I was able to figure it out. With any card, there are some challenges, but you can normally figure a way to fix it. 

When the recipient pulls up the card, the doggie pops up. I also really love that I added the bunny popping out from the ground in the scene as well. It adds a little something extra to it.  

Thanks for stopping by! Come back soon! 


Monday, February 18, 2019

XOXO....!!

Hi everyone, it's Ashlee here with a new card to share with you...

For this card I used the super cute set "Lovely Pandas"(co-ordinating dies also available). 
I just adore this set, it can be used for many themes of cards!! 


I used a couple of Catherine pooler inks for my background in the colours tutti frutti and bellini. 
I blended them until I was happy with the blend and the spritzed with water for a cool effect. 

The panda is coloured with my fave medium Copics except for the balloon which I coloured with a WOW embossing pen and then heat embossed with sunset boulevard embossing powder. 

The xoxo sentiment is also heat embossed with WOW opaque white powder.

I hope you enjoyed my latest Gerda inspiration. 
Happy crafting, till next time Ashlee. 

Sunday, February 17, 2019

I like you 'beary' much with Kaja

Hi there,
It's Kaja from Kajcyika crafts with you today. Valentine's day has just passed and this doesn't mean we shouldn't tell our loved ones how we feel about them. That's why I made a cute card full of love!

Take a look:
First, I made the background for which I stamped out the 'XOXO' a bunch of times on a scalloped rectangle. I used three colors of pink Distress oxides since I knew I will color in the hearts on the image with the same color shceme.

Then I stamped out the panda holding an envelope and some hearts from the Lovely pandas stamp set and colored the image in using alcohol markers.
I felt like the background is too bold so I added a piece of vellum behind the panda to soften it out.

Then, I stamped out the sentiment that reads 'I like you beary much' in black ink on white cardstock.

I glued everything together with double sided tape and foam tape.

Thank you so much for joining me!
Kaja

Saturday, February 16, 2019

Have a sweet day by Noga Shefer


Hi crafty friends, Noga here and I am so excited to be guest designing again with Gerda Steiner Designs today.


To make this card I took an A2 panel of Bristol smooth cardstock. The background was created by blended tattered rose distress oxide ink.


Next I glued a pic of plaid paper to the background to create a table.

Next I colored the images using copic markers. I glued all the images to my panel with foam tape for dimension.

Next I stamped a greeting from the stamp set using tumbled glass distress oxide ink and heat embossed it.


To finish off, I added a few sequins for decoration. 


I hope you enjoy the card I created and feel inspired to create!

 Thank you for visiting the blog.

Have a great day!

Noga.


Friday, February 15, 2019

Easter is on its it's way!

Hello, crafty friends! It's me, Rebekah, here to share a card I made using a stamp set from the new collection coming soon to Gerda Steiner Designs! Easter Bunnies is the name of this set and look how adorable these little images are!


To make this card follow these easy steps -

1. On a 4 1/4 x 5 1/2 piece of light gray cardstock, randomly stamp the Easter egg using a similar color ink. 
2. Use a rectangular die and a circle die to create the top panel. Glue to gray cardstock. 
3. On the die cut circle, ink blend green on the bottom for grass and light blue on the top for sky. Add a few wispy pieces of grass with a Copic marker.
4. Stamp images and color. Fussy cut and then arrange your scene. Adhere to die cut circle. Add a strip of die cut grass. 


5. Stamp sentiment in Versamark ink and heat emboss with white embossing powder. Add to bottom of circle and adhere to the card base. 
6. Add a little sparkle here and there with a glitter pen.


Super easy, super fun and super cute! Look for this stamp set soon in the 

Thursday, February 14, 2019

[VIDEO] Birthday Window Card with Laura

Window Birthday Card feat Gerda Steiner Designs On the Table

Hi everyone! It's Laura here, and today I am back with a window birthday card I created with the Gerda Steiner Designs On the Table stamp set. At the end of this post you can also find a video tutorial showing how you can make it too!

As a first step I stamped my images with Scrapbook.com Premium Hybrid Ink on Strathmore Bristol Smooth Cardstock. I then colored them with Zig Clean Color Real Brush Markers and fussy cut them with my scissors. Coordinating dies are also available, if you are interested. 

Window Birthday Card feat Gerda Steiner Designs On the Table

For my card base I die cut some more Bristol Smooth Cardstock by Strathmore using the an A2 stitched rectangle die. I then die cut an opening in the panel, which will be the window where the critters will peek through. I blended Distress Ink in Pumice Stone through the a stencil to create a brick wall effect.

Window Birthday Card feat Gerda Steiner Designs On the Table

I die cut two grassy borders and blended Distress Inks in Mowed Lawn and Twisted Citron to add color and dimension to the them.

Window Birthday Card feat Gerda Steiner Designs On the Table

I stamped the Happy Birthday sentiment from the On the Table stamp set on the grassy border that was going to be in the foreground, using Scrapbook.com Premium Hybrid Black Ink.
For the window background I blended Distress Inks in Peacock Feathers and Tumbled Glass on a piece of Bristol Smooth cardstock. I added some interest to the panel by spritzing it with water from a Distress Sprayer.

Window Birthday Card feat Gerda Steiner Designs On the Table

I glued all the elements on my scene and mounted everything on a top-folding A2 card base. 

If you want to see the cardmaking process in more detail, you can watch the video tutorial below.


And that's it for today! I really hope you guys enjoyed this post and I hope I inspired you to create with the adorable Gerda Steiner Designs On the Table stamp set! Thank you all so much for stopping by and have a great day!