Saturday, October 30, 2021

Thanks a melon....!!

 Hey friends...

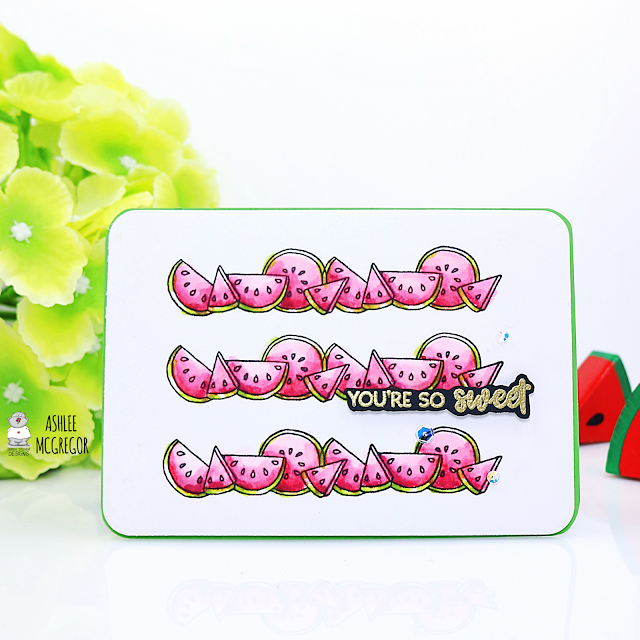
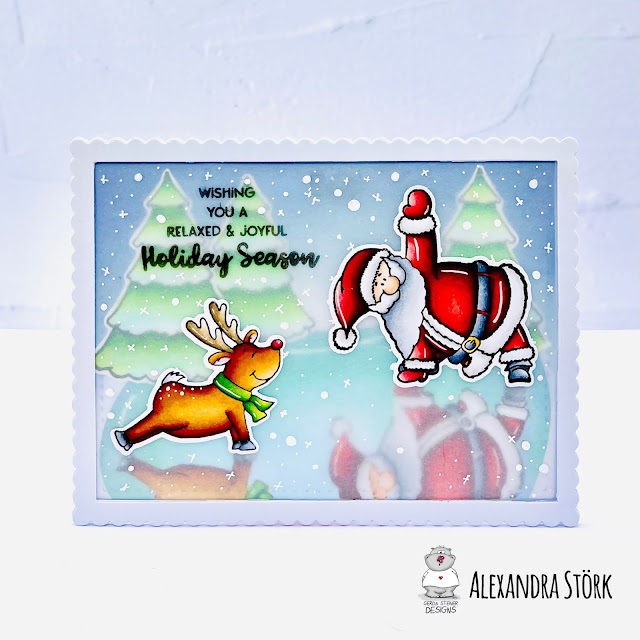
It's Ash and I have a slimline card to share today featuring a juicy watermelon theme using the Melon friends stamp set by Gerda Steiner designs!!

To create this card I started with a base of watercolour cardstock and masked off the bottom half so I could create an inked piece using Martini ink from Catherine Pooler....

Once I had the colour down I stamped on the fabulous watermelon border design from Melon friends using Versa Claire black ink and then gave it a splatter with CPD Midnight ink!!


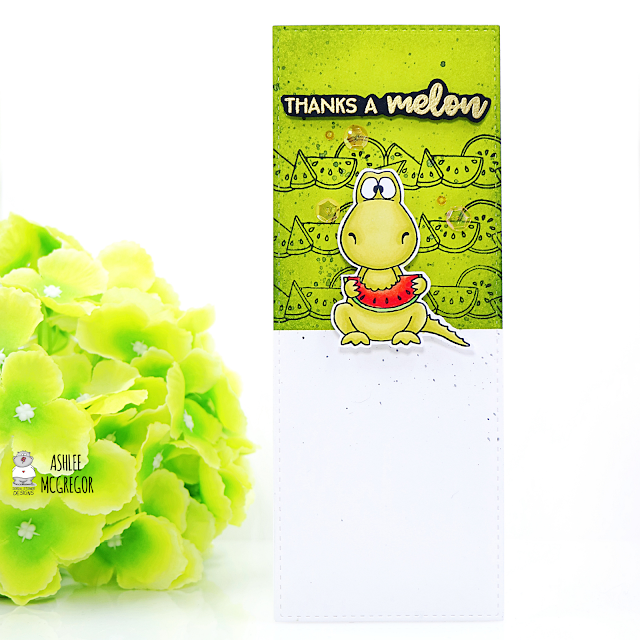
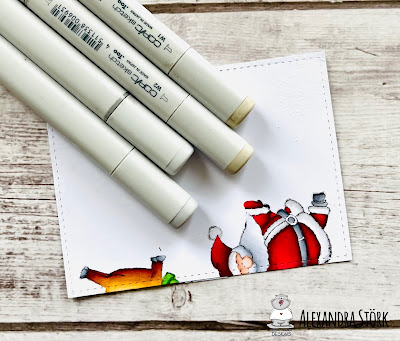
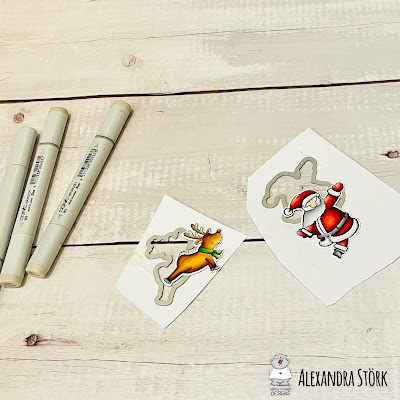
I coloured in the super cute Dino eating his watermelon with Parkoo alcohol markers and added him to the card base using foam tape for dimensions....

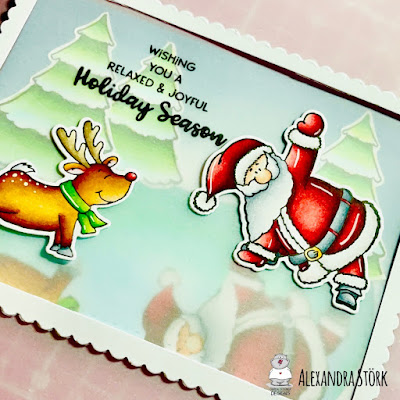
A WOW! Gold embossed sentiment on black cardstock then fussy cut and some sequins finished the card off!!

I hope you enjoyed this watermelon themed slimline, hugs Ashlee 

Friday, October 29, 2021

Halloween Card by Noga Shefer


Hi crafty friends,  Noga here and I am so happy to share with you another project for GSD today.

My card featuring the adorable Bats 4x6 Clear Stamp Set and Bats 4x6 Die Set.

To make this card I took an A2 panel of Bristol smooth cardstock.

The background was created by blending shaded lilac,speckled egg  and wilted violet distress oxide inks.
I spired some water onto it and soaked it up with paper towel.

Next I glued a white spider web on the background.
Than I colored the sweet spider using copic markers and glued it to my panel using  mini action wobbler.

Next I stamped a greeting from Gourds 4x6 Clear Stamp Set using white powder and heat embossed it on black banner.

For a final touch, I added a white twine.


I hope you enjoy the card I created and feel inspired to create!

Thanks for stopping by,


Tuesday, October 26, 2021

A boo to you card with a turning ghost - Larissa


Hi everyone, I am Larissa from Car-d-elicious and today it is my turn again to post something on the blog from Gerda Steiner designs and this time I have made a mini slimline halloween card with a special effect. I have stamped the funny ghosts from the stamp set A boo to you from Gerda Steiner designs and then I coloured them with my Polychromos pencils and the black glaze pen. I have coloured the ghosts also with the Clear Spectrum noir sparkle glitter pen.


The mini slimline card is made with the die set Mini slimline B (CLCZ83) from Crealies. I have made the card from white cardstock. The second layer is cut from black cardstock. The purple patterned paper is from the Classic sunburst paperpad from Sunny studio. I have cut a couple of clouds from white cardstock with the Spooky clouds (retired) from Taylored expressions and I glued those on the purple paper. I added stars that I have cut with the Star confetti die from Alexandra Renke from black cardstock. 

The upper ghost can turn when you pull the white cord and to make this I followed a tutorial (dutch spoken) from Crealies. For the squares and circles for the mechanism I have used the die sets Crea-nest-lies XXL 21 from Crealies and Crea-nest-lies XXL 22 from Crealies. I have added a little clip with my turning ghost more down below in this post. After I glued the ghosts both on the card I have added a sentiment that I have stamped on the card with a sentiment from the set Peekin' pumpkin kitty from Gerda Steiner designs


*********************************************************************************
STAMP: A boo to you and Peekin' pumpkin kitty from Gerda Steiner designs
COLORING MEDIUM: Polychromos pencils
PAPER: White and black cs, Classic sunburst paperpad from Sunny studio
INK: Vewrsafine clair nocturne
DIES: Mini slimline B (CLCZ83) from Crealies, Crea-nest-lies XXL 21 and 22 from Crealies, Star confetti die from Alexandra Renke, Spooky clouds (retired) from Taylored expressions
ACCESSORIES: Black glaze pen, Clear Spectrum noir glitter sparkle pen. White embroidery thread, brad. 

I am a participant in the Gerda Steiner designs Affiliate Programme. This means that if you click on one of my links and subsequently make a purchase, I will receive a small commission of store credit, at no extra cost to you.


Happy Holidays to you from Santa

Hi, it's Shar from Scrapendipity Studio and I am beyond excited to share my first guest post at Gerda Steiner Designs. Today's projects feature this Santa with letters stamp set from the October 4 release. He holds a banner for you to personalize with letters (as I did) or sweet little images, also included in the set. The word stamp "holidays" is also included, as well as a coordinating die. 


Santa is adorable and imagine how many ways you can embellish him with trees presents, sleigh, reindeer, or anything else you want to show him off! I used this Christmas tree by My Favorite Things and added a second banner by Taylored Expressions for the "happy". I have so many ideas how to use this sweet Santa stamp. 
Copics I used for this card.

And how cute is this?! For my second project, I made these personalized gift tags using this set! Any 5 letter name or nickname fits perfectly on the banner. Use your favorite tag die, stamp a background with the teeny stamps that are included in the set, then add your die cut Santa. Super quick and super cute!
Thanks for joining me in my first Guest Design post for Gerda Steiner Designs. I hope you love these adorably cute images as much as I do. 

Have a great weekend, crafters!


Monday, October 25, 2021

Watermelon....!!

 Hey friends...

Ashlee here to share a little creative inspiration with you!!

Today my little note card uses the super sweet stamp set "Melon friends" from Gerda Steiner designs...


To create this card I created a note card sized base using some Catherine Pooler Dies and cut the main base using watercolour cardstock. I stamped three lots of the watermelons using a waterproof black ink and then watercolored them using Karin brush markers!!

I then added an embossed sentiment using Gold WOW! powder on black cardstock and fussy cut it out before adding to the card with foam tape. I then finished it all off with a touch of sequins...

A sweet little card to send to a friend!!

I hope you enjoyed it, happy crafting hugs Ashlee

Sunday, October 24, 2021

Santa says Happy Holidays

Hi everyone! It’s Jeannie (InsideoutJeans) on the blog today with Gerda Steiner Design’s stamp set named, Santa with Letters. It's such a cute set that you can do a bunch of things with (I have a couple more ideas).


The first project I wanted to create was, of course, a holiday card. I stamped out the Santa first and colored it up with Copics. Since this Santa is holding a banner, I wanted to stamp up a custom sentiment. For this card, I went with a simple "Happy" to pair with the larger sentiment in the set, "Holidays".


For my background, I used a
snowfall stencil with white pigment ink because I wanted a snowy background look since this is a wintery card. I die cut some snow banks from white cardstock for the card as well, adding a light purple distress ink on the edges to add dimension. Along with that I also die cut a circle in my snowy background panel and added some silver glitter cardstock behind so I could spotlight Santa.


I added the Santa right in front of the circle and then stamped out the "Holidays" sentiment in a green ink matching the copic colored letters on the banner. After this, I thought I would be finished with the card but I thought it needed some finishing touches. I added additional white dots with a white gel pen to the background to make it a really snowy background. I also used some glue on the edges of the snow banks so I could adhere some glitter to it to add a little something extra to the card overall. 


I love how it turned out. What do you think? 


Thanks for stopping by today and I hope you get inspired to create. Come back again soon for more inspiration and ideas! Happy Crafting! 


Friday, October 22, 2021

You're A-maize-ing by Noga Shefer


Hi crafty friends,  Noga  
here and I am so happy to share with you another project for Gerda Steiner Designs today.

My card featuring the adorable  Yams & Corn 4x6 Clear Stamp Set and  Yams and Corn Die Set. This set is must have!!

To make this card I die cut a scallop frame die out of Bristol smooth cardstock. 
I ink blended the background  using  squeezed lemonade distress oxide ink  and splashed it with water.

Next I colored the sweet image using copic markers: Y15, Y13, Y11, G000, YG0000, G20 and G43.

I glued it to my panel with foam tape for dimension.
Next I stamped a greeting from this stamp set using black ink.

For a final touch, I added a yellow tiny heart.

I hope you enjoy the card I created and feel inspired to create!

Thanks for stopping by,


Tuesday, October 19, 2021

Namasleigh Christmas Card with *Video*

Hello and welcome, it’s Karen here again today. I’ve got a fun Christmas card today that features a brand new Gerda Steiner Designs stamp set called Namasleigh.  I love the idea of the reindeer and Santa getting ready for their big day by doing some yoga together, and even the birds and snowman got in on it!  To fit all these images in (because I had to include all the reindeer), I’ve made a double zig zag card. When the card is folded down, it measures 5” x 4 1/4”. But when it’s opened up, it’s over 16” wide! So there’s lots of room to fit all those images. 

Front of the card when closed with an acetate belly band. 


The inside of the card when opened. 

I’ve made a video for you to see how this card was made.  If you are interested in seeing it, PLEASE CLICK HERE.  Thank you so much for stopping by and I hope you’re having a great day! 

Boo!

Hi there,

it's Tanja here and I have another Halloween Card for you. This time I used the adorable Gerda Steiner Designs Ghosts stamp set:

  • stamp two of the ghosts from the Gerda Steiner Designs Ghosts set with Lawn Fawn Jet Black
  • color the images with Spectrum Noir Triblend Markers and add extra shading with Faber-Castell Polychromos pencils
  • add highlights with a white gel pen
  • create a background on a piece of grass cardstock with the help of three different colored striped of glitter paper
  • stamp the sentiment from the same set with Versafine Clair Nocturne and heat-emboss it with WOW! Clear Sparkle embossing glitter
  • add a strip of black cardstock and patterned paper to the left side of the panel before adhering it to a cardbase


I hope you got inspired.


Hugs,


Namasleigh with Santa and Rudolph - Alma


I'm Alma from "Alma im Stempelglueck" and today it's my turn to show you a

card with the new Gerda Steiner Namasleigh Clear 4*6 stamp set and the
coordinating Namasleigh die set. Santa and Rudolph are sliding back and
forth on the ice quite a bit! Oh it's so slippery!

I used the mirror stamping technique for this card with which the images can
be mirrored. Isn't the reflection on the frozen pond looking totally
realistic?

It's not that difficult!
The only thing you need is a stamping tool.

1.) Position the card on which the image is to be mirrored on the stamping tool
and place the stamp with the stamping side up on the card exactly where it
is to be stamped later.


2.) Ink your stamp and stamp the image on the upper side of your stamping tool.
It works best by using a slowly drying ink pad!


3.) Remove the stamp and stamp the image right from the top of your stamping
tool onto your card! Sometimes it works better if you put a cardboard underneath the card on the
bottom side of the tool.
Stamp the image! The imprint does not have to be perfect for a pond
reflection! On the contrary, it should look a bit blurry! 


4.) Colourize your image exactly the same like your main image! In addition to Rudolph, I also mirrored Santa.


5.) When you have coloured your images, you can create a scene around it.
I have coloured the pond and added the trees from the Tangled Penguin 4*6
clear stamp set!


6.) To make the pond reflection look more realistic, I put Vellum over it and
glue it on! You get more depth in the background and in addition, the colours on the
reflection are looking softer and more realistic.


Now, you only have to stick all together!
Done!!!!

Tuesday, October 12, 2021

A boo for you - Larissa


Hi everyone, I am Larissa from Car-d-elicious and today it is my turn again to post something on the blog from Gerda Steiner designs. This time I have made a halloween slimline card with the clear stamp set A Boo for you from Gerda Steiner designs. I have coloured the images with my Polychromos pencils and the black glaze pen and then I have fussy cut the images.


From white cardstock I have cut a large rectangle with a die from the set Slimline Distressed (CR1569) from Marianne design. I made a spooky background on it with Mustard seed, Carved pumpkin, Crackling campfire and Black soot Distress ink. I have added the grass with the Stencil 20 from Gummiapan. I blended the grass on the card with Versafine clair nocturne ink to make it really black. I have drawn the 2 trees on the background and coloured them with a black permanent marker. I have glued the background on a white slimline card. For the little ghosts I used foamtape to add them on the card. I have stamped a sentiment from the clear stamp set A Boo for you from Gerda Steiner designs on white cardstock and then I have fussy cut all the words and glued them on the card. I have decorated the sky with black star rub-ons.


*********************************************************************************
STAMP: A Boo for you from Gerda Steiner designs
COLORING MEDIUM: Polychromos pencils, Distress inks
PAPER: White cs
INK: Versafine clair nocturne ink, Mustard seed, Carved pumpkin, Crackling campfire and Black soot Distress ink
DIES: Slimline Distressed (CR1569) from Marianne design
ACCESSORIES: Black glaze pen, Black star rub ons, Black permanent marker, Stencil 20 from Gummiapan 

I am a participant in the Gerda Steiner designs Affiliate Programme. This means that if you click on one of my links and subsequently make a purchase, I will receive a small commission of store credit, at no extra cost to you.


Friday, October 8, 2021

Christmas Card by Noga Shefer


Hi crafty friends,  Noga here and I am so happy to share with you another project for GSD today.


My card featuring the brand new Namasleigh 4x6 Clear Stamp Set and Namasleigh Die Set.

To make this card I took a piece of bristol smooth cardstock and cut a slimline card.

The sky was created by blending cracked pistachio distress oxide ink,I spired some water onto it and soaked it up with paper towel.

I also glued some snow flakes that I die cut from white glitter cardstck.

Next I colored the sweet images using copic markers. I glued it to my panel with foam tape for dimension.

Next I stamped a greeting from the stamp set using black ink.

To finish off, I added a white scallop frame.

I hope you enjoy the card I created and feel inspired to create!

Thanks for stopping by,