Showing posts with label Lucky Duck. Show all posts

Wednesday, August 12, 2020

Leaping Frog Masculine Birthday Card

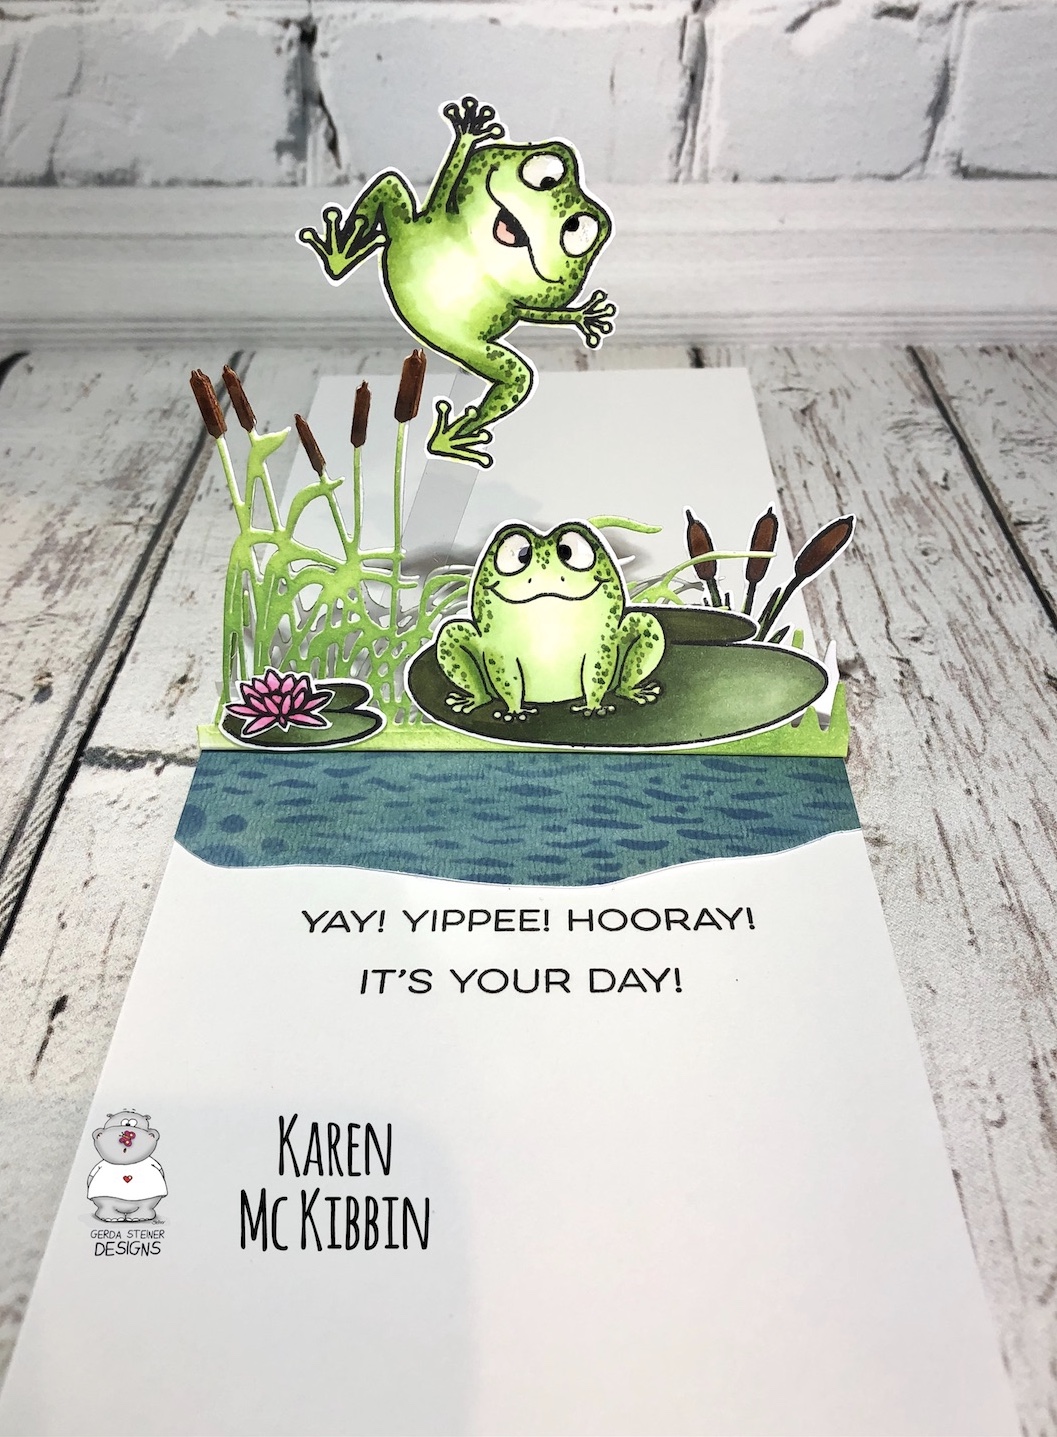
Hello again and welcome!  It’s Karen here today and I’ve got a card that I actually made a while ago, but have since made a video for it that I want to share with you.  I think of this card as being appropriate for a masculine card, so I’m going with that!  It features the adorable frogs from the “Frogs” stamp set from Gerda Steiner Designs  and I added a few images from the “Lucky Duck” stamp set as well.


If  you would like to see a video of how I made this card, I have it posted on my YouTube channel  and you can CLICK HERE to view it.


After copic colouring my images and cutting them out, I added glossy accents to all the frogs eyes and set them aside to dry. To create a shiny green cardstock for the happy birthday circles on the front, I combined some Nuvo glacier paste in Pineapple Delight and Sea Sprite to make a bright green, and spread that out on cardstock in a circle pattern. When it was dry, I used the Simon Says Stamp “Birthday Circle” die to cut it out. I also used this die to cut some circles from black cardstock. I stacked about 3 circles from white cardstock and added a final layer in the green for my center circle, then glued this in the center of my front panel. I glued down portions of circles around this in a mix of the black and green die cuts. I cut the hands from the front frog, trimmed his chest to fit in the circle, and then glued his hands down onto the center ring. Finally, I added dots with some of the copic markers I had used for the images, and added glossy accents to the dots.

For the inside of the card, I watercoloured a small piece of watercolour paper in a mix of blues and greens to make my pond. I used Distress Oxide Faded Jeans to stencil over the water with a stencil from The Crafters Workshop called Mini Sea Bubbles. I freestyle cut this piece to resemble a pond.

I die cut two grassy borders for the triangle pop up. You could use any straight grassy border in your supplies or even make your own border by cutting grass into 2 pieces of cardstock temporarily adhered together. I used a die from Paper Roses called Cattails and Grass border die. I then used brown copic markers to colour the cattails and Distress Oxide in Mowed Lawn for the grasses. I coloured both grassy borders, but for the one in back, remember that you actually colour the wrong side of the die cut. I creased both of these grassy die cuts at 1/4” from the straight edge, creased the folds and added double sided adhesive to the folds.

Next, I adhered the right leg of the leaping frog to a piece of scrap acetate with double sided tape and adhered him to the front grassy border with more double sided tape. Then I attached all my other images with glue, being careful not to get excess glue on the grassy areas.

I glued down my “pond” by positioning it 1/4” from the inside crease of my card. Now I could see where to stamp my inside sentiment and this is best done before adding the triangle pop up. I used a sentiment from MFT’S Yay for You set.

I glued together just the top portions of the grassy borders, to just about a quarter to a third of the way down. You need to leave the bottom of these borders unglued so they can form the triangle pop up. Then I removed the backing paper from the back grassy border, and lined it up along the crease on the inside of my card and pressed it down. Finally, I removed the backing paper on the front grassy border and folded my card base up and over the grassy borders and pressed it down. And that was the card done!

This is such a fun card to receive because the inside is so unexpected, and those frogs definitely make it a masculine card - always a bonus!!  I really hope you’ll give this one a try. Hope you have a great day!


Monday, July 1, 2019

Lucky Duck

Hello, crafty friends! Its Rebekah with you today sharing this sweet reminder card using the Lucky Duck stamp set by Gerda Steiner! 


I started off by stamping the ducky with copic safe ink on white cardstock. I also created a mask for him. I placed the mask on the image and then stamped the cat tails on either side. I also stamped the three dragonfly and the sentiment. I removed the mask and the colored my images! I also added a few clouds using Distress Inks to help create my scene.


Super easy and super fun! I love cards that can be used for anyone, for any occasion and this sentiment is a perfect reminder to anyone on my mailing list!


Tuesday, June 11, 2019

Halli Hallo! - Hello!

Hi there,

it's Tanja here and Gerda Steiner has released the fabulous new Frogs stamp set with EnglishSpanish and German sentiments and over the next three weeks I will show you my creations with the Gerda Steiner Designs German Froesche set. This colorful lake scene is my third creation:

  • color one of the frogs and two flies from the Gerda Steiner Designs Frogs set with Alcohol Markers - add extra shading with Faber-Castell Polychromos Pencils
  • add highlights to the eyes and some freckles to the cheeks with a white gel pen
  • add shimmer to the wings of the flies with Wink of Stella Clear Glitter
  • stamp some fish and some reed from the Gerda Steiner Designs Lucky Duck set into the background - use masking fluid to mask them
  • add color to the background with the Derwent Inktense Paint Pan Set and a watercolor brush
  • remove the masking and color those images with the Derwent Inktense Paint Pan Set as well
  • adhere  the sentiment strip with double-sided foam adhesive
  • before gluing the panel down onto the cardbase add a strip of green cardstock and of striped patterned paper to the left side


Have a colorful day.

Hugs,


Saturday, June 1, 2019

Lucky Duck

Hey there, crafty friends!

It's Kelly Martin here again, sharing another masked card for you today!

In case you missed it, check out my last post on the blog here, where I talk about some helpful tips on incorporating masking in your cards to achieve those one-layer wonders!


So for today's card, I used all those tips from that post to create this little water-ey scene! I stamped my duck and Cattail images from the Lucky Duck stamp set on to my post-it notes (to use as masks), stamped my ducks on to my cut and scored card panel, and then applied my masks. 

After the masks were applied, I could finish stamping the rest of the Cattail and lily pad images!


After all the stamping was done, I colored all the images with copic makers, created the water and sky using copic markers, and then stamped the sentiment to finish off the card!

One fun tip that I use almost every time I'm coloring (especially when making a scene card), is to use a white gel pen to add little highlights on to the images I am coloring. This small detail makes the images pop in a big way!

Thanks again for stopping by today and hope you have a crafty week!

Kelly

Thursday, March 7, 2019

You Lucky Duck!


Hi Everyone...

It's Christine here today, and I'm really happy to be here to share my second Guest Designer make.  As Spring is just around the corner, I was inspired to use the fabulous Lucky Duck Clear Stamp Set for my card.

Firstly, I cute a white cardstock panel using a stitched rectangle die - then used an inside and out stitched circle die in two different sizes to cut out the circles for the ducks.   I traced through the circles in pencil onto my pre-folded card base so I knew where to colour the background for each of the ducks.  I used Copics and Distress Inks for these backgrounds.

I adhered the panel to the card base using foam tape, then after colouring the ducks with my Copics, I also used foam tape to adhere them into each of the circles.

Lastly, I stamped a sentiment from the stamp set using Versamark onto black cardstock, before heat embossing with white embossing powder.  Be sure to use an anti-static pad or powder onto the black before stamping - otherwise you will get flecks of white embossing powder around the words.


Copic Colours Used:
Y15/17/18/38 YR24/14

I hope you liked my make today

Hugs
Christine x

Wednesday, September 13, 2017

Lucky Duck Pop Up Box with Bottom Window - InsideoutJeans (Jeannie)

Hello everyone! I had made this pop up box awhile back for fun and Gerda had asked me to make a tutorial because there were a lot of questions about how to go about doing it.
It's actually a pretty simple card, especially now since there are pop up box dies out there. I, however, did it the old fashioned way and made mine from scratch. It's actually bigger than the pop up box dies since those are A2 sized so it's a really good card for a special person.
It's quite hard to explain how I created it since there's a lot of steps, so I made a YouTube tutorial on the steps and all the measurements are listed at the end of this post.

Tutorial

The bottom window, which is the main feature, is one I cut out with an Xactoknife. Using acetate and a xyron sticker maker to adhere the images, it adds a special element to the card. The fish hang from the waves above and appear to be floating in the "aquarium". Don't you just love acetate?!
I hope you all enjoy this card! It's a really fun one. It has a lot of moving parts but if you pre-cut everything out first, and then assemble, it actually goes pretty quickly. 


→ Dimensions  
Card base: 6.5” x 12”
Score lines on the long side: 2.75”, 5.5”, 8.25”, 11”
Score lines on the short side: 2.75”
Inside Panels: (1) 2.5” x 6.25”; (3) 2.5” x 2.5”
Outside Panels: (1) 2.5” x 6.25”; (3) 2.5” x 2.5”; (2) 2.5” x 3.5”
Acetate: 2.75” x 3.75”
Inside strips: 4.75” long, scored at 1” on each side

Wednesday, July 13, 2016

I'm a lucky duck to have you!

Hi there!!

It's Yolanda here, from Scraping Time. Is it so hot around there? Here in the South of Spain it is and that's why I felt like using this duck... Imaging that he just came back from having a good swim!!

I thought I seldom make cards for "any ocassion". I mean... I make Christmas cards, Birthday's cards, etc but this card is for those that you love and just to say they are important for you!!


It´s a quick card. You have only to pay attention when you do some masking in the three balloons. In the beginning I thought I was going to colour them but finally I did some paper piecing with decorated papers

Isn't this duck so cute??? I would take him home, for sure!!

I love this sentiment and if you want to use it with any other image, you can mask some parts of it and just ink "I'm lucky to have you". I love playing with my stamps and giving them different uses.


Thursday, May 19, 2016

Video: Slider + Magnet

Hello guys! This is Emily Cupely and for today's card I made a slider using magnets so that the recipient can also use the image as a decorative magnet. I hope you enjoy the video tutorial! :)


http://gsd-stamps.com/collections/shop-clearstamps/products/lucky-duck-4x6-clearstamp-set http://gsd-stamps.com/products/gopher-it-2x3-clearstamp-set


Wednesday, May 4, 2016

Have a quacking good time!!

Hi there,

it's Yolanda here, from Scraping Time! I hope you had a great time these weeks! 
Today, I wanted to make a colourful card since spring has arrived and everything looks great around here!!
Since the first time I  saw the "Brush bunny stamp set" I knew I wanted to make a card like this, so I bought this easel die from Paper Smooches so that my bunny could paint anything!! 


I think that duck is having a cuack time!! ;)

Firstly, I die cut the easel and I painted my scene with some Peerless Watercolor, painting randomly the sea and with a water paint brush, the sun. I put some wink of stella clear on both before stamping, colouring, fussy cutting and adding the duck.


Then, I inked the clouds with Memento Blue Sky ink and I die cut a piece of cardstock that I inked with Lawn Fawn green ink.
At last, I stamped and coloured my bunny and added it to the scene.
I used a wood paper to stamp my sentiment with fine detail white embossing powder and added a yellow staple on it.


I love creating scenes in my cards and I enjoyed a lot making this! I hope you like it and see you soon!!

Monday, May 2, 2016

Stamped Critter Background

Hey everyone! It's Wiebke here! I'm a little late today, but excited as always to show you my card for this monday! :)


What about creating your own patterned background? It is so easy and fun to create! I stamped all of these cute critters and elements on a piece of watercolor paper (Versafine works very well with water). Then I looked for a few beautiful Distress Inks to color my elements. When you put several layers of water on each other, you'll get that messy watercolor look. I also splashed some waterdroplets on it plus some white ink splashes. A few lighter dots add more interest to your card! :)
Oh and I like to use black sentiments - specially on a colorful background! (there might be a comma  missing between "birthday" and "awesome"... )


The stamp sets, which I used: Just SentimentsHappy HoppyLucky DuckHow are Ewe

I hope you like it! Have a great day!


Thursday, April 7, 2016

Video: Smooching Technique

Hello everybody! This is Emily Cupely and for today's video I made a baby card using the smooching technique to decorate the background of my scene which goes perfectly with my images, since it gives the look of water. I hope you enjoy the video tutorial below!! :)


http://gsd-stamps.com/collections/shop-clearstamps/products/lucky-duck-4x6-clearstamp-set http://gsd-stamps.com/collections/shop-clearstamps/products/just-sentiments-4x6-clearstamp-set


Monday, April 4, 2016

Critter Birthday Party - Coloring on Craft Paper

Hey everyone! It's Wiebke here! And I want to share a card with you using several cute Gerda Steiner Designs Critters and a piece of craft paper :)

First of all, I created several masks for the critters and gifts standing in the front row. That way, you can stamp the others perfectly behind. After that, I colored them out with Polychromo pencils and went over the surface with baby oil. You'll get a darker, but well blended effect.


These are the stamp sets, which I used:

Happy Hoppy | Howl Are You | Lucky Duck | Monster Party How are Ewe | Happy Fall


Have a great day!


Saturday, March 26, 2016

A play on words and a bit of masking

Hello everyone!
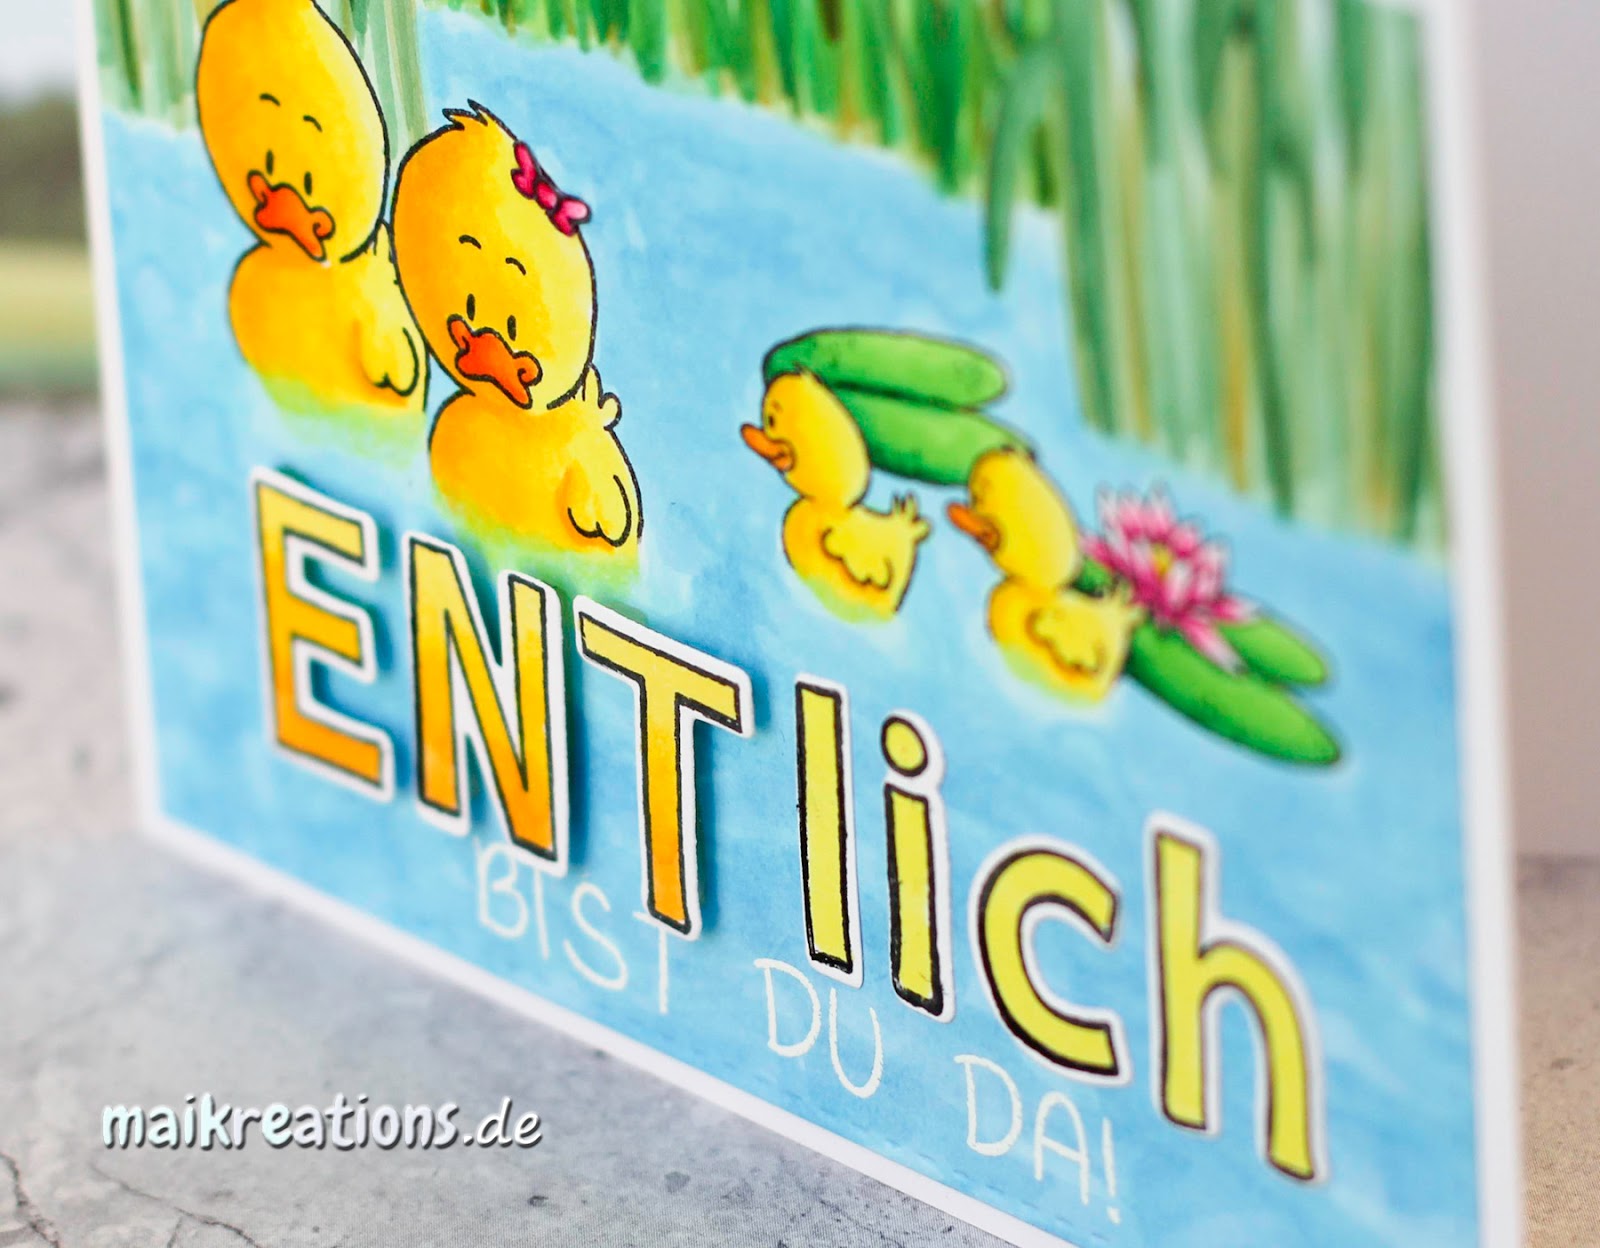
This is Maike from Maikreations and for my fourth card (I can't believe that the month went by so quickly) I used the set "Lucky Duck" once more and did quite a bit of masking.


I knew I wanted the sentiment to be below the ducks so I made sure to leave enough space. Once I had stamped all the images, I coloured them in using Copic markers. Next I added the grass at the shore and the water. When I die cut the letters for the sentiment I deliberately die cut the first ones in capital letters to emphasize the play on words here. The sentiment means "Finally you are here", but usually you would spell the first word a bit differently. I purposely misspelled it and wrote "ENTlich", because in German the word "Ente" means duck. After I had heat embossed the second part of the sentiment I adhered the die cut letters and glued the panel to a white card base.


It has been fantastic being guest designer here at the Gerda Steiner Designs blog for the month of March. Have a very happy Easter everyone and happy crafting ;o)

Friday, March 11, 2016

Hello Duck

Hello everyone!
This is Maike from Maikreations with a new card - this time using the adorable "Lucky Duck" set.


First I stamped the cute diving duck and masked it off. In order to create the background I started with the bottom part first using three different shades of blue Distress Inks: Salty Ocean, Blueprint Sketch and Chipped Sapphire and added a few drops of water next. I let the droplets sit for about a minute before I took them off with a tissue. Next I masked the water area as well and added a layer of Mustard Seed before placing a circle mask on top. Because I wanted to create the look of a sunset I used red and orangy colours: Spiced Marmelade, Abandoned Coral, Candied Apple and a tiny, tiny bit of Seedless Preserves at the very top.


When everything was dry I coloured the duck in using Copic markers and also die cut the word hello from the bottom part of the panel. I adhered some vellum behind the panel to be able to stick the inner parts of the letters back where they belonged. Then I placed an orange piece of cardstock behind the area with the die cutting to make it look like the red from the sun set would shine through the vellum. Now all that was left to do was to glue the little fish all around the die cut sentiment and to adhere the finished panel to the vanilla card base.


Happy crafting everyone ;o)))

Tuesday, February 2, 2016

XOXO Duck Tag

Hi there,

it Tanja here today and I want to show you this fun Valentine's Day Shaker Tag:


I hope you got inspired. If you have any questions, just leave me a comment below.

Yours,


Wednesday, January 27, 2016

Non-red Valentine's cards!

Hi there!

It's Yolanda here, from Scraping Time. I imagine all of you making Valentine's cards! I love this kind of cards but this year, I decided to try new colours apart from red or pink for my Valentine's!! What about brown??

For my cards, I have used some stamps from different sets:


Let me show you the first one! Since I saw the bulldog I fell in love to it!! It seems to be so sad and angry and I feel like hugging and sending some love!! That's why I decided to make a card with soft colours and a big heart!!


I love small stamps to make backgrounds and you have three of them in this set. They are adorable! With the cute bones I made a heart. Firstly, I draw a soft line with my pencil using a heart die. Then, I stamped the dog and masked it with masking paper because I wanted to hide two of the bones behind the legs. Then I stamped the whole heart and erased the pencil. I stamped the sentiment and coloured the bones and dog with Spectrum Noir markers.  A bit of Glossy Accent on the nose and that's all!!  I hope he feels better now!! ;) But just in case... I stamped a cute sentiment from one of the new stamp sets into the card.  


I love the sketch look of the "Ruff day?" sentiment.


Then, I played a little bit with the cute ducks from one of the new stamps sets that you can find on the shop. I think I will use this set a lot in spring and summer but I wanted to give it a try just now. 


I love paper piecing and it´s very easy to fussy cut these ducks. I made the sea background with distress inks, water and a piece of acetate. Then I used a wood decorated paper and some brads for my panel. I love the font from the sentiment. It is so nice!


I hope you enjoyed my cards for today and see you soon!!

If you are here, I am sure that you really enjoy with Gerda Steiner Designs' products so it could be a great opportunity to apply for being a Guest Designer on March!