
Thursday, June 30, 2022
Tuesday, June 28, 2022
It's All About You
Hi there,
it's Tanja here and I created this vibrant Birthday tag using the Gerda Steiner Designs Birthday Bear stamp set:

- cut out a Clearly Besotted Stamps Rounded Tag from smooth white cardstock
- stamp the bear hand with the balloon from the Gerda Steiner Designs Birthday Bear set with Lawn Fawn Jet Black
- color the image with Spectrum Noir Triblend Markers and add extra shading with Faber-Castell Polychromos pencils
- add confetti with the help of the Lawn Fawn Year Nine set and yellow and orange ink
- ink up the edges with some orange ink as well
- thread four strands of twine through the hole of the tag


Hugs,

Monday, June 27, 2022
Thank you BEE....!!
Hey friends...
I've got some inspiration to share today using the gorgeous Gerda Steiner designs stamp set called Happy bee-day....
It's such a sweet set, one I've used many times hehe!!

To create this card I started with a white cardstock base which I masked off an oval shape and inked up using Distress oxide ink Prize ribbon. I then removed the mask and stamped a bunch of the flower images!

I stamped the sweet bee and added a sentiment into his sign. I then coloured him up using alcohol markers before adding him to the flower scene on my card base...
I adhered him with foam tape so he is popped up off the card!
To complete the card I added my usually touch of a few sequins for some bling...
I hope you enjoyed todays card. Happy crafting, hugs Ashlee.
Friday, June 24, 2022
You are so cool...!
Hey GSD friends...
It's DT Ashlee here today and I'm sharing with you all some inspiration using the super fun set from Gerda Steiner called Pigeon!!
These pigeons are just too cool, and I couldn't help but add the sunnies onto one of them just to complete the coolness hehe....

To create this card I started by making my card base by stamping the Catherine Pooler background stamp Cosy plaid onto some white cardstock using CPD ink.
I then wanted to make a super sparkly cardstock to die cut some frames from so to do this I got a piece of white cardstock that I covered with double sided adhesive. Using Glitter your world glitter in Holo light green I covered the open adhesive and then burnished the glitter in. This made a SUPER sparkly holo cardstock for me to die cut!!
I die cut two frames and adhered them to my card base using foam tape so they popped up off the background. It was then time to add the pigeons. I stamped, coloured and die cut three of them and added to the centre area of my frames creating a cool little pigeon scene!

To complete the card I added a sentiment "You are so cool!" which is included in the pigeon set by heat embossing it onto black cardstock with WOW! Opaque bright white embossing powder and then fussy cutting around it before adhering to the top of the glitter frames....

And of course a touch of sequins to top it all off!
What do you think of these cool pigeons? I'm totes loving them...
I hope you enjoyed todays inspiration, I will be back soon with another GSD card before the months end. Until then happy crafting, hugs Ashlee.
You got this by Noga Shefer
Hi crafty friends, Noga here and I am so happy to share with you another project for Gerda Steiner Designs today.

My card featuring the brand new adorable Pigeon Bundle Set.
To make this card I took an A2 panel of Bristol smooth cardstock.
For the background, I die cut the oval die out of white cardstock.
Behind it, I ink blended a background using dried marigold distress oxide ink for the sky and peeled paint distress oxide ink for the grass.
Next I colored the adorable image using copic markers and glued it to my panel.
To finish of I stamped a greeting from this set using black ink.
 Hi :) My name is Noga. I live in Israel, married to Yaniv and have two cute boys and a dog. In the morning I work in marketing in our nursery and at night I create cards. This is my therapy :)
Tuesday, June 21, 2022
Enjoy your Day
Hi there,


Thanks for stopping by.

it's Tanja here and I created this dimensional card using the adorable Gerda Steiner Designs On the Bookshelf stamp set:

- stamp one of the cats, the cactus and the picture frame from the Gerda Steiner Designs On the Bookshelf set with Lawn Fawn Jet Black
- color the images with Spectrum Noir Triblend Markers and add extra shading with Faber-Castell Polychromos pencils
- cut a strip of woodgrain paper and ink up its edges with Distress Ink Gathered Twigs
- create a background with the help of an embossing folder, Distress Ink Hickory Smoke and a brayer


Hugs,

Tuesday, June 14, 2022
Happy Mail
Hello and welcome back, it's Karen here. Today I've got a quick and easy happy mail card that is perfect for sending off to family or friends as a little Hello, thinking of you type of card.

I used the Puppy Mail stamp set from Gerda Steiner Designs and used Copic markers to colour in the two images that I used. I used a semicircular die to cut out the front cutout. I don't have the details on the die I used as I didn't keep the packaging (it may have been from Craftin Desert Divas but they are no longer around), but any circular or semicircular die would work. I then embossed the front with the Dappled Dots (EFPP-015) embossing folder from Creative Expressions. I coloured the opened background on the card base with some Distress Oxide in Mowed Lawn and the sky with Cosmic Shimmer Colour Cloud ink in Clear Day. I mounted the embossed card front on a layer of foam and attached it in place with glue. I then glued the images into the opening. Finally, I stamped and heat embossed the sentiment onto white cardstock and cut it out. I edged it with a little of the Clear Day ink before gluing it in place.
Thank you for stopping by and I hope you're having a great day!
 Hello and welcome! I am a retired physiotherapist, wife and mother of four sons, and live in Calgary, Canada. Card making has been my favourite hobby for several years now and I have become passionately obsessed with it. I hope to share my cardmaking passion with you through this blog.
Currently on design teams for:
Craft Consortium Ltd, Paper Rose Studio and Whimsy Stamps Video Team.
Hello and welcome! I am a retired physiotherapist, wife and mother of four sons, and live in Calgary, Canada. Card making has been my favourite hobby for several years now and I have become passionately obsessed with it. I hope to share my cardmaking passion with you through this blog.
Currently on design teams for:
Craft Consortium Ltd, Paper Rose Studio and Whimsy Stamps Video Team.
So happy we're Friends
Hi there,


Thanks for stopping by.

it's Tanja here and I created this cute card using the Gerda Steiner Designs Garden Critter stamp set:

- stamp the dragonfly from the Gerda Steiner Designs Garden Critter set with Lawn Fawn Jet Black
- color the image with Spectrum Noir Triblend Markers
- add Distress Stickles Dry Glitter Clear Rock Candy to the wings for extra sparkle and shine
- cut out five hexagons from yellow cardstock with the help of the CREAlies Hexagons die set
- add some texture with a stamp from the Klartext-Stempel Scribbles set, Versamark and WOW! Bright White Super Fine embossing powder
- ink up the edges of the hexagons and the card panel with Distress Ink (Fossilized Amber, Rusty Hinge)
- add some splatters with watered-down Distress Ink Rusty Hinge
- stamp the sentiment from the Gerda Steiner Designs Lovely Pandas set with Versamark onto a strip of Neenah Desert Storm kraft cardstock and heat-emboss it with WOW! Bright White Super Fine embossing powder
- add strips of kraft cardstock and patterned paper to the left and tight side of the panel before adhering it to a cardbase


Hugs,

Sunday, June 12, 2022
Scene Card - Frogs
Hi everyone! It’s Jeannie (InsideoutJeans) on the blog today with Gerda Steiner Design’s stamp set named, Frogs. I figured it was almost summertime and these frogs were fitting for a fun card.

I really found one of the frogs sprawled out to be hilarious and I could only imagine if he was up on a glass window but I also wanted to use the one who looks like he's peeking. Of course, as a result, I have to create a scene card for this.
If you've seen my previous scene cards, I usually just create scenes by drawing lines, which is exactly what I do here to create this window sill with a planter outside. The idea is that the frog is on the glass window and the frog is peeking on the planter.


Thanks for stopping by today and I hope you get inspired to create. Come back again soon for more inspiration and ideas! Happy Crafting!

Friday, June 10, 2022
Friends like you are hard to find by Noga Shefer
Hi crafty friends, Noga here and I am so happy to share with you another project for Gerda Steiner Designs today.

My card featuring the adorable Garden Critter - 4x6 Clear Stamp Set and Garden Critter Dies. How cute is this set??
For the background, I die cut the Double Stitch Window die out of white cardstock.
Behind it, I ink blended a background using Distress Oxide in ripe persimmon, splashed it with water and and glued it behind the window cover panel and added some white clouds.
Next I colored the sweet image using copic markers and glued it to my panel.
Next I stamped a greeting from this stamp set using black ink.
For a final touch, I added some orange sequins.
I hope you enjoy the card I created and feel inspired to create!
Thanks for stopping by,
Hi :) My name is Noga. I live in Israel, married to Yaniv and have two cute boys and a dog. In the morning I work in marketing in our nursery and at night I create cards. This is my therapy :)
Saturday, June 4, 2022
"Garden Critter" with Alma
Hi my dears,
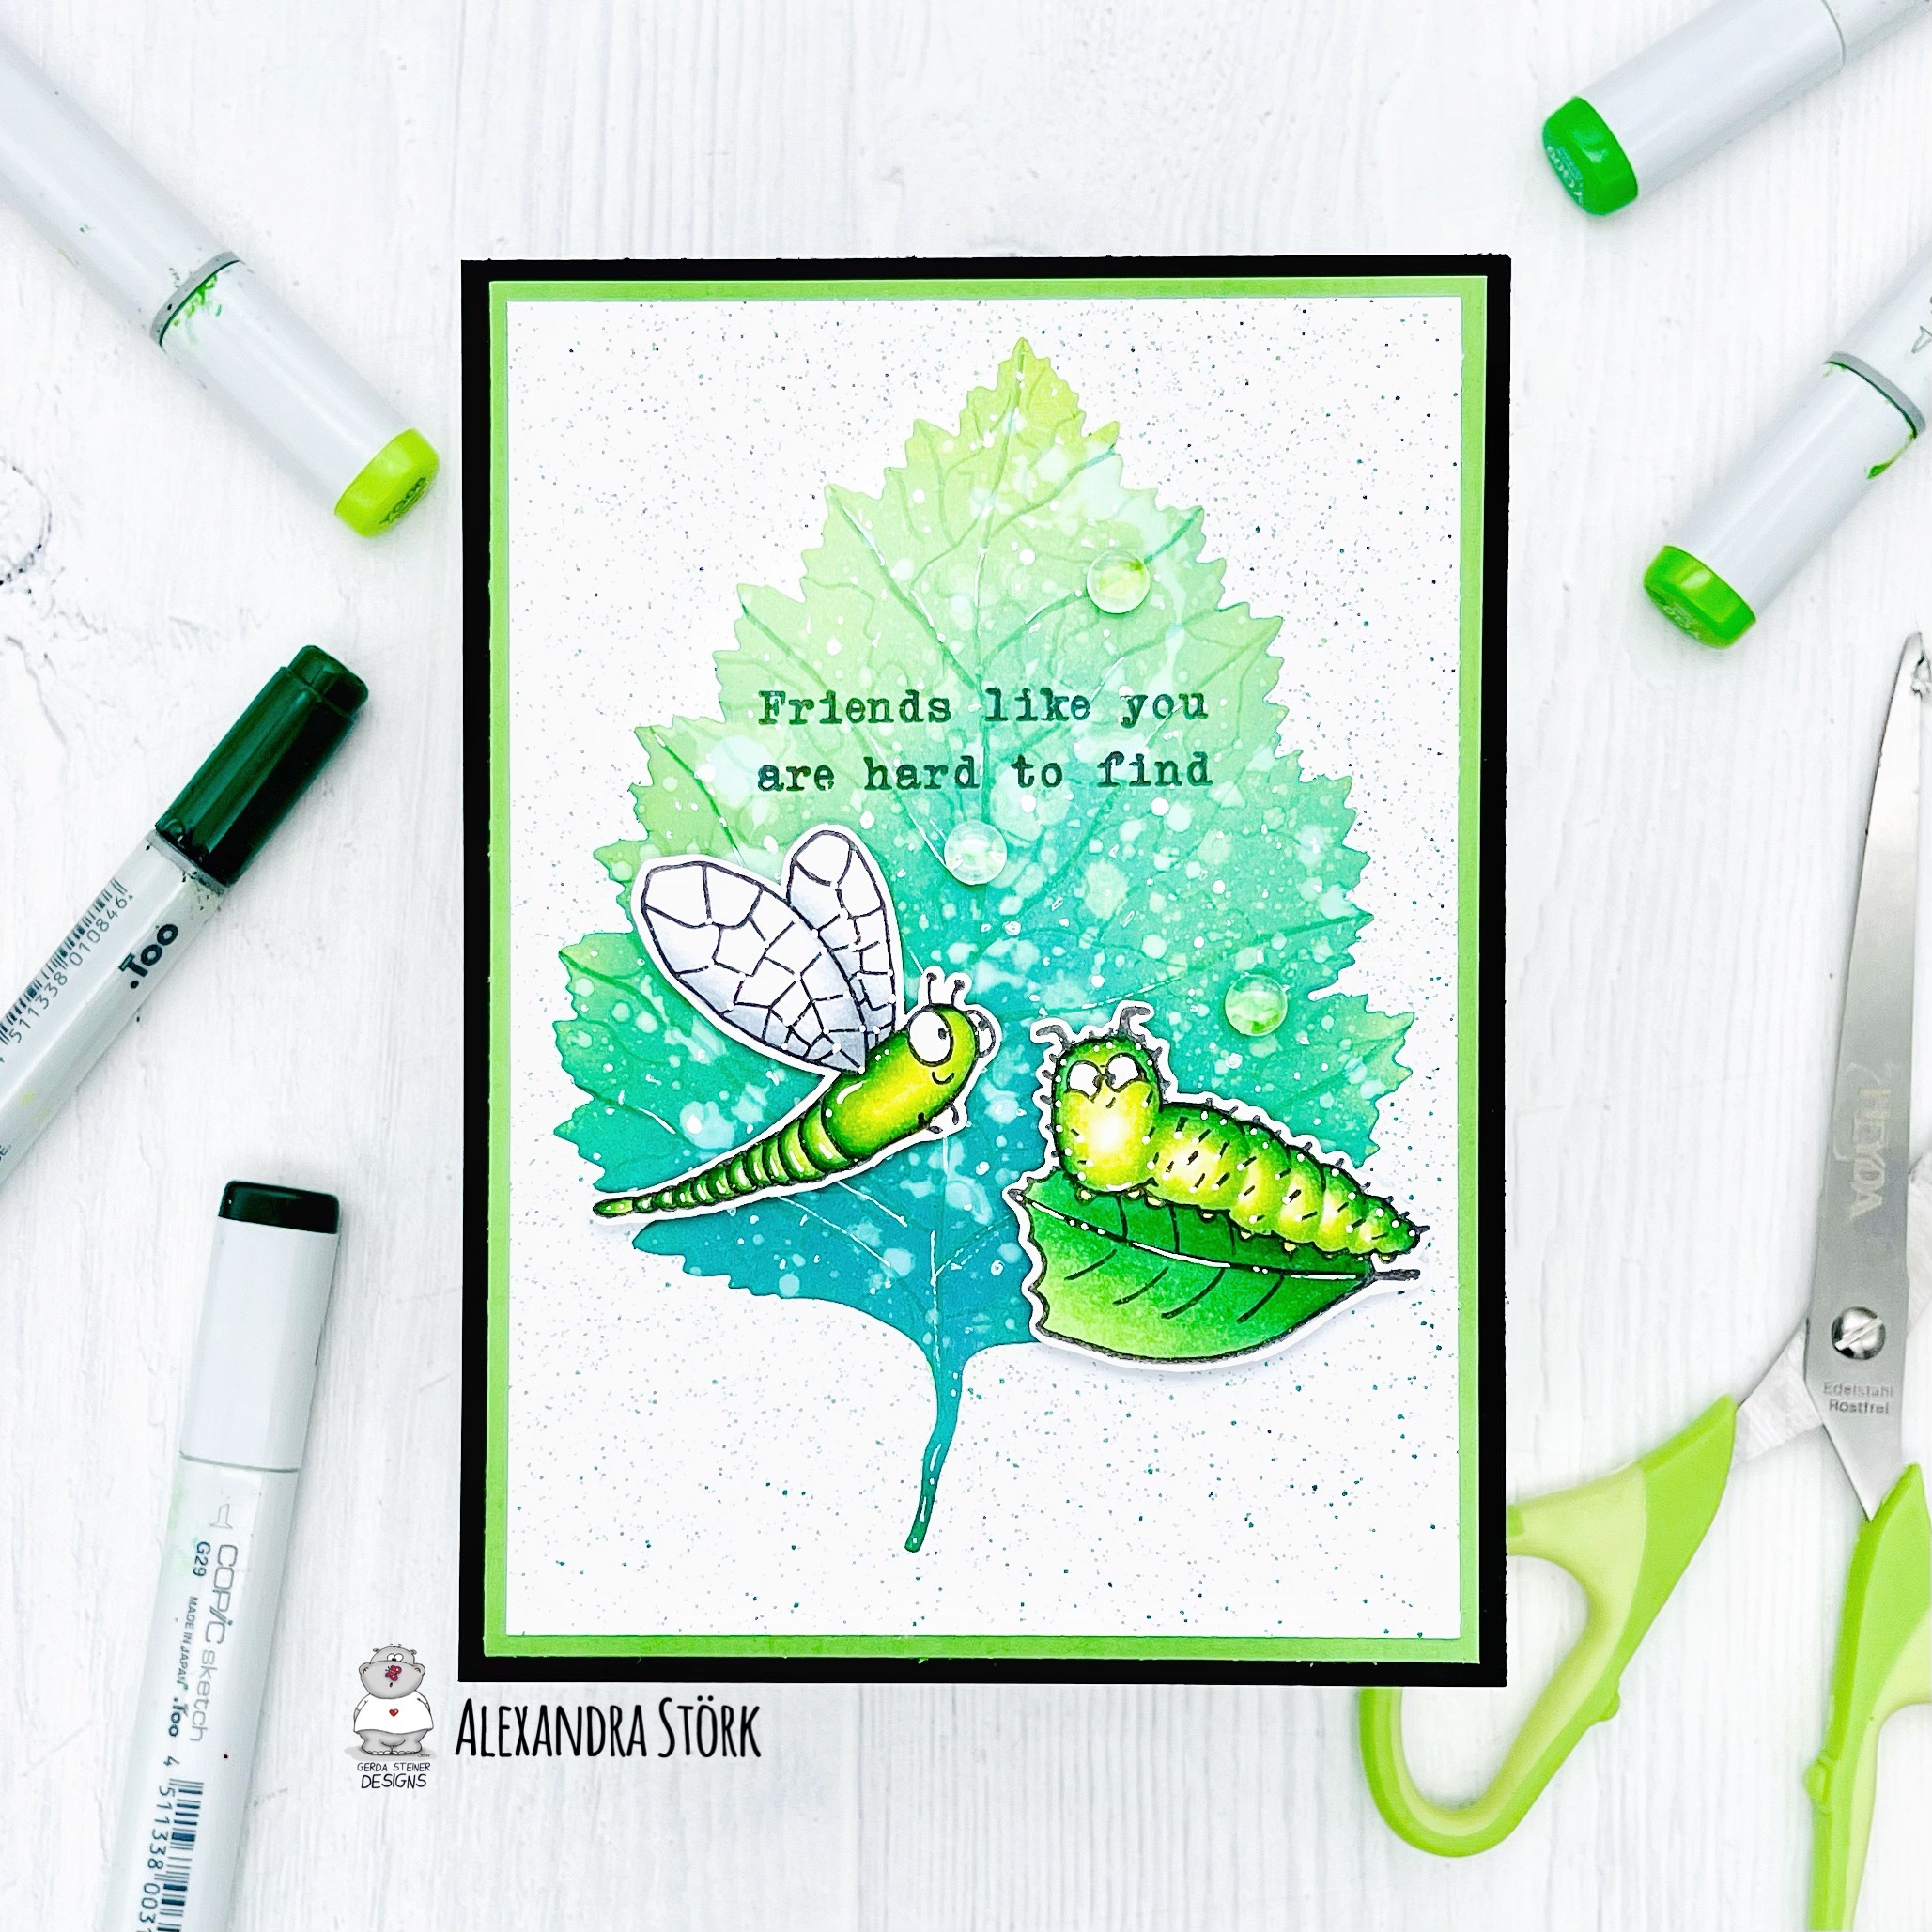
today I want to show you a card that celebrates friendship! I
used the great "Garden Critter" set.
used the great "Garden Critter" set.
First I punched out a large leaf and coloured it with the Distress Oxides Ink colors "Pine Needles",
"Moved Lawn" and "Twisted Citron".
"Moved Lawn" and "Twisted Citron".

Then I drew the leaf veins into the leaf with a dark green pencil.
I generously sprinkled it with water and set highlights with a white gel pen.
I chose the caterpillar and dragonfly from the same set and coloured them with
Copics and cut them out.
Copics and cut them out.
I chose the card format as rectangular.
The white background paper was airbrushed in dark green, light green and black.
I framed the paper with green and black paper.
Finally I glued everything together and stamped the text "Friends like you are hard to
find" and glued the animals on with 3Dpads.
find" and glued the animals on with 3Dpads.
Finally I imitated water drops with 3 Raindrops! Finished!
Subscribe to:
Posts (Atom)