Friday, March 31, 2017

Guest Designer | VIDEO | Party Animals Masked One-Layer Card


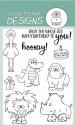
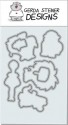
I'm thrilled to be returning as a Guest Designer for Gerda Steiner Designs! Today's card and video features the newly-released Party Animals stamp set. Coordinating dies are still en-route to me so I made this one-layered birthday card with lots of masking. See how it came together here:


By using a grey pigment ink to stamp the images, the images have a storybook look, especially with the watercolouring. It may take a while to create all the masks but every scene you create looks amazing and is perfect for mailing!


In order to keep all the colours of this busy scene organized, I only used three colours for all the animals and the trees. I simply used three different shades of each colour to create variation. I used a brighter accent colour to highlight the ostrich's head, cake and gift. To finish, I added blue for the sky around the animals.


The adorable koala is from You're Koalafied and was featured in a previous video HERE.

Please visit my blog for a full supply list. Thanks so much for stopping by!


Thursday, March 30, 2017

Guest Design - Go Wild Again!

Hi, it's me, Edith, again!

I have experimented with the new Go Wild! Stamp Set and I am very pleased with the result.

I used my Copic Markers again for coloring the little cuties. The background is a Design Paper and the leaves are die cutted and I have colored the outlines to add some extra depth. Then I placed the little critters on the ribbon. The Sentiment is stamped with Versamark and embossed with white Embossing Powder. I added some shimmer to the beak of the Toucan with my clear zig wink of stella brush marker. As final touch I added some Enamel Dots and glossy accents to the eyes and the beak.

I'm very happy how it turned out. I hope you like it too.

See you next time!

Edith / https://ediths-kreativer-output.blogspot.co.at

Wednesday, March 29, 2017

Guest Design - Go Wild!

Hi, Edith here! I feel very honored to be invited as a guest-designer for Gerda Steiner Designs. The new Stamp Set is so lovely and versatile.


I have colored the images and the shadow with Copic Markers. As background I used a Design Paper and the blades of grass are die cutted. The Sentiments are stamped with Memento Dew-Drop Chalk Ink. For positioning I used my MISTI Stamping Tool. And finally I added some glossy accents to the eyes of the elephant and the field glasses.

I hope you like my design and Gerda's new Stamp Set!

Edith / https://ediths-kreativer-output.blogspot.co.at

Tuesday, March 28, 2017

Go Wild!

Hi there,

I would like to show you a fun Birthday Card using the brand new Gerda Steiner Design stamp sets:

  • color the ostrich from the Gerda Steiner Designs Party Animals stamp set and the giraffe, the elephant and the car from the Gerda Steiner Designs Go wild stamp set (which will come out real soon) with ZIG Clean Color Real Brush Pens, Distress Markers and a damp watercolor brush
  • add highlights with a white gel pen
  • color the little sentiment banner with ZIG Clean Color Real Brush Markers as well and add faux stitching with a Memento Dual Marker (Gray Flannel)
  • create a background on a stitched panel cut from Strathmore Bristol Smooth Paper using Distress Ink (Mowed Lawn), Distress Oxide Inks (Peeled Paint, Cracked Pistachio) and water from your Mini Mister
  • add a strip of dark grey cardstock to the left side of the panel before adhering it to a white cardbase

I hope you got inspired.

Yours,

Sunday, March 26, 2017

Guest Design - Gift and Cake by Australe Créations

Hello everyone! 

It's Céline from Australe Créations, I'm back for a new serie of cards, so happy to find you !
                                                                                                              
For my first card I chose the cake and the gift from the Party Animals stamp set,


Colored with Copic Markers and decofoil finish,


Sentiment and some golden pearls


I love the look on the kraft paper, and you ?

Thanks so much for stopping by today !
                                                                                       
See you soon


Saturday, March 25, 2017

Guest Designer - Party Animals Watercolour Shaker Card!

Hi there,
I'm Therese from www.lostinpaper.com  and I am so excited to share two cards and videos today.  My first design features one of the new stamp sets called Party Animals and I filmed as I created so you could watch the process.


Don't you just love this great sentiment it comes from the fun Moody Unicorns stamp set.


My second card is a little bit special, it's a sneak peek of a new stamp set called Go Wild, and the link for the video is below,


Hope you have have had as much fun as me, I'll bet you love the Party Animal set as much as I do! Have a great and crafty day, Hugs,

Friday, March 24, 2017

Happy birthday!

Hello everyone!

Alexandra here today sharing a card that I made using the new stamp set called Party Animals.


For this card I started by creating the background using watercolor paper and Distress inks .
In meanwhile I started coloring this adorable lion and the cake from Party Animal stamp set using Spectrum Noir Alcohol markers.


Next I stamped the sentiment then attached everything using foam tape for a bit of dimension and the card was done!

Thank you so much for stopping by! Have a wonderful day!


Coffee Saurus

Hi there,

this is my fifth creation using an image from the Gerda Steiner Designs February/March Digital Stamp Bundle and it's just perfect for the Spring Coffee Lovers Blog Hop.
 

  • color the adorable Gerda Steiner Designs Coffee Saurus which is available as part of the Gerda Steiner Designs February/March Digital Stamp Bundle with Delta, Touch Twin and Copic Markers
  • add extra shading with Faber-Castell Polychromos Pencils
  • stamp coffee-related images from the STAMPlorations Coffee Petites set into the background using Versafine (Onyx Black) and color those images with Derwent Inktense Pencils and a watercolor brush
  • tear a strip of vellum and wrap it around the main panel
  • stamp the sentiment from the Gerda Steiner Designs Gopher it set with Versamark onto the vellum and heat-emboss it with WOW! Bright White Super Fine embossing powder
  • add a strip of brown cardstock and grid paper to the left side of the card before adhering it to the cardbase

Have fun joining the Spring Coffee Lovers Blog Hop.

Yours,


Thursday, March 23, 2017

Guest Designer- Peek A Boo Birthday!

Hi Everyone!!
Kimberly from Kimberly Crafty Spot here today as a guest designer.
Today I am sharing another card using the newly released
This blog post contains affiliate links.

For the card, I wanted the animals to look like they were peeking out. So I stamped, colored and fussy cut the animals from the set then paper pieced the gift and cake, also from the set.
Next, I die cut three circles from a rainbow chevron patterned paper then added the "Hooray!" sentiment and heat set in clear embossing powder. Then I added the animals to the circles. I layered this onto some burlap, then added some orange patterned paper behind the burlap. I added these layers to a top folding A2 Kraft card base.


 To the inside of the card, I added a white card stock die cut panel with the rest of the sentiment. Next, I added the Lion from the set and the cake that I colored
and paper pieced the frosting next to the Lion.


Thank you so much for stopping by!
Make sure to check out this great stamp set {here} and the rest of the details on my blog {here}.
Have a wonderful day!


Wednesday, March 22, 2017

Party Animals Copic Marker Tutorial


Hello! This is Mindy from My Creative Scoop! I'm so excited to be joining Gerda Steiner Designs in this guest post!

 I'm using the new stamp set, Animal Party and we are going to mask a scene, then create different animal textures with our Copic Markers. I always use patterned paper scraps to do this, then I cut him out, with some fussy cutting. Then, lay the patterned paper chimp over your actual image you're going to color. Now, you're going to ink up the stamp you want behind, I'm using the ostrich, and stamp him where you want. Just like in this first photo.


Now, color your image using N0, N1, N3 and N5. You don't have to make it too detailed since we will do that when we add the texture, but you do want to add some shadows. You'll make shadows with the N5 then blending out with the next color and so on, the darkest areas will be just behind the shoulder on the back and side, the outer part of the sides of the face, under the neck, under the chest and on the inner parts of the arms. 


Then use N9 to make tiny flicks and dots all over the gorilla, creating the hair like texture. Notice how I've even made the flicks come out of the outline just a little.


Now, with the N5 we are going to shadow those shadowed areas again, making them stand out a little more.


Then go back and add more N9.


Time to add a different type of texture to the ostrich. We want more of a fluffy, feathery look. So using E41, E42 and E43 color the neck and when you get to the body, add spots until the body is fully covered. Start with a little bit of the E42, and then E43 and then fully cover with E41. 


We still want to define shadow areas so behind the neck and under the wing and some spots using E49 and E45.


Then go over the entire body again with E43, blending all the colors in a little. When doing this you still want to 'dot'. 


Then add little finishing touches to your scene and you're all done!


I hope you have enjoyed my tutorial and card. Have a wonderful day!


Tuesday, March 21, 2017

Coffee Cat Tag

Hi there,

this is my fourth creation using an image from the Gerda Steiner Designs February/March Digital Stamp Bundle:

  • color the super cute Gerda Steiner Designs Coffee Cat which is available as part of the Gerda Steiner Designs February/March Digital Stamp Bundle with Delta, Touch Twin Brush and Copic Markers
  • add extra shading with Faber-Castell Polychromos Pencils
  • cut out a tag from watercolor paper using one of the My Favorite Things Tag Builder Blueprints 6 dies
  • use grey cardstock to cut a ground for the cat to stand on
  • stamp coffee-related images from the Lawn Fawn Love you a Latte set into the background with Versafine (Smokey Gray)
  • color the images with Caran d'Ache Prismalo I Pencils and a damp watercolor brush
  • thread a piece of teal twine through the hole of the tag

Have a colorful day.

Yours,

Monday, March 20, 2017

Birthday party !

Hello everyone!

Alexandra here from made by Alexandra sharing a card that I made using the brand new stamp set Party Animals.


For this card I started by stamping and coloring this 3 cute animals which are getting ready for a fantastic birthday party, using Spectrum Noir Alcohol Markers.


Next I die cut the panel for the background and the hill and inked them using Distress inks. Stamped the sentiment from the same stamp set and added some sequins.

Adhered everything using a combination of liquid glue and foam tape! And the card was done!

Thank you so much for stopping by! Wishing you a great day!


Sunday, March 19, 2017

Guest Design - Interactive - surprise sentiment card using GSD stamp set - Hoppiness

Hello there, I hope you are all having a great day!

Kamila here and today I have once again a pleasure to guest design and I have created an interactive card using the super sweet and versatile stamp set - Hoppiness.
I had so much fun creating this card, love the images and I think it's fun that the sentiment is hidden :) Hope you enjoy the video!


supplies:
Hoppiness - GSD stamp set
Nennah Solar white cardstock
yellow bunny - (promarker (PM) - buttercup, copic - Y02
grey bunny - PM - cool greys - 1,2,3
brown bunny- E29 & E35
chick - PM - yellow & sunflower duck egg
fence - E29 & E25
Avery Elle - Pierced Clouds die set
Ranger round blending tool
Tumbled glass & Salty Ocean distress inks
Michael's brads
Martha Stewart mini score board

Thanks for stopping by!

-Kamila

Saturday, March 18, 2017

Nerdy Bunny | Flowers and sparkles

It's Anna Sigga here today and I have another card using the adorable Nerdy Easter Bunny stamp set.


This bunny is so darn cute and I love that even though this set is meant for Easter it works for any occasion cards.


I colored the bunny using my Zig Clean Color Real Brush markers and I kept him on the soft side. Then I was unable to control myself and I just had to add a dash of sparkliness to the card too!


Bunny and sparkles are the perfect match - right?! :)

Thanks so much for stopping by!

Friday, March 17, 2017

Larissa - Hoppiness


Hello everyone, I am Larissa from the blog Car-d-elicious and today is my second time guestdesigning for Gerda Steiner designs. I got the set Hoppiness from Gerda to make some cards with. This time I decided to use the cute bird instead of one of the bunnies on the set.


This funny bird is from the set Hoppiness from Gerda Steiner designs. I stamped the bird 6 times and then I colouored them with my Polychromos pencils and the black glaze pen. I have cut 6 circles out of a piece of kraft cardstock with the Stans X-tra no. 7 die from Crealies. I adhered the kraft cardstock with foamtape on black cardstock and then I adhered the birds inside the circles. The sentiment is from the set Happy hoppy from Gerda Steiner designs. With a black fineliner I doodled a line on the kraft cardstock. On a kraft card I adhered a stripf of rainbow striped design paper from the Sweet celebrations paperpack from My favorite things and then I adhered the cardstock with the images on my card.

Thanks Gerda and Macy for asking me as a guestdesigner! I had so much fun. :)


*********************************************************************************
STAMP: Hoppiness and Happy hoppy from Gerda Steiner designs
COLORING MEDIUM: Polychromos pencils
PAPER: Kraft cs, black cs. Sweet celebrations paperpack from My favorite things
INK: Versafine onyx black
DIES: Stans X-tra no. 7 from Crealies
ACCESSORIES: Black glaze pen, corner chomper, black pen