Thursday, May 31, 2018

Whats on your bookshelf??

Hi Everyone,

Its Hazel from Didos Designs here today with a wee card made using the On the Bookshelf 6 x 4 Stamp Set.  

Now I dont know about you but Im not sure I would like to have one of the things on this bookshelf!!! Squeek squeek!!! 

I love this set as you can pick and choose what and where you would like the ornaments and kitties. 

I coloured my creation in with promarkers and for the rims of the kittys glasses I used a Sakura pen. 

Thanks for dropping by today, I hope I have inspoired you to get crafty,

Hazel x

Wednesday, May 30, 2018

Wild animal medals - Larissa


Hi everyone, I am Larissa from Car-d-elicious.


Last sunday my little nephews Menno and Niek participated in the Run voor Kika (Kika is a Dutch organisation  that raises money to help find a cure for children with cancer). I am really proud of these little guys and the money they raised for this organisation, so I made a little medal for both runners. Just to let them know they are simply the best! ;)


A while ago I found a handlettering set in a Dutch store with chiboard circles in it and I used those to make the medals. On one medal I stamped a lion and on the other the crocodile from the stampset Party animals from Gerda Steiner designs. I added a sentiment from the set Happy hoppy from Gerda Steiner designs on both medals. I have coloured the image with my Polychromos pencils. I thought it would be really hard to do, but it was actually really easy to do. I didn't add any shadows on these. I have coloured the eyes with a black glaze pen. I added a little metal ring and some ribbon and so the chipboard circles became 2 medals.


*********************************************************************************
STAMP: Party animals and Happy hoppy from Gerda Steiner designs
COLORING MEDIUM: Polychromos pencils
INK: Versafine onyx black
ACCESSORIES: Black glaze pen, Metal ring, yellow ribbon, Chipboard circle

Tuesday, May 29, 2018

Happy Birthday

Hi there,

it's Tanja here again and I have another creation using the adorable new Gerda Steiner Designs Dachshunds stamp set:

  • color the sweet dog from the Gerda Steiner Designs Dachshunds stamp set with ZIG Clean Color Real Brush Pens and a damp watercolor brush
  • cut out a stitched panel from Gmund Beer Paper Weizen with the help of one of the Elizabeth Craft Designs Stitched Rectangles
  • cut out a big heart using the Lawn Fawn Happy Color Slider die set and several small hearts using one of the Lawn Fawn Valentine Borders
  • cut the big heart and the small hearts again from purple cardstock and puzzle the pieces into the openings
  • stamp the sentiment from the Clearly Besotted Stamps Tiny Type set with Versafine Onyx Black
  • adhere the panel to a kraft cardbase

Hugs,


Friday, May 25, 2018

Let's meet

Hi there,

it's Tanja here and I created this fun card using the sweet little mouse from the Gerda Steiner Designs Fall Mice stamp set for the Spring and Summer Coffee Lovers Blog Hop:

  • cut out a stitched rectangle from smooth white cardstock
  • stamp the coffee mug from the Gerda Steiner Designs You're koalified set and mask it, stamp the mouse from the Gerda Steiner Designs Fall Mice set and mask it as well, stamp the computer and the sentiment from the STAMPlorations Hello you set
  • color the scene with Delta, Touch Twin Brush and Copic Markers - add extra shading with Prismacolor Colored Pencils and Zest-it
  • add highlights with a white gel pen
  • cut out a larger stitched rectangle from patterned paper and adhere all the layers onto a white cardbase

Enjoy the Summer Coffee Lovers Blog Hop.

Hugs,


Thursday, May 24, 2018

Paper Pieced Vrooming By...

 Hello Everyone,

Its Hazel from Didos Designs here today with a card made using the sweet Vrooming By Stamp Set. 
I wanted to show you today what you can do using the stamps rather than the digi version of this card. I have paper pieced it so that the image matches the background papers.  

To paper piece you just stamp the image on the backing papers, fussy cut them, and then glue onto the main image picture and you have a well matched image and card. My image has some colouring using my promarkers on it too. 

Its just one of the ways that using an acrylic stamp can be different from just printing out the image and colouring in.  

Thanks for dropping by today, I hope I have inspired you to get paper piecing.

Love Hazelx

Tuesday, May 22, 2018

Have a ball!

Hi there,

it's Tanja her and I would like to show you another creation using the fabulous new Gerda Steiner Designs Dachshunds stamp set:

  • color one of the dogs and the ball from the Gerda Steiner Designs Dachshunds stamp set with ZIG Clean Color Real Brush Pens and a damp watercolor brush
  • add color to the sentiment strip with Distress Ink Salty Ocean
  • cut out a stitched window from a stitched panel cut from Gmund Beer Paper Weizen
  • create a shaker element behind the window with the help of acetate, double-sided foam adhesive and Little Things from Lucy's Cards Diamonds Rainbow Bright
  • for the background behind the window apply Distress Ink Salty Ocean through the Create a Smile Focal Point stencil
  • adhere the panel to a grey cardbase after arranging the elements in front of the shaker window

Thanks for stopping by.

Hugs,


Saturday, May 19, 2018

Relax... Purrrfect Father's Day Card

Hello crafty friends!  It's Lisa here with you today and I have a super Clean and Simple card to share with you that I think would be perfect to use for this upcoming Father's Day...


To create the front part of my card all I had to do was adhere pattern paper, die cut a circle off the lower right corner and stamp the first part of my sentiment.  Next, I stamped the cute kitty from the On the Bookshelf Stamp set where the opening is and colored it in with Zig Clean Color Real Brush Markers.  I find these markers are some of my favorite for creating the look of thin wisps of fur.  To finish the card I stamped the second part of my sentiment on the inside of the card and tied some twine in a bow at the top.

Thanks so much for stopping by today and I hope you get a chance to check out all of the cute sets available at this time in the store!
Happy Crafting!
Lisa

Friday, May 18, 2018

On the Bookshelf - Jeannie (InsideoutJeans)

Hello there! Today, I'm back with another card using the On the Bookshelf stamp set. I'm a sucker for nerdy glasses and since I didn't use the main cat with the adorable Harry Potter-esque glasses, I had to this time.

I wanted to do a pretty simple card, so I decided to create a circular frame of the items in the stamp set. I stamped these out and created a mask for the circle of the items. I used distress inks to color in a blue ombre (Chipped Sapphire, Salty Ocean, and Peacock Feathers) and colored up the images using alcohol markers.


It's a really simple card, but I think it's pretty cute. The main star is the kitty in the middle. I just love him! I didn't even add a sentiment because I felt like it wasn't needed. I can give this card to any bookworm.


Hope you liked this card. This stamp set is quickly becoming one of my favorites so I hope you love it too!

Until next time!

Thursday, May 17, 2018

Dinky Bookshelf...

 Hello Everyone,
  Its Hazel from Didos Designs here today with a couple of cute cards made using the brand new On The Bookshelf Stamp Set. 
 I wanted a couple of cute small cards so have gone for 4 x 4 creations.  They are stamped then coloured with watercolour pencils on kraft card.
The sentiments have been stamped and then I slightly moved the stamp to the side and restamped over the original to give a 3D effect. This is very easy to do as the stamps are acrylic so you can see exactly where you are stamping. 

The Kitty with the glasses has been masked so I could add books behind him and the wee mouse popping his head out. 


I hope I have inspired you today,

Hazel x


Tuesday, May 15, 2018

Do you see????? - Larissa


Goodmorning, I am Larissa from Car-d-elicious and today I am posting a new card on the blog from Gerda Steiner designs. This time I made a card with the new stampset On the bookshelf from Gerda Steiner designs. When I saw this set, I knew I had to make this little scene. 


For this card I started with stamping the image from the cat and the piles of books on masking paper. Then I started with stampin the cat and then with the help of masking paper I stamped all the piles of books below the cat. I have coloured all images with my Polychromos pencils and the black glaze pen and then I have fussy cut all the images. The sentiment is made with the computer. After I had printed it, I used a black pen to draw frames around the words and then I fussy cut them all. With the Crea-nest-lies XXL 36 from Crealies I have die-cut a rectangle from white cardstock. I used Scattered straw, Wild honey, Ground espresso and Walnut stain distress ink to make a background for the images and the sentiment on it. I adhered the rectangle on white cardstock and then I adhered them both on a black card. I have adhered all images and words with foamtape on the card.


*********************************************************************************
STAMP: On the bookshelf from Gerda Steiner designs
COLORING MEDIUM: Polychromos pencils, Distress inks
PAPER: White and black cs, Kraft card
INK: Versafine onyx black, Scattered straw, Wild honey, Ground espresso and Walnut stain distress ink
DIES: Crea-nest-lies XXL 36 from Crealies 

ACCESSORIES: Black glaze pen, black fineliner

Speedy Pup!...

Hello again, it's Jayne, with another DT project for you!

Today I am sharing with you a card featuring a new stamp set called Dog on Scooter. I couldn't resist making him a little reckless because he was going so fast and looked so happy !!


I have coloured him using alcohol markers and for the background I have used Distress oxide inks.
I fussy cut him out and popped him up on foam tape for added dimension.


I do hope you like him and feel inspired!

Happy crafting and see you soon xx

Jayne x


Saturday, May 12, 2018

Have a Purr-fect Day!

Hello crafty friends!  It's Lisa, here today and I'm so happy to be back on the blog sharing another super cute Gerda Steiner set called 
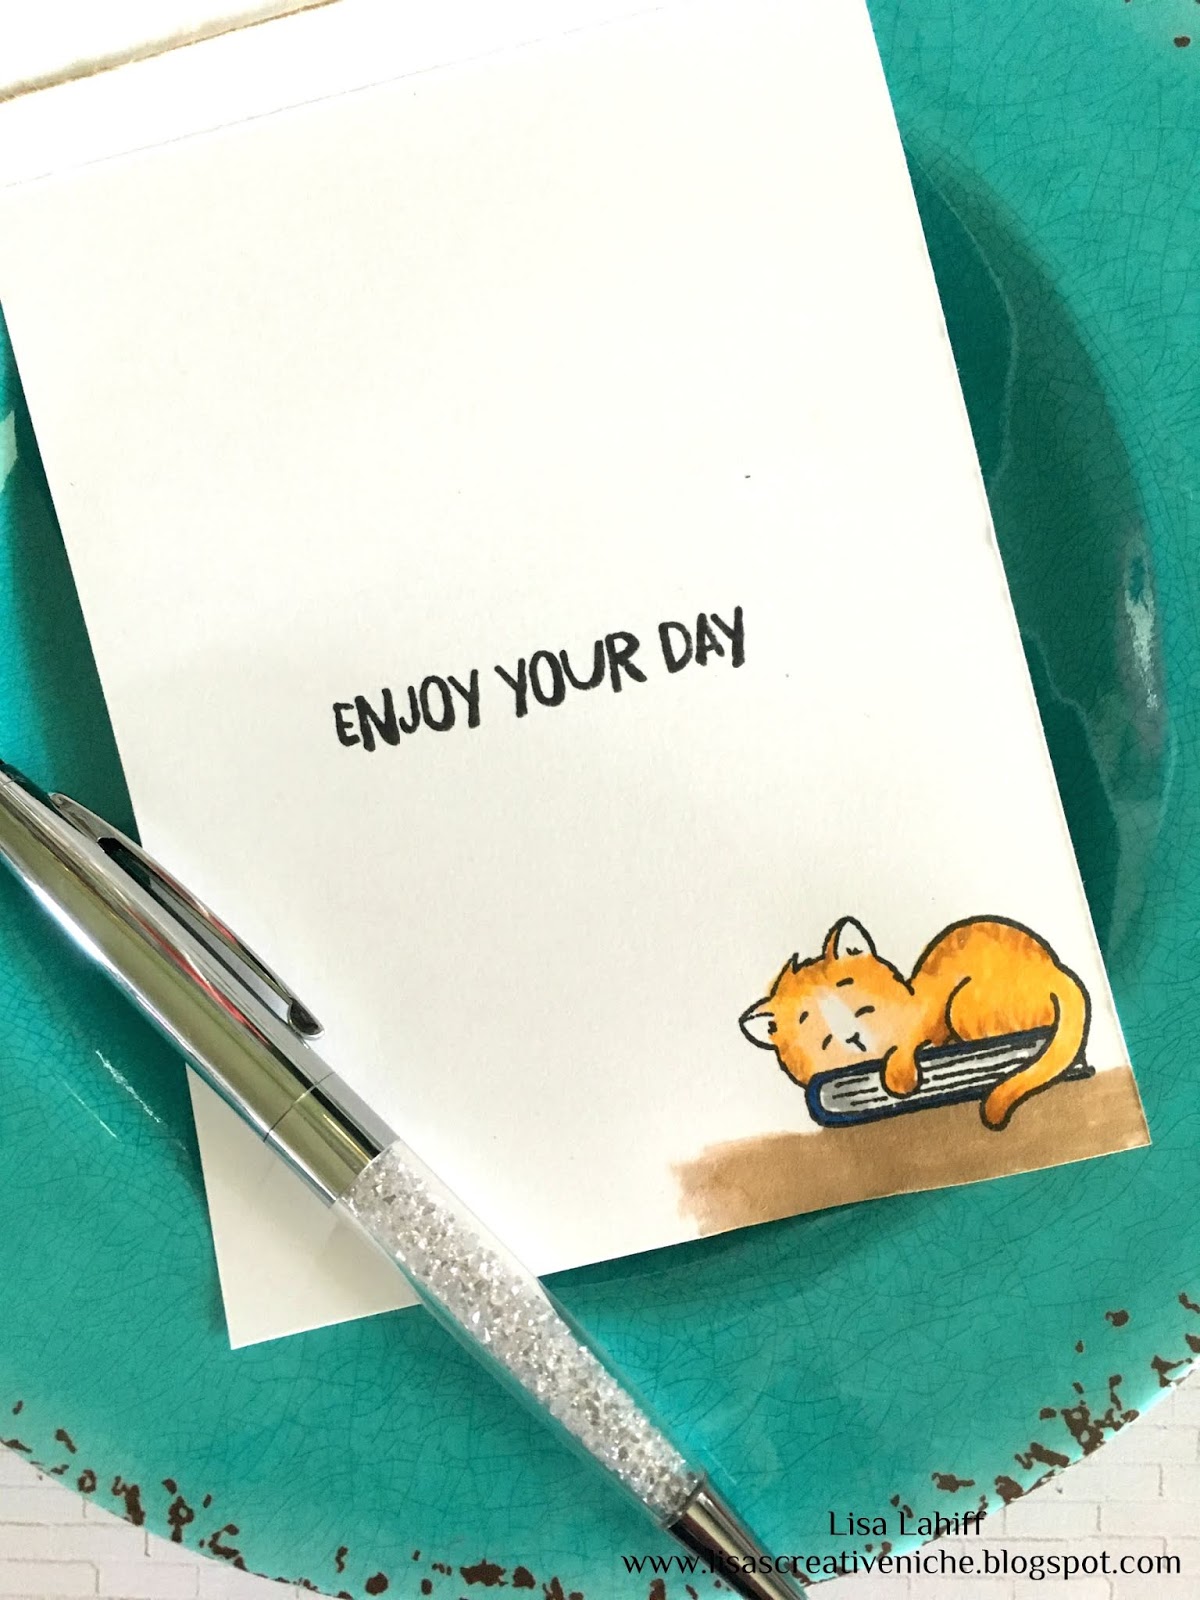
On The Bookshelf.  The images in this set are so fun to mix and match to create different scenes, and the shelf idea is so unique!  Here's what I've created for today...


To create this cute little scene I started by first stamping the shelf, the accessories to go onto the shelf, and the mouse down below.  I knew that I wanted the cat to stand out more so I opted to stamp him onto a second piece of cardstock, colored him in and cut him out.  Coloring the entire back panel wasn't appealing to me, so opted to create a fun wall paper design instead.  I drew my baseboard and floor lines first and then used my Spectrum Noir Markers to added a random mix of dots all over the wall.  The sentiment I've used for this card comes from another cute cat set called Buckets of Love.  With a busy background like this one I didn't need to add any extra embellishments, and simply popped the cat up with foam adhesive.

Thanks so much for stopping by today, and I hope you'll get a chance to stop by the store and see the new cute sets that are being added all of the time!

Happy Crafting!
Lisa

Friday, May 11, 2018

On The Bookshelf - Jeannie (InsideoutJeans)

Hello all,

Today I'm sharing a card using the new set, On the Bookshelf. This set is absolutely adorable and I had to create something immediately. Of course, I automatically went to an one layer card which mimicked a bookshelf. This set has so many items that you can find on a bookshelf that the scene came together really quickly.

I decided that instead of using the bookshelf nooks provided in the stamp set, I wanted to create my own "shelves" so I could cram as much stuff in them as possible. I just drew some pencil lines and went over it with a copic multi-liner pen.

Once I started stamping all the books, gadgets and cats to the bookshelf, the scene really came to life.


It's a really simple card but looks like a lot of things are going on. I really loved how this turned out. How about you?

I hope you enjoyed today's card and that this gave you some inspiration. I'll see you next week for another card share.

Thursday, May 10, 2018

Kinetic Vrooom!!!

 Good Morning,

Its Hazel from Didos Designs here once again with a wee make to share with you all. 

I got the amazing Vrooming By Stamp set to play with. Its a dinky 3 x 4 Set.  Its got a few super sentiments with it. 
I decided to make a kinetic card as I wanted him to be vrooming by on the open road. 

I used distress inks for the background. I masked off areas I wanted in different colours. I then colored up the wee doggy with my promarkers.  I added the kinetic parts so he can vroom over the card. 

Thanks for dropping bu today,

Love Hazel x

Wednesday, May 9, 2018

Coffeesaurus - Larissa


Hi everyone, I am Larissa from Car-d-elicious and today I am posting a new card on the blog from Gerda Steiner designs and this time I made a card with the stampset Coffeesaurus from Gerda Steiner designs.


I stamped the dinosaur and then I coloured him with my Polychromos pencils. After I coloured the image I have fussy cut it. With masking paper and Picked raspberry, Mustard seed and Peacock feathers distress ink I coloured a circle on the front of a white card. Then I stamped the word coffee from the stampset Coffeesaurus from Gerda Steiner designs a couple of times on the circle. I also added a sentiment on the card. I have die-cut a circle frame from white cardstock with the Single stitch line circle frames from My favorite things and then I coloured it with Picked raspberry distress ink. I adhered the frame with foamtape on the card. I used Picked raspberry ink to colour the edges of the card and then I doodled some lines with a black pen. With black paint from the Kuretake gansai tambi set I made a couple of paint splatters on the front of the card. Then I decorated the card with a couple of black hotfix gems.


*********************************************************************************
STAMP: Coffeesaurus from Gerda Steiner designs
COLORING MEDIUM: Polychromos pencils, Distress inks, Kuretake gansai tambi
PAPER: White cs
INK: Versafine onyx black, Picked raspberry, Mustard seed and Peacock feathers distress ink
DIES: Single stitch line circle frames from My favorite things
ACCESSORIES: Black fineliner, black hotfix

Tuesday, May 8, 2018

Keep your Head up!

Hi there,

it's Tanja here and I created this cute card using one of the adorable little dogs from the new Gerda Steiner Designs Dachshunds stamp set:

  • color the sweet dog and the balloon from the new Gerda Steiner Designs Dachshunds set with Zig Clean Color Real Brush Markers and a damp watercolor brush
  • add extra shading with Derwent Coloursoft Pencils
  • use one of the Lawn Fawn Mini Picture Frames to cut out a background from white cardstock and a frame from patterned paper from the ModaScrap Wood Effect 6x6 paper pad
  • use Distress Ink Broken China, a Mini Ink Blending Tool and the My Favorite Things Mini Cloud Edges to create a cloud background
  • stamp the sentiment from the Gerda Steiner Designs Just Sentiments set with Versafine Vintage Sepia
  • round the top left and the bottom right corner with a 1'' corner rounder

Thanks for stopping by today.

Hugs,


Monday, May 7, 2018

Fruit and Veg...

Hi,

Its Hazel from Didos Designs here to give you a little inspiration to start the wheek!!! (See what I did there!!!) 

I have been playing with the Wheek Wheek Wheek Set once again. I had a little think about something different and came up with changing the veg to fruit. So instead of the cucumber stamp being a cucumber I coloured it like a wee watermelon. 

I colored the background which I randomly stamped with the fruit/veg/ using watercolour pens and promarkers and the guinea piggies were coloured with promarkers and prismacolor pencils.

I finished the creation off with one of the brilliant sentiment stamps.

You can also get matching dies to go with this set here. 

Thanks for dropping by today,

Love Hazel x 

Friday, May 4, 2018

Vrooming By (into the weekend!) - Jeannie

Happy Friday! Today I'm sharing a card using the Vrooming By clear stamp set, which has a similar digital stamp image. Personally, I prefer having an actual stamp because I don't have easy access to a printer so I was delighted to play with this cute image.

I wanted to depict how fast the dog was going on his scooter and decided to do this using the second and third generation stamping. A stamp positioner is really helpful in creating cards where you need precision and I think it's one of my most used tools. In this instance, I'm using it to help stamp the same image multiple times but shifted over just a little bit.


Using some light grey Copic markers, I colored them lightly to help portray that he's zipping by. It turns out pretty cool, doesn't it? It's a very simple card but I think the additional stamped images gives it enough to catch your interest.

This card is a bit out of my comfort zone but I decided the share it and the video tutorial anyway.

I hope you enjoy the card and try it out. Have a great day!


Thursday, May 3, 2018

Guinea Piggy Friends.

Hi, 

Its Hazel from Didos Designs back again with another cute wee Guinea Piggys Card.

I have used a few of the stamps available in the Wheek Wheek Wheek Set for my card today. 

I stamped and them masked off the largest guinea piggy and added more piggies round him as his friends.  

For the background I used the leaves and cucumber and randomly stamped them on the card and the border paper. 

The colouring is done using promarkers. 

There is an additional die set which complements the Wheek Wheek Wheek Set. You can find it here. 

I hope you like the card I have made.  Thanks for dropping by today,

Hazel x

Wednesday, May 2, 2018

Dachshunds


Today I am sharing two cards I made using the new stamp set called Dachshunds.

The first card was coloured with copic markers and fussy cut out and popped up on foam tape for added dimension. The Background was inked with Distress oxide inks.


The second card was also coloured with copic markers. The balloons were stamped and masked to create many layers and give it a 3D look.


I hope you feel inspired...have a lovely day!

Jayne x