Monday, November 30, 2015

Traditional colored christmas card

Hi everyone!
It's Wiebke here and today I want to a share a card made with the Snowman Friends set!
For some of you not knowing me - I LOVE craft paper backgrounds for christmas cards. Omg, no single christmas without a plenty of these! Today, I combined this cute little snowman with an clear embossed craft paper background. To let it look a bit more interesting, I blended some brown Distress Ink Color on the edges. Combined with lots of red colors, you'll get a traditional colored christmas card!


Happy first Advent and have a good start into the month december!

Friday, November 27, 2015

How to create Depth using Inexpensive color pencils


Aloha Guys!  This is Joyce from http://enjoyscrappin2.com and today I'm sharing how to achieve depth and dimension using some inexpensive color pencils.  You can layer multiple layers to create the look that you want.  I hope you liked this card and I'll see you next time.  Thanks again :)


Thursday, November 26, 2015

Clean and Simple Christmas Card and Thankful for YOU Giveaway!


Hello crafty friends! It's Jess from JessCrafts.com. Today I am sharing a card made with the Deck the Halls and Holiday Friends stamp sets. I wanted to create a fun background for a bold sentiment. But since it is American Thanksgiving I have a special little giveaway for you if you visit the YouTube video to comment. Check out the video for more:


I love how there are several faces included for the gingerbread man so you can customize him to your card. I think it would be fun to use the surprised face after altering the stamp to look like there's been a bite taken out of him.


Tuesday, November 24, 2015

Merry Christmas Reindeer

Hi there,

it's Tanja here and I would like to show you this sweet Reindeer Tag Card step-by-step:


Thanks for stopping by today.

Yours,


Wednesday, November 18, 2015

Gingerbread men...

Hi there!

It's Yolanda here, from Scraping Time.  Since I had in my hands the gingerbread man, from the "Holiday friends" stamps set, I thought about the card I've finally made!


As you can see, I made the dish with two different sizes of circle die cuts. Then I used fine detail white embossing powder for the gingerbread men. I think they are so cute and you have the possibility of changing the faces since there are three different expressions in this set and it includes even a cute bow to transform them into a girl . Aren´t they adorable??
I used kraft cardstock and once I had embossed them, I used Vintage Photo Distress Ink to make them more realistic. I added some red details and I placed them into the gold dish.


I used the sentiment of the same set, although you can also find it in the "Deck the halls" stamps set. In this occasion, I used Delicata Pigment Ink instead of gold embossing powder since I love how much it shines without giving so much volume to the sentiment.  I added the cup of coffee from the "Snowman friends" stamps set because I can't think about a cookie without a cup of hot chocolate or coffee :))


Finally, I added the detail of the napkin just to have fun... That´s the essence of carmaking, isn´t it??


Some days ago, I tried something I had been thinking for a long time: adding some kind of smell to my Chritmas cards. Today I have done it again. My gingerbread card smells to cinnamon. Just take your double side foam and press the borders gently into a little bit of cinnamon and your card will smell nicely! Put it into a plastic envelope in order to keep the smell for a longer time.


I hope you have enjoyed and... see you soon!!


Monday, November 16, 2015

Do you wanna build a snowman?

Hey everyone!
It's Wiebke here today and I have another christmas card for you!


I looooved using one of the cute snowmen of the Snowman Friends stamp set! I colored him and the two birdies with ZIG Clean Color Real Brushes.


I used a snowflake stencil and embossingpaste for the background. To get that night sky look, I colored over it with some watercolors. To finish the card up, I put some liquid fake snow on the bottom of the card.


I hope I've given you some inspiration! Have a great day! ;)

Saturday, November 14, 2015

Create a Cute Christmas Tag

Hi crafters! I'm excited to be back as guest designer today. Gerda has such a wonderful clear stamp set for the holiday season (one among many!) that I just had to craft with it!

The set features different characters that are drawn to peek out from behind something. The images are not complete, so you don't have to worry about masking or about coloring the entire image.


I started by stamping the outline on to my tag from Pretty Pink Posh, then used masking paper to protect that outline while I sponged color in with my Distress Ink blending tool. I found out that it works best for me when I start out with the lightest color, which is the one closest to the top of the tag, and then add the darker colors which are closer to the bottom. That allows me to blend them together nicely without covering areas with darker color that are meant to stay light.


The image itself was colored with my Stabilo markers. They are water based, like Distress Markers, and to blend the color out I used a Dove Blender Pen (a Blender pen from Stamping Up works just as well). I just rediscovered this technique after using it last year, so I want to give this some more attention.

You can use a water brush or regular brush to blend out the colors, but I am not good enough to have proper control over what I am doing. But give me a blender pen with a proper marker tip (like a felt tip marker) and I'm in business! Total control :)


The I put the mask back on my colored image before stamping the sentiment from Mama Elephant and I have to admit, I like how the critter partially obscures the sentiment. It adds a nice layer effect to the otherwise simple tag.

I hope you enjoyed today's project. Thanks for stopping by!

Friday, November 13, 2015

How to get Glowing Christmas light effect using Gelatos


Aloha Guys!  This is Joyce from http://enjoyscrappin2.com and today I'm sharing 2 cards using the Deck the Halls stamp set and some tips on how to get a look of glowing Christmas lights with watercoloring.  This is my first Christmas card of the year, and I wanted to start with this adorable kitty.  I've watercolored the kitty using Gelatos on a Classic Linen Card stock, which gave such a great texture and the glowing effect.  I hope you like these cards and I'll see you next time.  Thanks so much :)  

Thursday, November 12, 2015

Snowman Christmas Card Layering Stamps and Stencils

Snowman Christmas Card by Jess Crafts using Gerda Steiner Designs Snowman Friends


Hello crafty friends! It's Jess from JessCrafts.com. Today I am sharing a card made with the Snowman Friends and  Deck the Halls stamp set. I've loved the shivering snowman since the first time I saw the set so I knew it would be the first one I used. Check out my video for more on this card:


I love how easy it is to fussy cut these snowmen so that you can layer them on all kind sof fun snowy backgrounds but be sure to stamp the image directly on the background too so you can get those shiver lines. 


Check out Gerda Steiner's amazing selection of Christmas stamps and then share your creations over on the Facebook group


Tuesday, November 10, 2015

Girly Monster Birthday

Hi there,

it's Tanja here and today I want to to show you this Girly Monster Birthday card:


Thanks for joining me today.

Have a colorful day.

Wednesday, November 4, 2015

Snowmen joy!

Hi there!!

It's Yolanda here, from Scraping Time. Today I am going to show you a Christmas card.
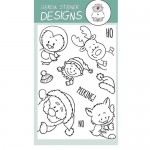
To make it, I have used some stamps from the "Snowman friends" set and one of the presents of the "Holiday friends" set.  One of the things I love from the "Snowman friends" stamps set is that you have different stamp sizes so I decided to use one of the smallest snowmen and the medium size one to make a night scene in my card.


I love cards with volume!! Firstly, I cut out the house with my Silhouette Cameo in kraft and watercolor cardstock. Then I took a piece of watercolor cardstock and made my yellow window's background with Lawn Fawn ink. I stamped a star there and once more in another cardstock to colouring it with Wink of Stella (grey 0,8 mm marker) before sticking it on its place. I stamped, coloured with Spectrum Noir markers and cut out the two presents and set them on the window. Once I had it done, I put some acetate behind the window and sticked the yellow background with some foam to give it some depht. To finish the house, I decided to use a die cut as my sentiment.


Then, I stamped my cute snowmen. I coloured it with spectrum noir markers and I did paper piecing in the biggest one scarf. 
It was time to pay attention to my background. I used my Peerless Watercolors to make it and once it was dry, I used a stencil and white embossing paste for my snow flakes. But since, I wanted to have any special detail on my card, I thought it was a good moment to use for the first time my "Flower soft".  In Spain it´s not a very popular product, so for me it was like magic when I created my snow and some details in my snowman. You just have to put some glue and then the flower soft as it were glitter. You press gently and remove the excess. You can put a couple of coats althoug it's not necessary. I love the result! 


I think it gives a very cute touch to the snowman and the snow! 


Finally, I used some foam squares to set my house on the card. I had a really good time making this card. I hope you have enjoyed and have a great week! 

Monday, November 2, 2015

Two Christmas Cards using Craft Paper

Hey everyone! It's Wiebke here for you today!
And I thought I'd share with you two christmas cards today, using craft paper! Craft paper is a popular medium for cards in combination with bright colors, therefore it seems that it's often used for christmas cards :) And I just love the combination! You can create such nice snowfall backgrounds with it! I don't know about you, but I even wrap the christmas presents for my family in craft paper! With just a bit splashes of color and a cute little tag, you'll get an awesome packaging.

My first card features the current Challenge Digistamp. What a lil' cutie! I actually planned on turning him in a polarbear.. but he somehow got a bit.. grey. Anyhow! I die cut some Snowflakes on my craft paper background and blended over them with white Pigment Ink. I also added some white snowfall points with my white gel pen. The sentiment is from the clear stamp set Holiday Friends and white heat embossed on a piece of cardstock. I combined all of that with only one second color: red.


I nearly did the same on this card: I die cut some snow mountains and blended over them with white pigment ink. Because I cut them out of craft paper, it was easy to get a two tone mountain and it isn't just white with a white Ice cone. I stamped some snowflakes from the Holiday Friends clear stamp set on my craft background and placed the little reindeer from the same clear stamp set on a snow landscape. The last thing I did, was heat embossing the matching sentiment with some golden embossing powder.


I hope that I gave you some inspiration on how you can use craft paper in combination with your Gerda Steiner Designs Stamps!

Have a great day!