Friday, November 29, 2019

Christmas tags....!!

Hey everyone...

It's Ashlee here with you today with a post sharing these tags 
perfect for Christmas gifts featuring the santa and reindeers from the "Reindeer and a tree" set!!....

To create the tag bases I used a die from Honeybee stamps called "Scallop sqaure gift tag" and stamped them with a background stamp from "Catherine Pooler" called "Plaid background"


I coloured up these cuties from the "Reindeer and a tree" stamp set with Copic markers and added them to a fun snowy scene I created using distress oxide ink, some opaque white paint and a hill using a die from "Hello Sweetums" called "Slippery slopes"


I added the characters to the tags with some foam tape for added dimension and finished them both off with some pretty sequins and some ribbon to tie the tag onto a gift....

I hope you enjoy my tag inspiration today and I will be back soon with some more creations to share with you!!

Hugs Ashlee

(P.S Gerda Steiner designs is currently on a thanksgiving break at the moment but they will be back open December 1st) 

Thursday, November 28, 2019

Grateful Skating Mice Card by Karla

Hello friends! Karla back today with a sweet fall/winter card using the adorable Ice Skating Mouse digital stamp from the Gerda Steiner Designs Shop. I just love the sweet sweater, scarf and hat on this guy, and even though I used pretty fall papers and embellishments, you could totally do this card in a holiday theme with either winter colours or full on Christmas!


The fun thing about digital stamps is how easily they can be manipulated. I added two images to Word on my PC, sized them to the desired size by dragging, and then simply clicked on one to flip it horizontally. Voila, 2 mice skating together!! I used the papers from the November SCT Sampler Pack as my inspiration to colour in the accessories on each of these cuties with Copic Markers.


I stitched some embroidery floss through the tiny holes on the diecut oval and used a black pen to hand draw in the ice - adding some coloured pencil and some shiny Stickles to the background. A bit of Glossy Accents on the hearts and pompoms add a little dimension along with the sequins and enamel dots.


I added a stamp from my stash and thought I would give this out as a thank you card, but it would also be lovely as a Thanksgiving card!


Thanks so much for stopping by! Be sure to check out the Gerda Steiner Designs Shop to see what fun goodies you can find. If you will be celebrating Thanksgiving today, I hope you have a wonderful holiday and many things to be grateful for. (PS the store is closed until Dec 1st for Thanksgiving Break, but you'll be able to shop after that - and meanwhile be sure to check all the fabulous inspiration on the blog and FB page!)

Hugs,
Karla

Wednesday, November 27, 2019

Hoera Sophie 3 jaar - Larissa


Hi everyone, I am Larissa from Car-d-elicious and today I am posting a new card on the blog from Gerda Steiner designs. This time I made a card for Sophie who celebrated her 3th birthday. :)


On the card I have used the digital stamp Cat with balloons from Gerda Steiner designs. I have coloured the image with my Polychromos pencils, the black glaze pen and a white gelpen. Then I have fussy cut the image. On a white card I made a background for the image with the Mini cloud edges stencil from My favorite things and Blue breeze dye ink from My favorite things. I have made the grass with the Grassy edges stencil from My favorite things and Mowed lawn distress ink. I have glued the image with foamtape on the card. I have stamped a sentiment from the set Bulletjournal - Tekst diversen from Craft emotions next to the image.


I have die-cut the name Sophie with the Mini alfas dies from La pareja creativa from black cardstock and I glued it on the green balloon. I have die-cut the number 3 from black cardstock with the Journaling number dies from Neat and tangled and I glued it on the pink balloon.


*********************************************************************************
STAMP: Cat with balloons from Gerda Steiner designs, Bulletjournal - Tekst diversen from Craft emotions
COLORING MEDIUM: Polychromos pencils, Distress inks
PAPER: White and black cs
INK: Versafine clair nocturne
DIES: Mini alfas dies from La pareja creativa, Journaling number dies from Neat and tangled
ACCESSORIES: Black glaze pen, white gelpen, Mini cloud edges and Grassy edges stencil from My favorite things. 

I am a participant in the Gerda Steiner designs Affiliate Programme. This means that if you click on one of my links and subsequently make a purchase, I will receive a small commission of store credit, at no extra cost to you.


Monday, November 25, 2019

MERRY CHRISTMAS by Noga Shefer


Hi crafty friends,  Noga here and I am so happy to share with you another project for Gerda Steiner Designs today.


My card featuring the brand new Little Snowman 2x3 Clear Stamp Set stamp set . This set is so adorable!!


To make this card I took a piece of Bristol smooth cardstock and cut a slimline card.


The sky was created by blending tumbled glass  and peacock feathers distress oxide inks,
I splashed white paint on it to make snow.


Next I colored the image using copic markers and fussy cut it and glued it to my panel.


Next I stamped a greeting from Holiday Snail 3x4 Clear Stamp Set  on white banner using silver powder and heat embossed it.

to finish off, I add some glitter powder to the snow hill.


I hope you enjoy the card I created and feel inspired to create!

Thanks for stopping by,


Sunday, November 24, 2019

Slimline Caroling Kittens & Puppies

Hi everyone! It’s Jeannie (InsideoutJeans) on the blog today with a card featuring Gerda Steiner Design’s stamp sets: Carol Kittens and Carol Puppies. Last year, I created cards with just each separate set but this year, I wanted to pull them back out to create a fun combination card. I love that they are the same size so they work perfectly together.

To get all these friends together onto a card, I used the trending slimline card to stamp them on. I almost got all of them but I am missing one. I could have squeeze them in but it seemed crowded enough already. I did stagger some in the front and some in the back. 
Don't they all look like they are having so much fun! Once I stamped everything out, I had to take the time to color them up and I love that I could spend the time to color them all up.

The slimline card really allowed me to fit them all on the card and I think it's so fun! I even have a matching envelope so I can send it off. 


Thanks for stopping by today and I hope you get inspired to create. Come back again soon for more inspiration and ideas! Happy Crafting! 

Friday, November 22, 2019

"No Peeking" Panda Christmas card

Hello everyone, it’s Karen again from @Karens_Kardzz and I’ve got a “No Peeking Panda” Christmas card to share with you today that has a fun inside surprise element.


If you would like to see a video of how I made this card, you can see it in HD HERE


I started this card by cutting a card front that is 4 1/4” x 5 1/2” from white cardstock. The base is 4 1/4” x 11”.

I started working on the card front first so it would have time to dry. I white heat embossed a selection of snowflakes all over the front. I used the snowflakes from Simon Says Stamp “Lots of Snowflakes” set, but you could use whatever you have. Then I ink smooshed the card front with Distress Oxide inks in the colours Tumbled Glass, Shaded Lilac, and Blueprint Sketch. Once I had this looking the way I wanted it to, I spritzed the front with Tsukineko shimmer spray in Sparkle. I set this aside to dry.

Front of the card with snowflakes


I took my images from three Gerda Steiner stamp sets - Lovely Pandas, Peeking Friends, and Puppy Kisses for Santa.


I used all the pandas, but for the one holding the balloon, I used a baby wipe to remove any ink from the balloon or string. I wanted him to look like he was standing by Santa, waiting for his turn to give Santa a hug!  I coloured all these images with copic markers and I have listed the markers I used down below.

Since I don’t have the dies, I fussy cut out my images. For the Peeking panda and Santa that go on the card front, I didn’t want the copic markers to show through to the inside when you open the card. To get a matching cut, I used temporary tape to adhere another piece of cardstock to the back of my coloured image, and then cut through both pieces of cardstock together.

Cutting through two layers of cardstock


I creased the card base at 2 3/4” in from both ends and then used a bone folder to really crease the folds.

Crease card base at 2 3/4" from both ends

On the inside, I placed the word “Joy” from the Simon Says Stamp set “Stained Glass Greetings” and stamped this in Versafine black ink. I coloured this in with a red Tombow marker so it wouldn’t bleed through to the back. I used a red copic marker and coloured a scrap strip of cardstock. I stamped this with Versamark ink and white heat embossed the sentiment -“May your Christmas be filled with”.  I trimmed this down and adhered it across the word Joy with double sided tape.

I stamped a few more snowflakes on the inside front panels in Tumbled Glass Distress Oxide ink and then sprinkled them with some Hero Arts Sparkle embossing powder and heat set them.

Then I cut my snowflake card front in half at 2 3/4”. After making sure I had these with the snowflakes lined up the way they were stamped, I adhered these to the front folds of my card base. I placed 1/8” double sided tape along the coloured peeking panda’s paws and placed him on the card front near the top. I glued the matching blank back piece and adhered it to the back of the panda so he was white when you open the card.  I did the same with the peeking Santa, placing tape just on his mittens.

Adhering the back of the peeking Santa

On the inside, I placed my images where I wanted them to be and glued them down into place.   I was careful to keep the standing panda to the right of the front fold. The Santa with the puppy was just slightly on the fold and I had to work to make sure he was creased very well, using a bone folder and pinching the crease. I found I had to keep working at this crease, but it eventually works out.

Showing the crease line with images attached

For the sentiment on the front of the card, I stamped the “No Peeking” from the Peeking Friends stamp set in Blueprint Sketch Distress Oxide ink onto white cardstock. I had a die in my stash that I used to partially die cut the ends into fishtails, but you could easily do this with scissors if you don’t have a die. I also cut one slightly longer out of silver foil cardstock and adhered these together. I then used double sided tape to adhere my sentiment to the card front.

I love that this card is still 4 1/4” x 5 1/2” and fits into a regular A2 sized envelope, yet it has such a fun surprise inside and lots of room to write a message. I hope you’ll give it a try!

Copic markers used:

Santa:  E000, E00, R20, R39, R25, R35, YR23, N6, N4, N2, C2, C0
Dog:  E35, E53, E51, R20, G99, G94, G82, YR23
Pandas:  N6, N4, N2, N0, R20, C2, C0

Thursday, November 21, 2019

FA LA LA


Hi crafty friends! It's Cathy here and I've finally gotten a start on my Christmas cards! I just love the Carol Puppies stamp set and couldn't wait to create this scene with a new Hero Arts die that I recently received. This might look a bit complicated, but it really wasn't.

The whole background scene is die-cuts that I colored with Copic markers. I did ink the door with black soot distress ink before adding some dark neutral gray Copic shading. I die-cut the letters from silver metallic cardstock.

For the puppies, I stamped the center one on Copic friendly cardstock and masked it before stamping the puppies on each side. I colored them with Copics and then fussy cut around the whole image. Then, I glued the puppies to the scene. 

Hope you're having a great week and if you make Christmas cards, I hope you're way farther ahead on them than I am!

See you again soon!

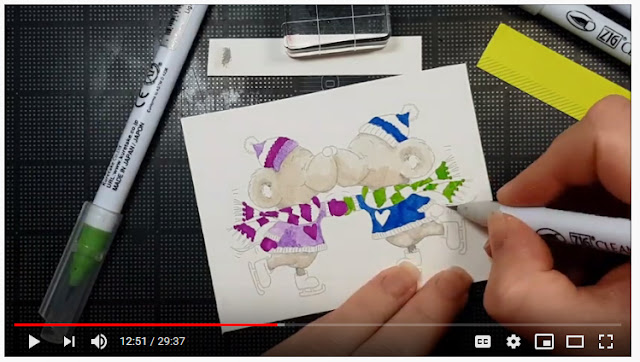
Skating Mice Pair

Hello everyone!  Allison Cope here! It’s snowy and rather white here in Southern Alberta today so I thought I’d create a pretty winter scene to put some cute critters on.

Today I’m working with the sweet “Ice Skating Mouse” digital image.  I have printed out my images on to Strathmore 400 Series Cold Press Watercolor paper to use my ZIG Clean Color Markers with today.

Grab a warm cuppa your favorite drink and join me at my crafty desk…

https://www.youtube.com/watch?v=Z4RxbsqyM_k

Now check out my final card with it’s sentiment on it!

Thanks for joining me today!  I’d love to hear what you think about my card today!

Happy stamping!

~ Ally ~

Wednesday, November 20, 2019

Huh? A Lettuce & Tomato Christmas Card!! Why Not!


Hello and Happy Wednesday Crafty Friends!  Tina here from Cards and Coffee Time, I am up on the Blog today, sharing my Design Team project with the adorable Wheek, Wheek Wheek stamp set. I just love this set and thought it would be fun to create a Christmas Card with it.  The little guinea pig looking up fit perfectly inside the lettuce and tomato wreath....I never saw that coming!!  But I do love the quirky outcome and hope you do too:)


Thanks so much for stopping by!  If you would like to see how I created this card check it out down below, just click on the Gerda Steiner Designs - Wheek, Wheek Wheek Christmas Card Tutorial🙂  Have a Fantastic warm & cozy day!  Hugs, Tina


Gerda Steiner Designs - Wheek Wheek Wheek Christmas Card

Gerda Steiner designs - Merry christmas


Hi everyone, I am Larissa from Car-d-elicious and today I am posting a new card on my own blog and also on the blog from Gerda Steiner designs.


Today I have made a christmas card with the digital stamp Snowman and birds from Gerda Steiner designs. I have coloured the image with my Polychromos pencils and the black glaze pen. Then I have fussy cut the image. With a white gelpen I have added dots on the hat and shawl of the snowman. I have diecut a square from white cardstock with the Crea-nest-lies XXL 34 from Crealies and coloured on it with Peacock feathers Distress ink. I glued the image with foamtape on the white square. On the bottom of the image I have stamped a sentiment from the set Tiny type from Clearly besotted stamps. With the Crea-nest-lies XXL 22 from Crealies I have diecut a larger square from green cardstock and glued the image on it. From pink cardstock I have diecut a scalloped square with the Crea-nest-lies XXL 54 from Crealies. On a pink card I have glued 2 squares from green cardstock and Winter wonderland patterned paper from Doodlebug. Then I added a strip of pink cardstock and then I glued the squares with the image with foamtape on the card.


*********************************************************************************
STAMP: Snowman and birds from Gerda Steiner designs, Tiny type from Clearly besotted stamps
COLORING MEDIUM: Polychromos pencils. Distress ink
PAPER: Pink, green and white cs, Winter wonderland from Doodlebug
INK: Versafine clair nocturne, Peacock feathers Distress ink
DIES: Crea-nest-lies XXL 22, 34 and 54 from Crealies
ACCESSORIES: Black glaze pen, white gelpen

I am a participant in the Gerda Steiner designs Affiliate Programme. This means that if you click on one of my links and subsequently make a purchase, I will receive a small commission of store credit, at no extra cost to you.

Tuesday, November 19, 2019

How old?

Hi there,

it's Tanja here and before I start showcasing some Christmas cards, I wanted to show you that you can use the Gerda Steiner Designs Ghosts set all year 'round:

  • stamp one of the ghosts from the Gerda Steiner Designs Ghosts set with Lawn Fawn River Rock and mask the image
  • create a background with Distress Oxide Ink (Black Soot, Evergreen Bough, Old Paper) and a Blending Brush
  • cut the panel in half
  • add some splatters to the lower part and stamp the sentiment from the same set on the upper part with Versafine Onyx Black
  • color the image with Faber-Castell Polychromos pencils
  • add a strip of turquoise glitter paper between the two parts and assemble the card


Thanks for stopping by.

Hugs,