Tuesday, November 30, 2021

Howly jowly.....!!

 Hey friends....

I've got some howly jowly inspiration for you today using the cute doggies from Gerda Steiner designs....

The other day I shared some tags using Carol kitten so I thought I better not leave the doggies out and used the Carol puppies!!


I created a simple base for this one by just adding a strip of designer cardstock behind the white base and then added the Christmas sentiment with black ink....

I then stamped, coloured and fussy cut two of the Carol puppies. These were coloured up using Parkoo shop alcohol markers and then added to the base with some foam tape for dimension!!

To complete the card I added a touch of red sequins....

I hope you enjoyed this sweet but simple card ready for the festive season!!
Happy crafting, hugs Ashlee 

No Peeking!

Hi there,

it's Tanja here and I created this sweet Christmas Tag using the Gerda Steiner Designs Peeking Friends stamp set:


  • cut out the Clearly Besotted Stamps Rounded Tag from smooth white cardstock
  • stamp the adorable little penguin from the Gerda Steiner Designs Peeking Friends set with Lawn Fawn Jet Black
  • color the image with Spectrum Noir Triblend Markers and add extra shading with Faber-Castell Polychromos pencils
  • add highlights with a white gel pen
  • ink up the edges with some left-over blue ink from a blending brush
  • stamp the sentiment from the same set with Versafine Clair Nocturne
  • dye a piece of torn seam binding with Distress Ink Peacock Feathers and thread it through the hole of the tag


Have you started creating your Christmas Projects, yet?

Hugs,


Sunday, November 28, 2021

Nutcracker Scene

Hi everyone! It’s Jeannie (InsideoutJeans) on the blog today with Gerda Steiner Design’s stamp set named, Nutcracker. It's the perfect stamp set for a scene card, with the help of a stencil and a couple dies.

I stamped out the images from the Nutcracker, using the little ballerinas and the ribbon, coloring them using copic markers. I also fussy cut them out. Of course, you can use the coordinating dies if you want. 

For my curtains, I used a piece of red cardstock as a base. I used the Center Stage die set for the stage and the side curtains. For the background and the top portion of the stage's curtain, I used the Curtain Call stencil and die set. It was really easy to add the details using some ink blending. 


I decided to go with a mini slimline size since it's so popular right now and it was the perfect size for the stage and the ballerinas. The only downside is that I wasn't able to add the Nutcracker into the scene without making the stage size look too small. I'll just use him for another card! 

For the sentiment, I used the one from the stamp set but I think it's a versatile set that you can use to swap out for any sentiment or occasion. 


Thanks for stopping by today and I hope you get inspired to create. Come back again soon for more inspiration and ideas! Happy Crafting! 


Joy to the world....!!

 Hello friends...

Being that it's coming up to the festive season I thought it was time to get some of my Christmas tags prepared so today's post features a set of co-ordinating tags using the Carol kitten set from Gerda Steiner designs!!


To create these tags I started with a red cardstock base that I stamped with a plaid background and then die cut using the bookmark die from Create a Smile stamps...

I then heat embossed some sentiments from Carol kitten set on black cardstock with WOW! Embossing opaque bright white powder then fussy cut them before adhering to the tags with foam tape!!

The kitten images were coloured using alcohol markers and then fussy cut...
One kitten for each tag along with some twine and the tags are ready for gifts!!


I hope you enjoy these tags and they get you inspired to make some too...
Happy crafting, hugs Ashlee


Friday, November 26, 2021

Namasleigh Postage Card


Hi friends!

It's Miki here, from @mp.cards and as promised last week, today I am back with a new project for my GSD Guest Design Role and this time I'm sharing with you a Christmas card using the Namasleigh stamp set

To find out how I made this card, please keep reading.

I started by focusing on the background - it was so easy! I took a stencil and inked it up with the Festive Berries Distress Oxide. I then cut it down to 3.75"x5" and adhered it to an A2 card base using foam tape.

Then, I moved on to the images. I first used three nesting postage dies to die cut them from white cardstock. For this card I used three images from the Namasleigh stamp set. I stamped the santa on the largest of the postage die cuts and colored him in. For added details I used a white gel pen for highlights. The smallest postage die cut I turned into a small scene. I first stamped the cute chick and created a mask for it and then I stamped the trees "behind" him. I colored them both, added some white highlights and a bit of shadow underneath the trees.

The sentiment went on the middle-size postage die cut and I chose to emboss that in black to make it stand out even more.

To finish the card I simply layered the three postage die cuts on my card using foam tape for added dimension and that was it. I think this card is super cute and funny and the sentiment is a perfect match!

I hope you like it and thanks so much for tuning in again!

Sending crafty hugs,
Miki


Thursday, November 25, 2021

You're my cup of tea by Noga Shefer


Hi crafty friends,
  Noga  
here and I am so happy to share with you another project for Gerda Steiner Designs today.


My box featuring the adorable "Positivi-Tea 4x6 Clear Stamp Set" stamp set and "Positivi-Tea Die Set". This set is so cute!!


I die cut a box using MFT box die out of Bristol smooth cardstock. 
I ink blended the background of the box using  picked raspderry distress oxide ink and splashed it with water.

Next I colored the sweet image using copic markers and glued it to front of the box.

Next I stamped a greeting from this stamp set using black ink and put tea bags inside the box.

 I hope you enjoy the card I created and feel inspired to create!

Thanks for stopping by,

Tuesday, November 23, 2021

Holiday friends - Thinking of you this christmas - Larissa


Hi everyone, I am Larissa from Car-d-elicious and today it is my turn again to post a card on the blog from Gerda Steiner designs. This time I have made a Christmas slimline card with the clear stamp set Holiday friends from Gerda Steiner designs. I have coloured the images with my Polychromos pencils and the black glaze pen. I have fussy cut the images, but the Holiday friends die set is also available to use if you prefer those. 

I have cut a rectangle from kraft cardstock with the Slimline marquee die (WSD347) from Whimsy stamps. I have glued it on black cardstock and then I glued them together on a kraft slimline card. In the left and right hole I have glued the images with foamtape. In the hole in the middle I have stamped a sentiment from the set Holiday friends van Gerda Steiner designs with Versamark ink and then I embossed it with white embossingpowder. I have die-cut a couple of stars from red and green cardstock with the Star confetti die from Alexandra Renke and I glued those around the images and the sentiment. 


*********************************************************************************
STAMP: Holiday friends from Gerda Steiner designs
COLORING MEDIUM: Polychromos pencils
PAPER: Kraft, black, red and green cs
INK: Versafine clair nocturne, Versamark ink
DIES: Slimline marquee die (WSD347) from Whimsy stamps, Star confetti die from Alexandra Renke
ACCESSORIES: Black glaze pen, White gelpen, White embossingpowder


I am a participant in the Gerda Steiner designs Affiliate Programme. This means that if you click on one of my links and subsequently make a purchase, I will receive a small commission of store credit, at no extra cost to you.

Sending you Love and Blessings

Hi there,

it's Tanja here and I created this Thanksgiving Card using the Gerda Steiner Designs Fall Mice stamp set:

  • stamp the cart and the pumpkins from the Gerda Steiner Designs Fall Mice set with Lawn Fawn Crunchy Leaf - use the masking technique
  • stamp one of the mice from the same set with that same brown ink
  • color the images with Spectrum Noir Triblend Markers and add extra shading with Faber-Castell Polychromos pencils
  • add highlights with a white gel pen
  • stamp the sentiment from the same set with Versafine Clair Pinecone
  • ink up the edges of the top part of the panel with some left-over blue ink from your Blending Brush
  • die cut a decorative edge and adhere the panel to a cardbase covered with burlap


Have a wonderful Thanksgiving.


Hugs,


Saturday, November 20, 2021

I like you beary much !


Hello everyone !

Lounon here ! Today, I share with you this cute monochromatic card I made as my second project as guest designer. I used the Lovely Pandas 4×6 Clear Stamp Set.

First, I used my Silhouette Portrait 3 to cut a heart into my Make it Colour white blending cardstock. I stamped my Panda with my LDRS Raven hybrid ink.

I wanted to do a monochromatic black and white scene so I used different shades of grey. For my Panda, I used cold greys (Illustrators : Black IG7 IG5 IG3 IG1). For the bench and the tree I used warmer greys (Copics : W9 W7 W5 W3 W1). For my bushes I used a blueish grey (Illustrators : BGR4 BGR3 BGR1). And finally, for my sky and my grass, I used the same blend as for the panda but I left out the black.


After that, I matted and layered the heart with a bigger black one.

For my card base, I used my dies from the Lisa Horton Dies Stitched Collection Scallop Layered Squares set. I die cut the scalloped square into black cardstock and the smaller one into white cardstock. I matted and layered them.

Then, I stamped my sentiment with my LDRS Raven hybrid ink.


Finally, I glued my heart with foam pads on my base card.

Et voilà !

May the craft be with you !

Friday, November 19, 2021

Namasleigh Christmas Tags


Hi friends! 

This is Miki from @mp.cards and I'm super excited to be joining Gerda Steiner Designs (GSD) as a Guest Designer this month! I have two funny projects to share with you by the end of the month. Today it's all about Christmas tags and I prepared two cute ones for you. 

Please keep reading to find out how I made them.

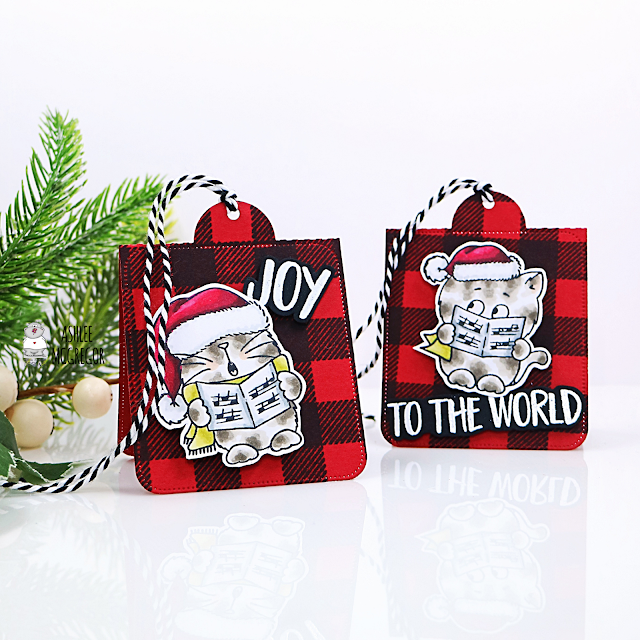
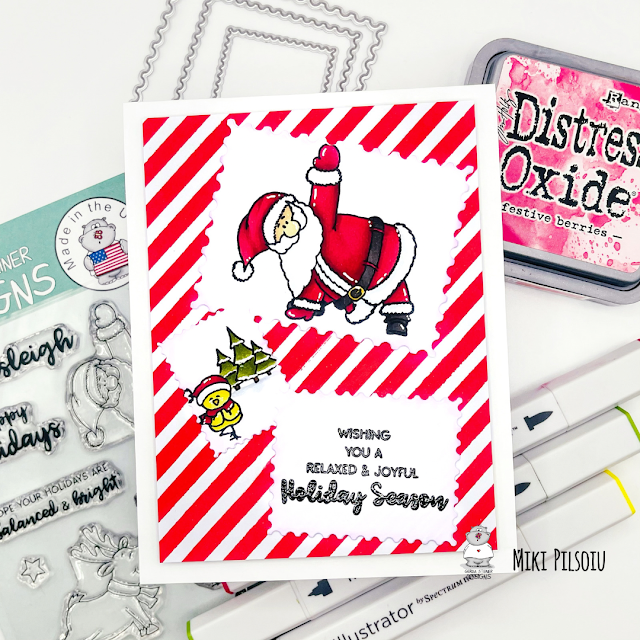
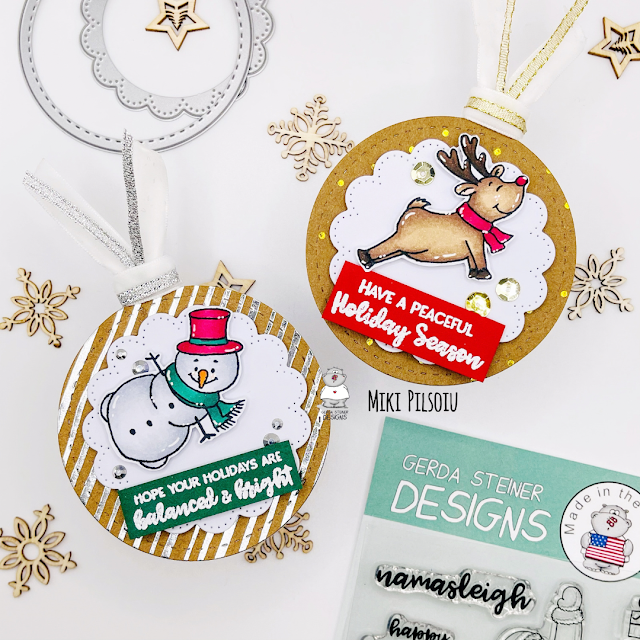
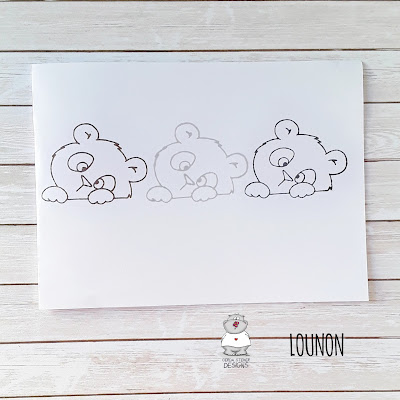
To start off, I stamped the GSD reindeer and snowman from the Namasleigh stamp set, fussy cut them and colored them in using my Spectrum Noir Illustrators. I then added some white highlights using a gel pen. How funny are these guys in their yoga poses?

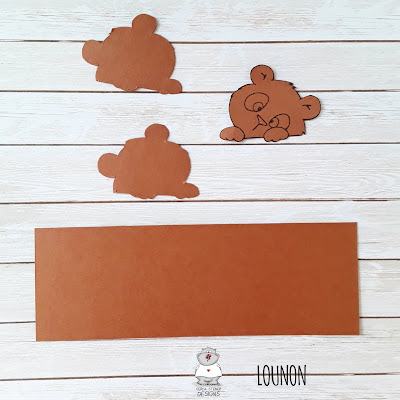
For the actual tags I wanted to use some pattern paper. Firstly, I took a tag die and cut it from white cardstock. I then picked a circle die that pretty much matched the size of the tag die. I used the circle die to cut my pattern paper - one with silver accents and one with gold accents. I then picked the next smaller lacey circle die and used it to cut some white cardstock. It was then time to assemble - I glued the pattern paper circles on the tags and added the white lacey circles on top using foam tape.

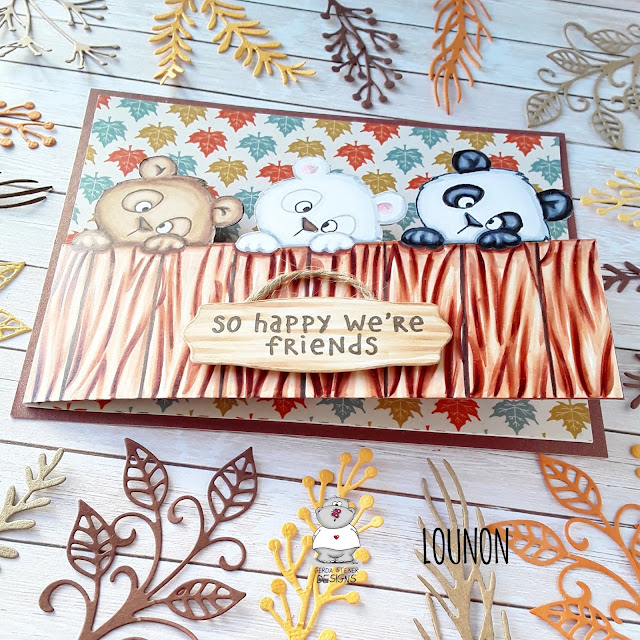
The next step was to focus on the sentiments. I picked two from the Namasleigh set and embossed them in white on red and green paper. I cut those to size and added them to the tags using foam tape. I did the same for the reindeer and the snowman.

I then spent a good few minutes digging through my huge box of ribbons to pick out the perfect ones. In the end, I decided to use white velvet ribbon for both tags and to add a second, thinner ribbon for added detail (and sparkle!). I picked silver for my silver tag and gold for my gold tag. To finish them off, I added some stunning gems.

I will have a reel on my Instagram tomorrow showing you the process so please make sure to check it out!

I hope you like these tags, I find them super funny! I will see you back here next week with another project!

Sending crafty hugs,
Miki


Wednesday, November 17, 2021

Holiday friends - Thinking of you this Christmas - Larissa


Hello, Today it is my turn again to post a card on the blog from Gerda Steiner designs. This time I have made a christmas card with the clear stamp set Holiday friends from Gerda Steiner designs. I have stamped the santa on a separate piece of paper and I have stamped the trees with the help of masking paper on the card. Then I have coloured all the images with my Polychromos pencils. 

I have fussy cut the Santa image, but there are dies available for the Holiday friends set if you prefer those. I have coloured the sky with Tumbled glass distress ink and glued Santa with foamtape on the card. I have made the snow on the card with a white gelpen. Then I have stamped a sentiment from the set Holiday friends from Gerda Steiner designs on the card.


*********************************************************************************
STAMP: Holiday friends from Gerda Steiner designs
COLORING MEDIUM: Polychromos pencils, Distress ink
PAPER: White cs
INK: Versafine clair nocturne, Tumbled glass Distress ink
ACCESSORIES: White gelpen, Masking paper

I am a participant in the Gerda Steiner designs Affiliate Programme. This means that if you click on one of my links and subsequently make a purchase, I will receive a small commission of store credit, at no extra cost to you.

Tuesday, November 16, 2021

Namasleigh Christmas Card with Circle Spinner and Shaker Center

Hello and welcome back, it's Karen here again.  My card today is a circle spinner style card with a central shaker. I’ve used the fun, new Namasleigh stamp set from Gerda Steiner Designs for this one. 


The outer ring on this 5 1/2” square card will spin around to add an interactive element and of course, the card can be shaken to move the shaker bits in the middle. There are no special dies required for this card other than a few circle dies in different sizes.  I’ve made a video for you to show you how I made this card, but I have to confess, I may have switched up some of the stamps and the Reindeer and a Tree stamp set from Gerda Steiner Designs may be involved! Here's a sneak peek at the actual card made in the video.


If you would like to see how I made this card, PLEASE CLICK HERE.
 
Thank you so much for stopping by and I do hope you're having a great day!


Happy Birthday Sunshine

Hi there,

it's Tanja here and I created this sunny Birthday Card using the Gerda Steiner Designs Hello Sunshine stamp set:

  • stamp the sun from the Gerda Steiner Designs Hello Sunshine set with Altenew Crisp Ink Honey Drizzle and the sun's face from the same set with Lawn Fawn Jet Black
  • color the image with Spectrum Noir Triblend Markers and add extra shading with Faber-Castell Polychromos pencils
  • stamp the sentiment from the same set and some birds from the Karten-Kunst Sonnengrüße set with Versafine Clair Nocturne
  • add a strip of glitter paper to the left and right of the panel and a strip of patterned paper to the left before adhering it to a cardbase


Have a wonderful day.

Hugs,


Sunday, November 14, 2021

Namasleigh

Hi everyone! Today, I’m sharing a card featuring Gerda Steiner Design's stamp set named, Namasleigh, which is super cute combining yoga and the holidays! Since all the images are in yoga poses, I thought it would be easiest to do a cute stack.


I stamped images from the Namasleigh stamp set using Memento Tuxedo ink. This actually can be done without any masking because I lined it up exactly so the lines would not overlap each other. However, I did end up cutting out masks from Eclipse masking paper because I wanted to add some ink blending right behind them. I wanted the card panel to have white space on the bottom so I masked off all the images and the bottom part of the card panel.


Then I colored them up using copic markers. For the background, I used Festive Berries distress ink, which works so well for holiday cards. I added the sentiment by stamping it on black cardstock and heat embossing it with white embossing powder. To add a bit of interest, I trimmed the card panel down by 3/8 of an inch so I could mat some red glitter cardstock, and then added some washi tape.  


I'm super happy with how this turned out and they are soooo cute and happy to be hanging out with each other. Thanks for stopping by! Happy Crafting! 


Saturday, November 13, 2021

So happy we're friends !


Hello everyone !

Lounon here and I am super excited to share with you my first card as Guest Designer. I used the adorable Lovely Pandas 4×6 Clear Stamp Set.


First, I folded in two a 4 1/4″ x 11 1/2″ (11 cm x 28 cm) marker friendly piece of white cardstock to make a 5 3/4″ x 4 1/4″ (11 cm x 14 cm) card base. I drew a line with my pencil at 2″ (5 cm) from the bottom. I used this line to place and stamp the cute panda three times. I stamped the one on the left with my LDRS Coffee Bean hybrid ink, the one in the middle with my LDRS Allow Hybrid ink and the one on the right with my LDRS Raven hybrid ink.


After that, I colored the wood fence and our three cuties with my Illustrators.


Then, I fussy cut the top part of the card.


I cut a rectangle into my Polkadoodles In love with Autumn pattern paper and I glued it inside the card. I matted and layered it with a bigger brown cardstock rectangle.

Then, in order to have a cleaner finish I stamped and fussy cut the pandas three times into brown cardstock and cut a rectangle in it . I glued them inside the flap.


Finally, I stamped my sentiment from the set into my white cardstock and I cut it with a LDRS frame die from the Elegant Stitched Frames Slimline Dies set. I colored it with my markers. I cut a piece of twine and I glued it behind. I put foams behind my sign and glued it on my card.


Et voilà !


May the craft be with you !