Wednesday, October 31, 2018

It's the most wonderful time of the year - Larissa


Goodmorning,  I am Larissa from Car-d-elicious and today I am posting a new card on the blog from Gerda Steiner designs. This time I made a card with the image Santa owl from Gerda Steiner designs. I have coloured the image with my Polychromos pencils and the black glaze pen. Since it is a christmas image, I had to add some glitter, so I coloured parts of the image with the Clear Spectrum noir sparkle pen. I have fussy cut the image.


On a white card I glued design paper from the A perfect winter paperpad from Echo Park and then I adhered the image on the card with foamtape. I have stamped a sentiment from the set Most wunderful from Uniko on the design paper.


*********************************************************************************
STAMP: Santa owl from Gerda Steiner designs, Most wunderful from Uniko
COLORING MEDIUM: Polychromos pencils
PAPER: White cs, A perfect winter paperpad from Echo Park
INK: Versafine onyx black
ACCESSORIES: Black glaze pen, Clear Spectrum noir sparkle pen

Tuesday, October 30, 2018

Glow-in-the-Dark Witch

Hi there,

it's Tanja here and this is my third creation using the new Gerda Steiner Designs Halloween Kids Digital Stamp Bundle and on this card I used all the accessories provided in the bundle:

  • color the scene using all the accessories from the Gerda Steiner Designs Halloween Kids Digital Stamp Bundle with watered-down Distress Inks (Fossilized Amber, Mustard Seed, Carved Pumpkin, Chipped Sapphire, Pine Needles), Derwent Inktense Pencils and a damp watercolor brush
  • add white highlights to the sentiment with a white gel pen

What makes this card extra special are the glow-in-the dark Nuvo Drops Banana Split that I added as stars - I hope you can see it in this last photo. It was kind of hard to take a picture in the dark :o)


Have a wonderful day.

Hugs,

Monday, October 29, 2018

You are going to "Fall in Love"!!


Hello & Happy Monday Crafty Friends!  Tina here from Cards and Coffee Time:)  Today I created a card with the "Fall in Love" stamp set and the Coordinating Dies.  The leaves are changing into beautiful colors and apples are perfect for picking and pie making!!  I love the cute couples in this set and not only is it great for Fall cards but would be adorable for those Valentines Day cards too!


I used my copic markers to color in my images and oxide inks for the background.  I created a bit of playfulness by adding a photo frame for the sweet couple!  You can watch how I created this card down below.  Wishing you a Lovely and Crafty Day! Hugs!


Video Tutorial Below:)


Sunday, October 28, 2018

Happy halloween - Larissa


Hello, I am Larissa from Car-d-elicious and today I am posting a card on my own blog, but also on the blog from Gerda Steiner designs. I have made a halloween card with the stampset Hippo in disguise from Gerda Steiner designs. This is a really versatile stampset, because you can turn the hippo into a dracula, like I did today, but you can also turn him into a superman, like I did here.


So this time I turned Hippo in disguise from Gerda Steiner designs into a dracula. I have coloured the hippo with my Polychromos pencils and the black glaze pen and then I have fissy cut the image. On a piece of red cardstock I glued a piece of deign paper from the Do what you love pretty paper bloc from Marianne design and then I glued it on a card. On a strip of red cardstock I stamped a sentiment from the set The wizard, the witch and the cauldron from Stamping Bella and then I embossed it with clear embossingpowder. I glued the strip with foamtape on the card and then I adhered the image also with foamtape on the card.


*********************************************************************************
STAMP: Hippo in disguise from Gerda Steiner designs, The wizard, the witch and the cauldron from Stamping Bella
COLORING MEDIUM: Polychromos pencils
PAPER: White and red cs, Do what you love pretty paper bloc from Marianne design
INK: Versafine onyx black
ACCESSORIES: Black glaze pen, clear embossingpowder

Saturday, October 27, 2018

Santa and a Kitten

Hello and happy Saturday!

Today I am here to share this card I made using the recently released Santa and a Kitten stamp.


This is such a sweet image and it's a good size so I knew I wanted it to be a simple card to allow the image to shine!

I stamped the image onto Neenah smooth white cardstock and coloured it using Copic markers. Once it was coloured, I cut it out using the Scan n Cut. I then set it aside to create the rest of the card.

I love the festive look of red and white candy stripes so I decided to use a background stamp that I have, to achieve this look. You can find this stamp here.

Using another background stamp, I stamped and heat embossed the 'snow' onto kraft cardstock and die cut a stitched rectangle to a size that would allow the candy striped border to show nicely. You can find this snowy background stamp here.


I adhered the candy stripe piece onto an A2 card base and then adhered the snowy kraft piece on top.

Next I stamped and heat embossed the sentiment onto some red card stock and die cut it using a pierced fishtail die set. This die set is no longer available but you can find a similar one here. I used the partial die cutting technique to achieve the fishtail at both ends.

The image and the sentiment strip were both adhered with foam tape to pop them up.

This was a fun stamp to play with, it's so cute! That's all for today, see you again soon.

Have a wonderful weekend!


Catherine x


Guest Designer | VIDEO | Coffeesaurus Mirror Stamping Water Reflection


The Save the Crafty YouTuber Video Hop is a celebration of cardmaking video tutorials created by a group of talented crafters of all different styles and levels. We are coming together to give our viewers a chance to discover other amazing cardmakers and help reach monetization goals! All you have to do is watch, like the video, consider subscribing, comment and click the link in the video description below to hop to the next video. Let yourself be inspired!

Don’t forget to comment because we have tons of prizes to give away. Please indicate if you are located in the USA or International so that prizes can be awarded appropriately as some prizes (not all) have restrictions on them. Be sure to check back every day this week since there are five themed days of video hops. You never know when you'll discover your next favourite YouTuber!


Here are a few photos of the card featured in my video. I used the fun and adorable Coffeesaurus stamp set by Gerda Steiner Designs.


I heat embossed the coffee-loving T-Rex and used the mirror stamping technique to create a reflection in the water. He's inviting a friend to join him for coffee but he's also enjoying coffee with his reflection. ;)


I used distress inks to watercolour the panel and added gold crystals to symbolize prehistoric rocks on the shore. 


GIVEAWAYS:

I'm giving away the Coffeesaurus stamp set to one lucky winner and Gerda Steiner Designs is giving away a $15 gift certificate to their store! There are over 100 giveaways and every comment counts as a chance to win.


Please visit Justine Hovey's blog for a full list of participants. Thanks so much for hopping along with us!

Supplies:

Friday, October 26, 2018

Have a Monster Halloween!

Hi everybody! Cathy here having a little fun with the Coffee Monster stamp set for Halloween. This is one of my favorite Gerda Steiner stamps and they looked like they wanted some candy to go with that coffee!


I stamped and masked the monsters with a light gray Copic friendly ink and did some no-line Copic coloring with colored pencil accents. 

The candy pieces and sentiment are from an MFT stamp set, but the candy pieces from the Gerda Steiner Where is the Candy? 4x6 stamp set would work perfectly with this too!


Since the card base is black, I added a white insert inside and couldn't resist adding a little surprise.


Is it just me, or do they look really happy for the candy?

Hope you enjoyed and see you soon!

Cathy


Thursday, October 25, 2018

Baby's 1st Christmas with Kaja

Hi there,
It's Kaja from Kajcyika crafts and today I have made a cute Chrismas card! :)

Take a look:
I used a brand new stamp set called Baby boy Christmas and I colored it in using alcohol markers. I decided to use the colors that I quite traditional form winter holidays - green and red.

Since the image is so cute and playful I kept the rest of the card simple. I stamped out the sentiment from the same set, that reads 'Baby's 1st Christmas' on the white card stock using black ink.

I put a stripe of patterned paper on the background and the only thing left to do was to glue everything togerther.

The only thing that I added was some green crystals and this card was all finished.

Thank you so much for joining me and hope to see you again soon!

Kaja

Wednesday, October 24, 2018

Halloween Kids


Hi Everyone, It's Melissa here.  For today's card I have used the Digital Image Bundle 'Halloween Kids'.

The image has been coloured using Copic Markers and fussy cut.  The sentiment has been printed from the computer, the border has been drawn using a Copic Multi Liner Pen.  Trim the top of the card and mount onto patterned paper.  Adhere the image using foam tape.

Have a great day!

Halloween treat bags - Larissa


Goodmorning, I am Larissa from Car-d-elicious and today I am posting a new project on the blog from Gerda Steiner designs. This time I made 3 halloween treats bags.I made the bags from white cardstock with the Thinlits treat bag 663096 from Sizzix and decorated them all.


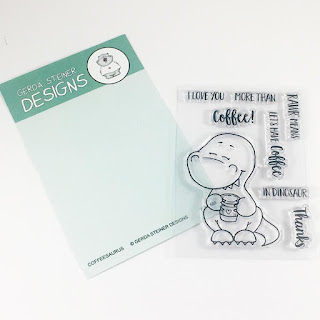
I used the same image on all the treat bags. I have used the sweet Peeking pumkin kitty from Gerda Steiner designs. The only difference that I decorated them all in a different way and I also coloured each cat with a different colouring medium.


For the first treat bag I coloured the Peeking pumkin kitty from Gerda Steiner designs with my Caran d'ache Museum aquarelle pencils. I stamped the image first met black ink and then I embossed it with clear embossingpowder. I have fussy cut the image.


On a piece of design paper from the Black and white dots paper pack from My favorite things I used the Distresser on the edges of the paper. Then I tied white ribbon around it and glued everything on the treat bag. I used foamtape to adhere the image on the treat bag. 


For the second bag I decided to colour the Peeking pumkin kitty from Gerda Steiner designs with the Zig clean colour real brush markers. I really love the bright colours! 


I have glued a strip design paper from the Black and white stripes paper pack from My favorite things on the treat bag. I have die-cut the orange cardstock with the upper edge from the Thinlits treat bag 663096 from Sizzix. I have die-cut the word BOO from orange cardstock with the Mini alpha number & dies from CC designs (retired) and glues those letters next to the image.


On the last bag I coloured the Peeking pumkin kitty from Gerda Steiner designs with the Altenew watcolour 36 pan set. I have glued design paper from the Designer sheet mega pack Tartan bright colours from Card deco on the bag. I stamped a sentiment from the set Too cute to spook from Reverse confetti on orange cardstock and then I have die-cut it with the Flag it die collection from Clearly besotted stamps. I glued the banner with foamtape on the bag.


I have put a little bag with halloween candy from Haribo in every treat bag.


*********************************************************************************
STAMP: Peeking pumkin kitty from Gerda Steiner designs, Too cute to spook from Reverse confetti
COLORING MEDIUM: Altenew watercolour 36 pan set, Museum aquarelle pencils, Zig clean colour real brush markers
PAPER: White and orange cs, Black and white dots paper pack and Black and white stripes paper pack from My favorite things, Designer sheet mega pack Tartan bright colours from Card deco
INK: Versafine onyx black
DIES: Thinlits treat bag 663096 from Sizzix, Flag it die collection from Clearly besotted stamps, Mini alpha number & dies from CC designs (retired)
ACCESSORIES: Clear embossingpowder, white ribbon, Distresser, white gelpen

Tuesday, October 23, 2018

Happy Halloween Kids

Hi there,

it's Tanja here and this is my second creation using the new Gerda Steiner Designs Halloween Kids Digital Stamp Bundle and on this card I used the little monster and the tiny tiger:

  • color the scene created using images from the Gerda Steiner Designs Halloween Kids Digital Stamp Bundle with Delta, Touch Twin Brush and Copic Markers to lay down a base coat of color and then add extra shading using Prismacolor Colored Pencils
  • mat the panel onto a piece of patterned paper from the Graphic 45 An eerie Tale 6x6 paper pad before adhering it to a cardbase
  • googly eyes will add a little something extra special to the project

Thanks for stopping by.

Hugs,


Beary Grateful

Hello, Margreet here.
This time I made a card with the digital stamp Beary Grateful from Gerda Steiner Designs.
I made it to be a card for my Rolodex.
I die cut my DP with an Essentials die from Studio Light.
I coloured the digi with copics and fussy cut all elements.
I cut the sentiment in 3 parts and used foam to adhere.
Wishing you a nice day and till next time.
xxx Margreet


Monday, October 22, 2018

Met on the web..!!

Hey everyone....

Ashlee here today to share with you a card that I made using the fun stamp set "bats
and the "co-ordinating dies".

I just love the sentiment "so glad we met on the web" I think its such a great one
to be able to use from this set at any time of the year and send a card to any of those friends
you have met through the wonderful world wibe web!! 


I created a distress inked panel on the card using oxide inks and regular distress ink...
Colours used are :
- Blueprint sketch
- Wilted violet 
- Ripe persimmon 
along with regular distress ink Black soot. 

I thought it would be fun to create a full spider web using the stamp and dies by stamping and cutting it out four times, then joining them all together!!

I made a video to show you the process of this whole card, 
I hope you will enjoy it and give it a go yourself! 


Happy crafting everyone, Ashlee.

YIPPEEH! Happy Fall!! Tutorial


Hello and Happy Monday to You!  Tina here with another fun project using the Happy Fall! Stamp Set and Coordinating Dies.  Okay....You just gotta love those those adorable super happy critters:)  Oh my goodness are they (and me) ever excited for Fall:)  Just makes me smile!!


I colored the images with my alcohol markers and did a bit of masking to stack those cute critters.  For more details on how I created this card you can watch the tutorial down below.  Have a Wonderful and Crafty Day!  Hugs


Step by Step Tutorial Below


Happy Crafting to You!

Sunday, October 21, 2018

Personalizing Foxes!

Hello, friends! It's Rebekah here with you today bringing you a card I made using the Foxes Stamp Set!


The little Fox that is sleeping a sweet smile on her face which made me think she must be having a good dream! It made me think what I dream about. Lately, I have been dreaming about my son. He is in the US Air Force and is currently hundreds of miles away. I have only seen him once in the last t months! I know there are other families who have gone a lot longer without seeing their loved ones but, non the less, is so difficult!


I colored the foxes with Copic markers. For the eyes on the sleeping fox, I added eyelashes with a Copic safe pen. I drew the 'dream bubble' myself. It is a simple shape which does not need to be perfect! Its easy!

The hat was also easy to make. I looked up an image of one online and drew it one dark blue cardstock and cut it out! I added the detail with a white gel pen.


I stamped the sentiment and added a little red heart! Simple card but it totally gets the message across to my son - I miss him and am so proud!