Tuesday, December 29, 2020

Hedgehog Thank You Card

Hello and thanks for stopping by. It’s Karen here today and I hope everyone had a very happy Christmas, however it was celebrated this year. I’m finding myself very much in need of some thank you cards at the moment, and luckily the Hedgehog with Gifts stamp set from Gerda Steiner Designs has come to my rescue. There are so many great sentiments in this set, and I just couldn’t decide which ones to use, so I used them all! *Big grin*


I started my card by making two rows of sentiments in my stamp positioner and then stamped with Versamark ink onto my card front that I had used an anti-static powder bag on. I started at the top of my card, and then just shifted my card front up in my stamp positioner to stamp the next two lines. Once the whole card front was stamped, I added white embossing powder and heat set it. Then I ink blended the background with Distress Oxide inks in Rustic Wilderness, Evergreen Bough, Twisted Citron, and a little Speckled Egg. From white cardstock, I die cut a semi-circle and a strip of cardstock for my sentiment. I ink blended these with Speckled Egg and a little Rustic Wilderness around the edges.  I again, stamped and white heat embossed the sentiment on the strip of cardstock. 

I chose two of the three hedgehogs in this adorable stamp set and one of the gifts. When I googled hedgehogs, they have slightly darker markings around their noses, so I tried to be brave and added in some darker lines.  I have to confess, I’m a little undecided whether I like it better or not, but I wanted to give it a try.  I’ve listed the copic markers I used down below if you’re interested. I cut around the paw on the hedgehog holding the gift and then mounted the hedgehogs and sentiment on foam tape. Finally, I centered the semi-circle on the card front and attached the sentiment and hedgehogs. This was a quick and simple card to make, but those hedgehogs just steal the show!

Copic Markers used:

Hedgehogs: BODY - C1, E40, R00, N0.  BACK - W7, W5, W2, N4, E53.  FACE - W1, W3, N2

Gift - Y08, Y38, YR27 and a gold DecoColor pen for the ribbon.

Free 2021 printable - Happy new year - Larissa


Hi everyone, I am Larissa from Car-d-elicious and today I am posting my last card for this year on the blog from Gerda Steiner designs and with this card I want to wish everyone a happy and healthy 2021!

On my card I have used the image Free 2021 printable from Gerda Steiner designs. This is a freebie image that you can download on the site from Gerda Steiner designs. This image is perfect to use on a card to wish someone a happy new year, but it is also perfect for planners and agendas, to make the start of the new year extra special. I have coloured the little mice with my Polychromos pencils and the black glaze pen and then I have fussy cut the images. The numbers are paperpieced with pink patterned paper from the Candy land paperpack (retired) from My favorite things and then I glued the little mice back on the numbers.


With the Crea-nest-lies XXL 22 from Crealies I have die-cut a square from watercolour paper and then I made a background on it with Salty ocean, Blueprint sketch and Chipped sapphire Distress ink. With white acrylic paint I have added little splatters on the background. Then I glued the background on a white square card. I have die-cut two snowhills from white cardstock with the Landscape trio creative cuts from Mama elephant and I glued those on the background. I have die-cut a couple of trees from green and brown cardstock with the Scandinavian prints christmas dies (retired) from Neat and tangled and I glued those on the card. Then I added the image with foamtape on the card. I have die-cut a couple of stars from white cardstock with the Star confetti die from Alexandra Renke and I glued those on the card. I have stamped a sentiment from the set Just saying (retired) from Clearly besotted stamps on the bottom of the card.


*********************************************************************************
STAMP: Free 2021 printable from Gerda Steiner designs, Just saying (retired) from Clearly besotted stamps
COLORING MEDIUM: Polychromos pencils, Distress inks
PAPER: White, brown and green cs, Candy land paperpack (retired) from My favorite things, Watercolour paper
INK: Salty ocean, Blueprint sketch and Chipped sapphire Distress ink, Versafine clair nocturne
DIES: Crea-nest-lies XXL 22 from Crealies, Landscape trio creative cuts from Mama elephant, Scandinavian prints christmas dies (retired) from Neat and tangled, Star confetti die from Alexandra Renke
ACCESSORIES: Black glaze pen, White acrylic paint

I am a participant in the Gerda Steiner designs Affiliate Programme. This means that if you click on one of my links and subsequently make a purchase, I will receive a small commission of store credit, at no extra cost to you.

Thursday, December 24, 2020

Merry Christmas by Noga Shefer


Hi crafty friends and Happy Holidays! 
Noga  here and I am so happy to share with you another project for Gerda Steiner Designs today.


To make this card I took an A2 panel of Bristol smooth cardstock.

The sky was created by blending tumbled glass  and worn lipstick distress oxide inks,
I splashed some water on it to make snow and glued a snow hills.


Next I colored the images using copic markers and glued them to my panel with foam tape for dimension.

Next I stamped a greeting from this stamp set using black ink.

For a final touch, I added some clear snowflakes sequins and pink bakers twine.

I hope you enjoy the card I created and feel inspired to create!

Thanks for stopping by,

Wednesday, December 23, 2020

Freebie 2021


Hello, Margreet here with Gerda Steiner's latest freebie.
You can find it HERE.
I think you can also use this cutie the whole year long for a baby card.
I made a Rolodex card.
After printing directly onto the card, I coloured with copics.
With a stamp with stars and Versamark I stamped randomly and then heatembossed with golden embossingpowder.
Afterwards I used  distress oxide Seedless Preserves for the borders.

Wishing you a Merry Christmas and a very Happy 2021.
xxx Margreet


I miss your face....!!

 Hello my friends...

Ashlee here today with a card featuring a cute little doggy from the "Puppy mail" stamp set....

I stamped him with Memento tuxedo black ink and then coloured in with Copic markers!!


To create this card I started with a blue piece of MFT cardstock and used a hot foil stamp with gold foil to do the foiled heart detailing on the background...

I then added a sentiment on a die cut banner that I could sit the little puppy dog above!! 

If you don't have this super cute stamp set "Puppy mail" in your stash yet I totally recommend it, its such a sweet set especially if you love sending happy mail cards...

While I'm here I wish you all a very Merry Christmas and a happy new year, I will see you back here in 2021!!

Happy crafting, hugs Ashlee. 

Tuesday, December 22, 2020

Christmas puppies - Missing you this howliday season! - Larissa


Hi everyone, I am Larissa from Car-d-elicious and today I am posting a last christmas project on the blog from Gerda Steiner designs. I have made a little box that holds a couple of tea lights. It is really the perfect present to give to someone that you can't see this christmas this year.


I have decorated the box with a cute little doggie from the clear stamp set Christmas puppies from Gerda Steiner designs. I have stamped the image with Versafine clair nocturne ink on Aquarelpapier smooth Wit 200g A6 from Vaessen creative and then I embossed the image with clear embossingpowder. I have coloured the image with Distress inks and then I have fussy cut the image. With the Silhouette cameo I have cut a little box from white and red cardstock that holds 3 tealights. The box is my own design. I have die-cut a sentiment from the set Christmas puppies from Gerda Steiner designs on the white cardstock and then I doodled with a black fineliner on the edges of the white cardstock. I glued the cute little doggie with foamtape on the box. I have die-cut 3 hearts from red cardstock with the Mini hearts set wafer dies from Simon says stamp and glued those on the box.


*********************************************************************************
STAMP: Christmas puppies from Gerda Steiner designs
COLORING MEDIUM: Distress inks
PAPER: Red and white cs, Aquarelpapier smooth Wit 200g A6 from Vaessen creative
INK: Versafine clair nocturne
DIES: Mini hearts set wafer dies from Simon says stamp
ACCESSORIES: Clear embossingpowder, Black fineliner, Silhouette cameo

I am a participant in the Gerda Steiner designs Affiliate Programme. This means that if you click on one of my links and subsequently make a purchase, I will receive a small commission of store credit, at no extra cost to you.


Monday, December 21, 2020

Last minute tags

 
Hi, Margreet here.

I have been working with the digi 3 Gifttags from Gerda Steiner
It is a freebie and so handy if you are in need of some quick tags.
You can find it 
HERE.


After printing, I cut them out and colored with copics.

A hole at the top. A string of baker's twine . Ready!
Thanks for stopping by!
Wishing you a Merry Christmas.
xxx Margreet


Sunday, December 20, 2020

Sending Hugs

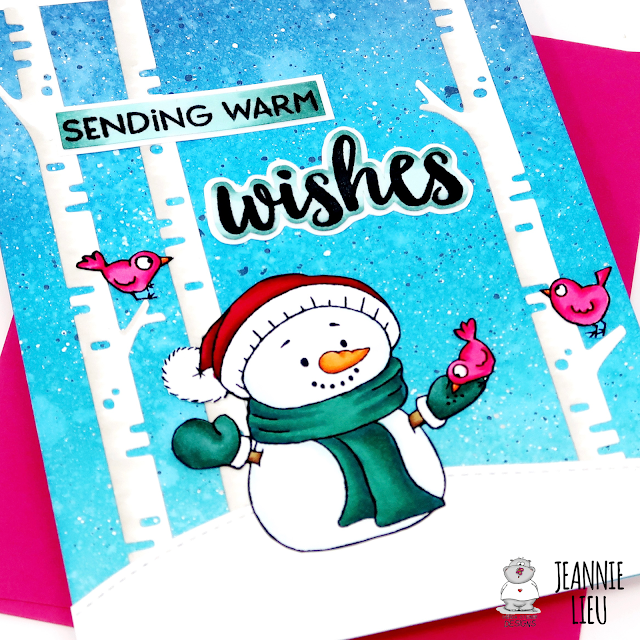
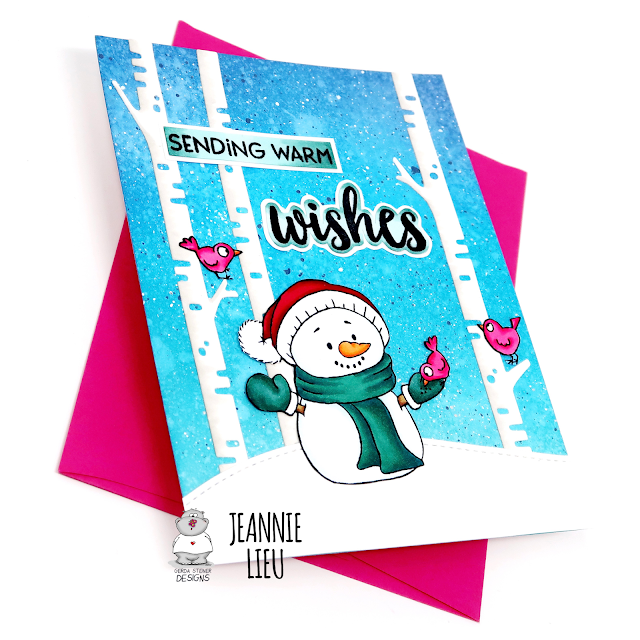
Hi everyone! It’s Jeannie (InsideoutJeans) on the blog today with Gerda Steiner Design’s stamp set named, Sending Hugs. The images in this set are super cute but I chose to focus on the snowman and birdies today.


I stamped, colored and fussy cut the snowman along with the little birdies. I've been enjoying using backgrounds I created hidden in my stash. This is another one of them where I don't really remember how I created it but it was the perfect backdrop for the snowman. 


I also used a few die cuts from my stash to set up the scene (snow back and birch trees). I really love how winter cards have primarily white images and so if you have a bright background or some colorful characters (like the birds), it really pops! 


Thanks for stopping by today and I hope you get inspired to create. Come back again soon for more inspiration and ideas! Happy Crafting! 


Tuesday, December 15, 2020

Fun with Penguins!

Hello and thanks for stopping by! It’s Karen here today and I’ve been having a little too much fun with this new stamp set from Gerda Steiner Designs called Happy Holiday Penguin.  I’ve made three cards with it, and because we’re so close to Christmas, I’ve decided to share them all with you today.  So I hope you have your coffee at hand, as this is a rather long post!


I created the front of this card by ink blending in Distress Oxide ink in Squeezed Lemonade, Dried Marigold, and Worn Lipstick.  I placed a sunray stencil over top (mine was MFT Stamps Radiating Rays), dabbed on some Versamark ink and then brushed on some PearlEx powder which gave it a lot of shine and more colour.  Next, I die cut some snowbanks and dry embossed them (my folder was from Lifestyle Crafts, called Tide).  I used a Nuvo shimmer pen over the raised edges of the embossing.  To get the individual penguin images, I masked off alternating penguins and filled in with a copic multiliner pen as needed. I only coloured in the top of the images as they would be hidden behind the snow. For the banner, I ink blended a scrap of cardstock in Dried Marigold and Worn Lipstick before white heat embossing the sentiment which is from the stamp set.  I added a few trees from Sunny Studios Woodland Borders die set that I had heat embossed with some Hero Arts Sparkle embossing powder.  On the inside, I stamped the “birthday” sentiment from the “Meerkats on the Lookout “ set from GSD before gluing my image above it.  This card would be so easy to adapt to whatever holiday was being celebrated by just changing the inside sentiment.


In my second card, I’ve also got the adorable little Tangled Penguin with the other penguins.  I somehow had the idea that these penguins were floating by each other on icebergs, wishing each other a merry Christmas.  Weird, I know!

This is a Double Z fold card so the inside image is hidden from the front of the card when it’s closed.  I’ve made a video previously on how to make this style of card, so if you want more detailed instructions, here is the link to the video.

I ink blended the background sky using the Cloud Edger stencil from A Colorful Life Designs, using Distress Oxide inks in Warm Honey, Worn Lipstick, Shaded Lilac, and Stormy Sky. I die cut a wave border from some blue cardstock I had in my stash and glued that to my card base.  I made the second wave border out of some Brusho crystals and Nuvo shimmer powders and then die cut another wave border.  I needed help with drawing the icebergs, so I pulled out my “Make a Splash” stamp set from Craft Consortium and copied the one there. After copic colouring all my images, I glued them to my card base, being careful to keep the inside iceberg and penguins hidden inside.  The sentiment on the front of the card is from MFT Stamps Bitty Holiday Wishes and I stamped it in Stormy Sky Distress Oxide ink.  Finally, I added some sparkle pen to the icebergs and glossy accents to the Christmas lights.


My final card is an 8 x 4” slimline pullout card and again has the Tangled Penguin with the other penguins, only he’s having a little more trouble now! I had intended to make a video for this card but just ran out of time, so I’m hoping the photos will be enough of an explanation.  

I used the Cloud Edger stencil and Stormy Sky Distress Oxide ink for the sky.  After die cutting the snowbanks, I used a snowflake stencil (mine is Snowflake Swirls from Echo Park) with Versamark ink, before heat embossing it with sparkle embossing powder. The trees are also embossed with the sparkle embossing powder and are again, from the Sunny Studios Woodland Borders die set. 

To create the pull tab, I stamped the “Holidays” sentiment next to the tangled Penguin and then drew some lights through the word in a very tangled pattern with a copic multiliner pen.  I also used the same stencil and embossing powder to add the snowflake swirls to the pull tab.  Next, I added two strips of scrap cardstock at the left hand edge to create a stopper.  Finally, I added the word “pull” on the right edge and corner rounded those edges.


I created a channel for the pull tab by applying foam tape along the bottom edge of the card, and above the upper edge of the stopper on the pull tab.  I also placed foam tape to the left of where the pull tab would stop (so it wouldn’t disappear into the card), and two small pieces of foam tape at the opening edge to prevent the tab from pulling all the way out.  


Next, I placed the tab inside the channel, removed the backing paper from the foam tape, and adhered the snowbanks over top to cover all the tape.  


I finished decorating the front of the card by adding the holiday penguins, the embossed trees and a little string of lights leading to the pull tab (this was my son’s idea and I loved it!).   

If you have managed to stay with me up to this point, huge kudos to you! I’m sorry for this being such a looooong post, but I wanted to share these ideas with you.  Thanks again for stopping by and I hope everyone has a wonderful Christmas!!


Christmas puppies - Have a howly-jolly christmas - Larissa


Hi everyone, I am Larissa from Car-d-elicious and today it is my turn again to post something on the blog from Gerda Steiner designs. This time I have made a christmas card with the clear stampset Christmas puppies from Gerda Steiner designs. I have stamped 2 images from the set on Aquarelpapier smooth Wit 200g A6 from Vaessen creative with Versafine clair nocturne ink and then I embossed the image with clear embossingpowder. Then I coloured the images with Distress inks and then I have fussy cut the images. 

On a pink card I have glued the patterned paper Winter wonderland (retired) from Doodlebug. With the Big labelzz & tagzz Smooth (CLBLT16-retired) from Crealies I have cut a label from pink and white cardstock and made a background on it with Tumbled glass distress ink. I have glued the images with foamtape on the tag. I have stamped a sentiment from the set Christmas puppies from Gerda Steiner designs on the tag above the images. I have die-cut a couple of little stars with the Star confetti die from Alexandra Renke from pink cardstock and glued those on the tag. 


  *********************************************************************************
STAMP: Christmas puppies from Gerda Steiner designs
COLORING MEDIUM: Distress inks
PAPER: Florence watercolour paper smooth from Vaessen creative, Pink and white cs, Winter wonderland (retired) from Doodlebug
INK: Versafine clair nocturne
DIES: Big labelzz & tagzz Smooth (CLBLT16-retired) from Crealies, Star confetti die from Alexandra Renke
ACCESSORIES: Clear embossingpowder, Glitter, Black cord

I am a participant in the Gerda Steiner designs Affiliate Programme. This means that if you click on one of my links and subsequently make a purchase, I will receive a small commission of store credit, at no extra cost to you.

Friday, December 11, 2020

Thankyou hedgehog....!!

 Hello my friends...

Ashlee here with you and today I have a card to share using one of the newest stamp sets at Gerda Steiner designs "Hedgehog with gifts"....

This one is a fairly simple card with pops of colour!!


I created a base with two stripes of cardstock in pink and green and then stamped on the sentiments using Memento tuxedo black ink....

I popped on the images from the hedgehog with gifts using some foam dots for dimension...
(Images coloured up using Spectrum noir tri-blend markers)

The card was then finished off just the way I like with a touch of sequins for some bling!!

I hope you enjoy todays card and I will be back next week with some more GSD inspiration for you...

Happy crafting, Hugs Ashlee.

Monday, December 7, 2020

Days Are Better When You're Around by Noga Shefer


Hi crafty friends,  Noga  here and I am so happy to share with you another project for Gerda Steiner Designs today.

My card featuring the brand new adorable  Sending Hugs 4x6 Clear Stamp Set  and Sending Hugs 4x6 Die Set.

To make this card I took a piece of bristol smooth cardstock and cut a slimline card.

The sky was created by blending speckled egg distress oxide ink,I spired some water onto it and soaked it up with paper towel.

I also splattered some white acrylic paint to make snow flakes.


Next I colored the sweet image using copic markers and glued it to my panel.

Next I stamped a greeting from the stamp set using black ink.


I hope you enjoy the card I created and feel inspired to create!

Thanks for stopping by,