Showing posts with label Copic airbrushing. Show all posts

Thursday, May 9, 2019

Video Tutorial: Peek-a-boo Panda

Howdy all!  So happy to see you here today!  I'm Allison, your hostess today.  I'm here with a quick tutorial using the adorable "Peeking Panda" and "Panda in Love" digital stamps.

Come and join me at my desk today...
https://youtu.be/J5vOc5CDzSM


Here's a close up of the front of my card today...

Here's the inside popping mechanism with so much love...

Thanks for stopping by today!  I'd love to hear what you think!

~ Ally ~

Thursday, April 25, 2019

Video: 3-D Critter Scene

Howdy all!  Happy Thursday!  It’s Allison Cope here today to share a very simple tutorial on how to make your little critters (or any other images) POP!

The key ingredient to this technique today is Olba glue. It’s a thick, clear glue with lots of body.  It allows you create a 3-D backer for your fussy cut images to pop up.

Today my card features the adorable “Monkey Hanging in There” and the “Bunny with Glasses” digital stamp sets.

So come and join me at my desk and we’ll go get creative with digital stamps and Copic Markers!

https://www.youtube.com/watch?v=_GCJWUSAU2E&feature=youtu.be

Here’s a look at our card once again…

And here is a close up of our bunny (photos don’t do this justice!)

And here is a closer look at the monkey as well…

Thanks for joining me today!  I hope you too get to try adding some more dimension to your card creations sometime soon.

~ Ally ~


stamps: GSD (Monkey Hanging in There, Bunny with Glasses)
patterned paper: Echo Park Paper Co. (Imagine That! 6x6)
cardstock: Recollections (65# White)
tools: Copic Air Brush System
inks: Copic Markers
3D glue: Olba Glue

Monday, February 11, 2019

{heart} u

Hi there! It's Cathy here sharing a super simple card today with this cute little pig from the More Than Chocolate stamp set. With Valentine's Day just a few days away, there's still time to make a quick and easy card or two!


To start, cut a panel for the card front from white cardstock and ink it up using your ink of choice. For this one, I used Distress Inks in Victorian Velvet, Tattered Rose and Spun Sugar.

Stamp the sentiment from this set at the bottom. I stamped mine in Versamark and heat embossed with a dark brown embossing powder.

Die-cut a heart from white cardstock and ink it using your choice of medium. For mine, I airbrushed it with Copics (R85, R83, R81). 

Die-cut the letter u from light pink cardstock or stamp the letter u and fussy cut around it. Consider using a Thicker if you have some of those.


Color this adorable piggy with Copics and fussy cut around him. After adhering him, add a few shadows underneath with neutral gray Copics.

Super easy! Hope you enjoyed and see you again soon!


Friday, February 1, 2019

Penguin Love

Happy Friday! It's Cathy here sharing a card today using one of my favorite Gerda Steiner stamp sets. These Valentine Penguins are so cute and they're perfect for sending someone a little love any time of the year!


I started by die-cutting a piece of XPress It cardstock and a piece of Neenah Solar white cardstock with a stitched rectangle die and then cutting the XPIt cardstock down to 3 1/4" wide. It looks like the card front is one solid piece, but they're layered together.  I found it much easier to do it this way rather than taping off straight lines and I prefer to color with Copics on XPIt.

I set the Neenah piece aside and began working on my little scene by stamping the penguins in MFT Cement Gray ink and masking them. I then taped off a horizon line and masked the rest of the piece below it.

I airbrushed the sky on this with Copics in YR12, YR61, YR65, R21, and a little B00.
I wanted the clouds to look like hearts, so I die-cut a bunch of  small hearts from eclipse tape and randomly adhered them before airbrushing around them with the YR61.


I colored up the penguins and the rest of the scene with Copics and before I adhered it to the Neenah cardstock, I heat embossed a sentiment from this set on the Neenah.

Hope you enjoyed and have a great weekend!


Thursday, January 17, 2019

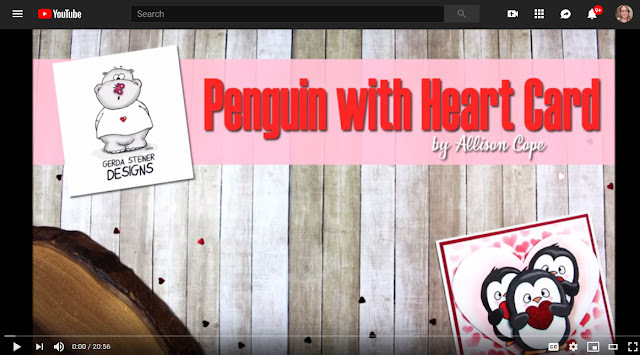
Video Tutorial: Penguin Action Wobbler

Hi everyone!  Happy Thursday!  Allison Cope here!


Today we’re going to be creating a fun wobbler card featuring the adorable “Penguin with Heart” digital stamp image. Since Valentine’s Day is 4 weeks away, I needed to get a jump on making some cute cards to send to my friends and family.  But of course, this image would be totally adorable on a birthday card or simply a “just because” type card too!

Grab a cup of your favorite beverage and join me at my crafty desk…

https://www.youtube.com/watch?v=Pe7B4sVlAwg&feature=youtu.be

Here’s another quick look at the card we created today.  Isn’t it super cute?

Thanks for stopping by and checking out another video!   I hope I’ve inspired you to print out a new digital stamp and get crafty!

For more digital stamps, check out the Gerda Steiner Designs shop right HERE.  New designs are being loaded daily!

Happy crafting everyone!

~ Ally ~

Thursday, January 3, 2019

Kitty Birthday Wishes

Hello again!  Allison Cope here again!  Happy New Year to you all!  I hope you had a wonderful evening celebrating the coming in of 2019 with family and friends!

Today I’m at my desk creating a simple birthday card featuring some digital stamps of kitties, cakes and presents.   This digi stamp is called "What's on the Table?"

Join me at my desk…

Here’s a quick look at the card we created today.  Isn't that kitty adorable?


A quick reminder that the Gerda Steiner Designs shop will be back open on Monday!  Happy shopping!

Thanks for joining me!  I hope you enjoyed my card making process and you'll give something similar a try soon!

~ Ally ~

Monday, September 10, 2018

Oh Manatee...Or Maybe Coffee?


Hi Everyone! It's Cathy here with a card using the 
 playful Oh Manatee stamp set. These guys have so much personality. 
Who doesn't love a big huggable manatee?!


I created a little habitat for him by die-cutting the background pieces and airbrushing a blue-green gradient with Copics. The Avery Elle waves die that I've used here is quite intricate, so it's easier to ink or airbrush the cardstock before die-cutting.

I've cut a few areas out of the waves background piece for open space to stamp the sentiments.


I colored all of the images from this stamp set with Copics and also used the coordinating dies to this set.

To bring the manatee up out of the scene just a bit and give him the appearance of floating along in the seaweed, I adhered him with dimensional foam tape.

Hope you enjoyed and happy crafting!
See you soon!

Cathy