Showing posts with label Cardmaking. Show all posts

Monday, September 11, 2023

Happy Summer!

Hi there friends and fellow crafters, LeeAnn here with my second project of my guest design spot. 
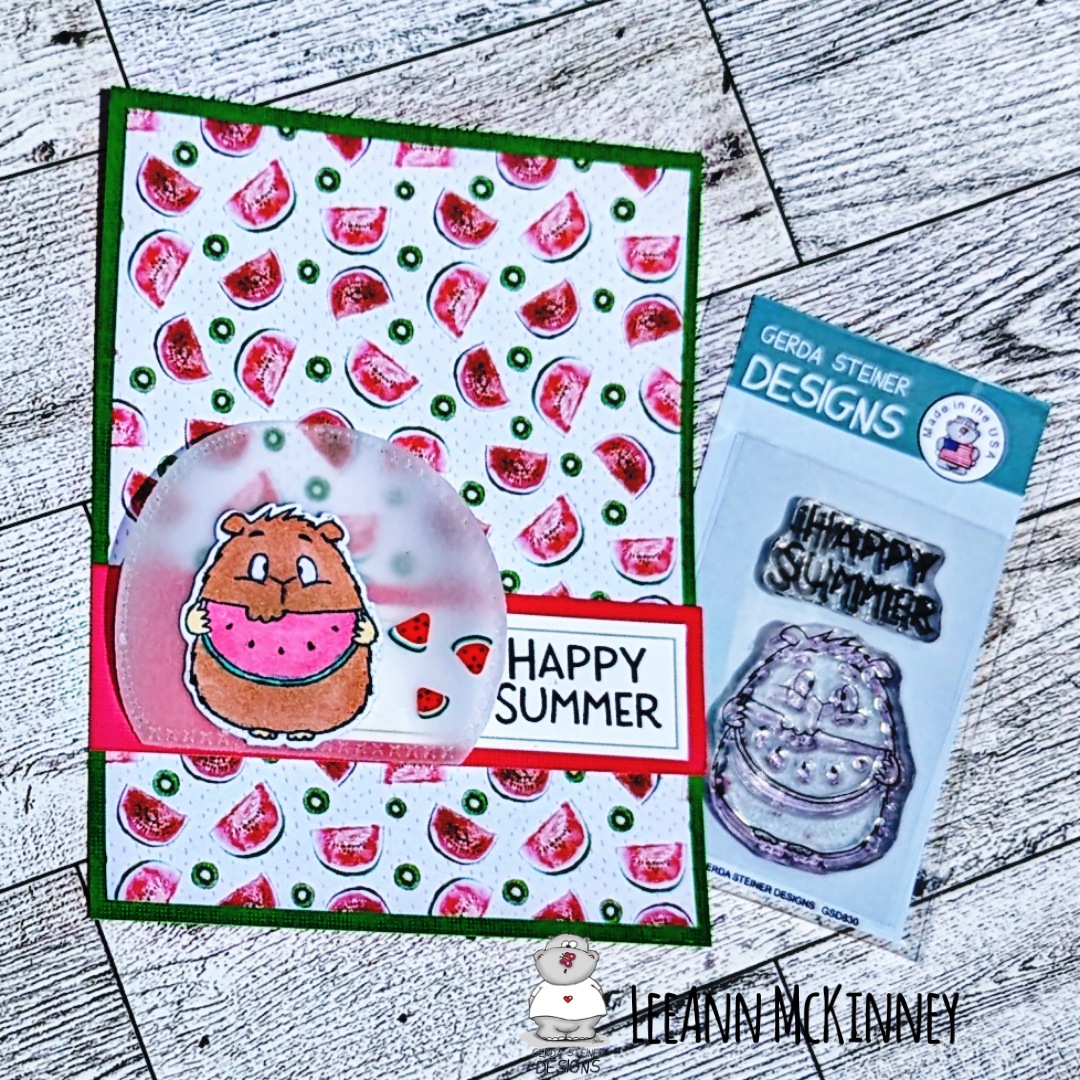

 I LOVE this little guinea pig as much as he loves his watermelon. Now, I'm wondering if I am part guinea pig as I have been eating a whole lot of watermelon this summer. 
I stamped this little guy with Memento Tuxedo Black and colored with Copics. The background pattern paper is from Craft Consortium called Tropical Paradise. 

I'll be back on September 18 with my next fun post. 

You can find me on all social media channels as Leeanngetscrafty.

Monday, August 28, 2023

Happy Fall Y'all


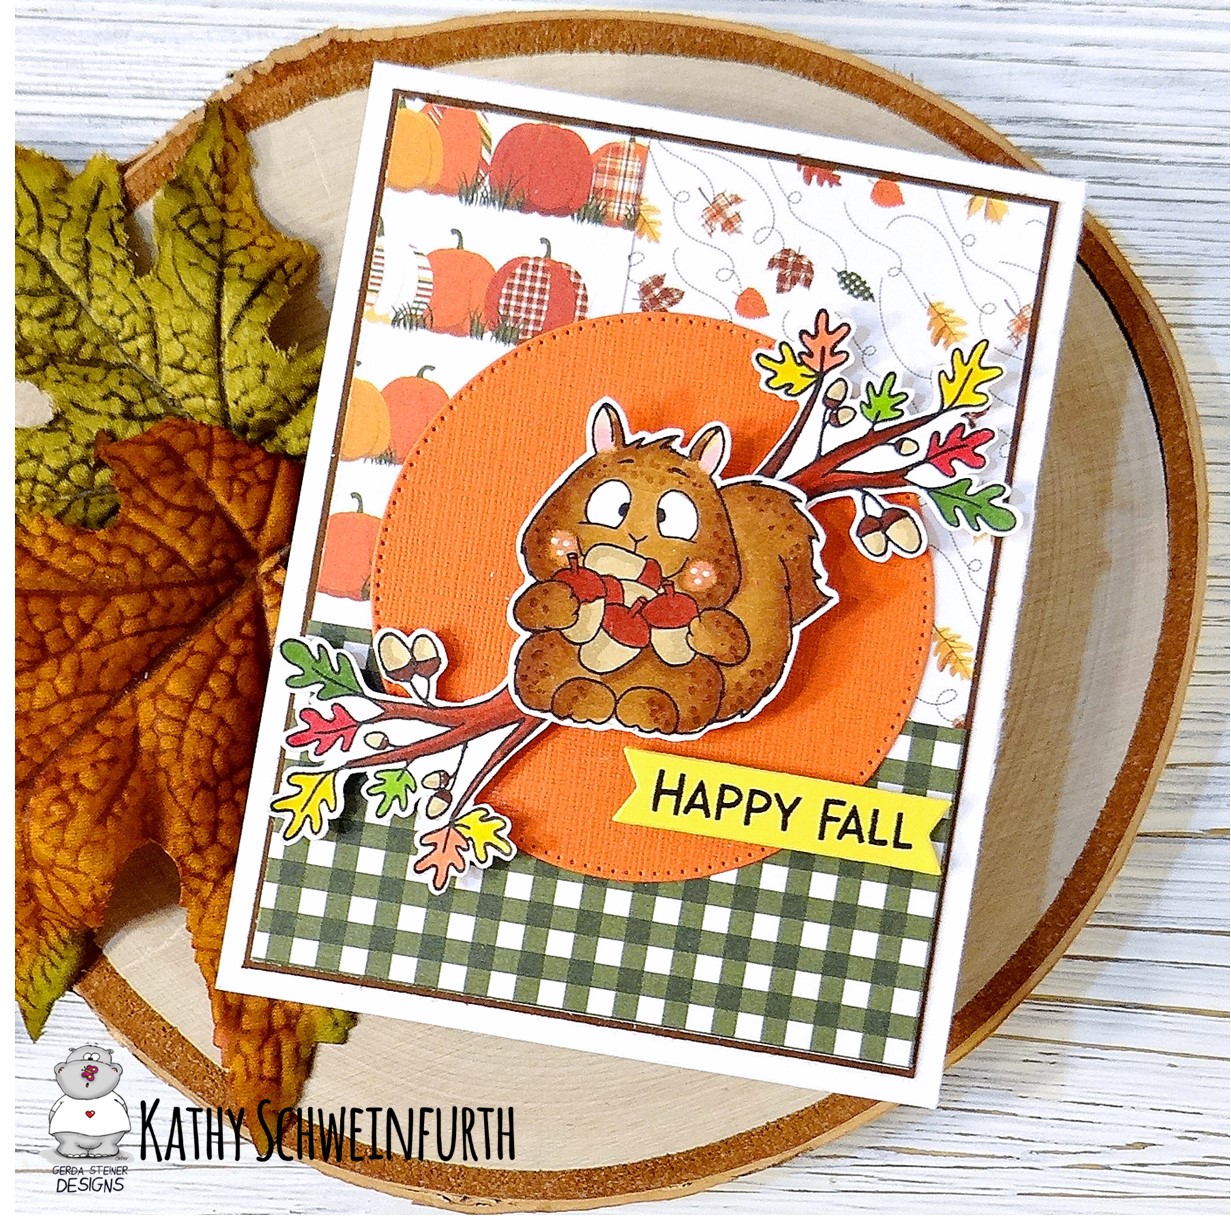
Hey, Crafty Friends - are you excited that Fall is right around the corner!  Kathy here sharing my last card as a Gerda Steiner Designs Guest Designer - it's been SO much fun and am so grateful to have had this opportunity to highlight some fabulous goodies from Gerda Steiner Designs!!


For my card, I first layered dark brown cardstock to the card base.  I then layered several different fall-themed pattern papers to the dark brown cardstock base.  Using a pierced circle die, I cut orange cardstock for a backdrop to the copic colored images.

This darling squirrel and branches/leaves images from the HAPPY FALL stamp set were Copic colored and fussy cut then popped up onto the card.  The sentiment, also from this set, was stamped onto yellow cardstock and cut with a mini banner die then popped up onto the card.


Here's to a blessed, happy Fall season to all!


Tuesday, August 22, 2023

I'm Nuts About You


Who's ready for fall?!  Kathy here sharing one of my first fall cards featuring the ADORABLE new, NUTS ABOUT YOU stamp set!

While summer is one of my favorite seasons, I'm looking forward to cooler weather and getting out my light sweaters.  Not to mention, I love fall colors!

For my card, I layered dark brown cardstock onto the card base.  I took strips of four different fall pattern papers and glued them together.  I then took orange cardstock, die cut a circle opening and then adhered the strips of pattern paper behind the opening before adhering the entire orange cardstock piece to the dark brown cardstock.

Is this little guy the cutest or what?!  Our little squirrel friend, acorns and sentiment are from the new NUTS ABOUT YOU stamp set.  The images were copic colored, fussy cut and popped up onto the card.  The sentiment was gold heat embossed onto a strip of  brown cardstock then placed in the center of the die cut circle opening; tucking in the ends.  To finish, I added yellow glitter enamel dots.


Thursday, August 17, 2023

Wonderful Water-Melon Muncher


Happy Summer!  Kathy here sharing a sweet summer card featuring the adorable MELON MUNCHER stamp set!

I hope you are enjoying these last days of summer not to mention some yummy summer fruit favorites like watermelon!


For my card, I first layered dark green cardstock to the card base.  I then added this pattern paper layer, putting glaze on the "watermelon pits" to make them shiny.  Using a pierced circle die, I cut dark green, black and lime green cardstock and layered them together for the backdrop for this super sweet MELON MUNCHER image which is copic colored and fussy cut.  The sentiment from this set is white heat embossed on a black cardstock mini tag and I added a lime bow.

Enjoy the remaining days of summer!

Saturday, August 12, 2023

Happy Summer Melon Muncher


Hey, Crafty Friends!  Kathy here and I'm super excited to share my first card as a Gerda Steiner Guest Designer!

One of the best parts of summer is the yummy fruit - especially watermelon!  This little cutie can't get enough of his juicy melon!


For my card, I layered lime green cardstock to the card base.  I embossed a piece of pink cardstock to layer on top of that.  I had a strip of watermelon pattern paper in my stash which worked perfectly for this set then created a framed background for this adorable MELON MUNCHER stamp set. I copic colored the image and then fussy cut it before popping it up on the framed background.  The 'happy summer' sentiment is included in the set.  To finish, I added several black shiny enamel dots.

Hope YOU are having a very HAPPY SUMMER!


Friday, December 31, 2021

Happy New Year by Noga Shefer


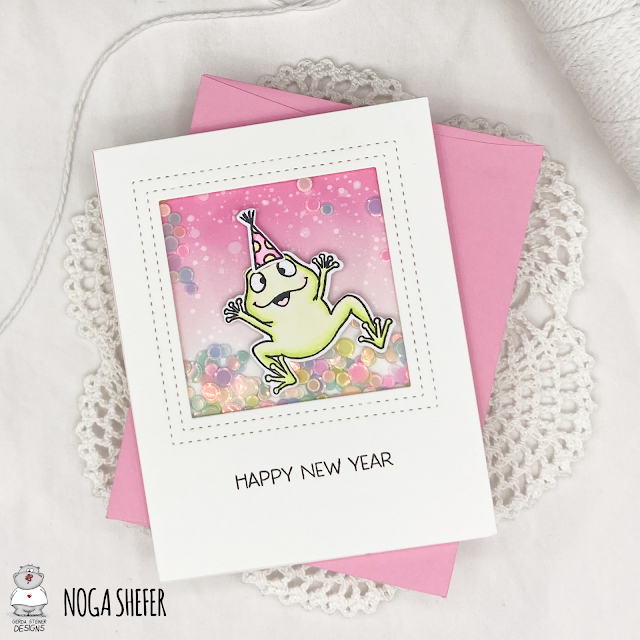
Hi crafty friends,  Noga  here and I am so happy to share with you another project for Gerda Steiner Designs today.

 My card featuring the adorable brand new  Frogs 4x6 Clear Stamp Set  and  Frogs - Froesche - Sapos 4x6 Die Set .
This set available also in German and Spanish version!! This is so amazing!!

To make this card I took an A2 panel of Bristol smooth cardstock. 
For the background, I die cut the double stitch window die out of white cardstock. 
Behind it, I ink blended a background using distress oxide in kitsch flamingo, splashed it with water and clear shimmer spray  and glued it behind the window cover panel with foam tape.

than I created a shaker  and filled it with sequins.

Next I colored the adorable image using copic markers and glued it to my panel.

To finish of  I stamped a greeting from Holiday Snail 3x4 Clear Stamp Set  using black ink.

I hope you enjoy the card I created and feel inspired to create!

Happy New Year to all of you!

Noga.

Thursday, November 25, 2021

You're my cup of tea by Noga Shefer


Hi crafty friends,
  Noga  
here and I am so happy to share with you another project for Gerda Steiner Designs today.


My box featuring the adorable "Positivi-Tea 4x6 Clear Stamp Set" stamp set and "Positivi-Tea Die Set". This set is so cute!!


I die cut a box using MFT box die out of Bristol smooth cardstock. 
I ink blended the background of the box using  picked raspderry distress oxide ink and splashed it with water.

Next I colored the sweet image using copic markers and glued it to front of the box.

Next I stamped a greeting from this stamp set using black ink and put tea bags inside the box.

 I hope you enjoy the card I created and feel inspired to create!

Thanks for stopping by,

Friday, November 12, 2021

Thanksgiving Card by Noga Shefer


Hi crafty friends,  Noga  here and I am so happy to share with you another project for Gerda Steiner Designs today.

Today this is a card for Thanksgiving.

My card featuring the  adorable Gourds 4x6 Clear Stamp Set and Gourds Die Set.
 
To make this card I took an A2 panel of plaid cardstock and panel of Bristol smooth cardstock.

I sponged dried marigold distress oxide ink on the Bristol smooth and  die cut a scalloped edge.

Next I colored the sweet images using copic markers: YR38, YR16, Y38, Y17, G43, G20.

I glued them to my panel with foam tape for dimension.

To finish off I stamped a greeting from Pumpkin Bear 3x4 Clear Stamp Set using black ink.

 I hope you enjoy the card I created and feel inspired to create!

Thanks for stopping by,
Noga

Friday, October 29, 2021

Halloween Card by Noga Shefer


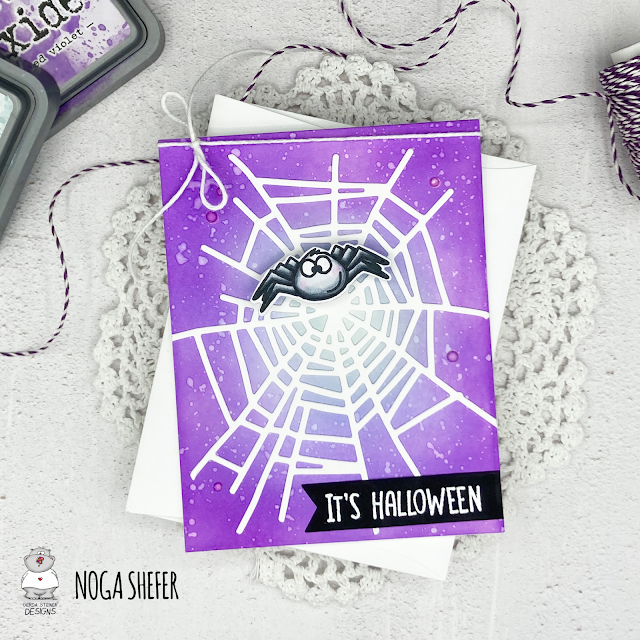
Hi crafty friends,  Noga here and I am so happy to share with you another project for GSD today.

My card featuring the adorable Bats 4x6 Clear Stamp Set and Bats 4x6 Die Set.

To make this card I took an A2 panel of Bristol smooth cardstock.

The background was created by blending shaded lilac,speckled egg  and wilted violet distress oxide inks.
I spired some water onto it and soaked it up with paper towel.

Next I glued a white spider web on the background.
Than I colored the sweet spider using copic markers and glued it to my panel using  mini action wobbler.

Next I stamped a greeting from Gourds 4x6 Clear Stamp Set using white powder and heat embossed it on black banner.

For a final touch, I added a white twine.


I hope you enjoy the card I created and feel inspired to create!

Thanks for stopping by,


Friday, October 22, 2021

You're A-maize-ing by Noga Shefer


Hi crafty friends,  Noga  
here and I am so happy to share with you another project for Gerda Steiner Designs today.

My card featuring the adorable  Yams & Corn 4x6 Clear Stamp Set and  Yams and Corn Die Set. This set is must have!!

To make this card I die cut a scallop frame die out of Bristol smooth cardstock. 
I ink blended the background  using  squeezed lemonade distress oxide ink  and splashed it with water.

Next I colored the sweet image using copic markers: Y15, Y13, Y11, G000, YG0000, G20 and G43.

I glued it to my panel with foam tape for dimension.
Next I stamped a greeting from this stamp set using black ink.

For a final touch, I added a yellow tiny heart.

I hope you enjoy the card I created and feel inspired to create!

Thanks for stopping by,