Showing posts with label Pool Piggies. Show all posts

Sunday, August 20, 2023

Enjoy The Little Things!

  Hi everyone!

Stacey with you today and I'm so excited to be back as a guest designer for
 Today I am sharing a card that I made using an adorable stamp set called
There are 8 super fun images in the Pool Piggies stamp set, along with 1 sentiment


All of the little piggies are adorable, but I was drawn to this one reading his book. I love to go to the beach and get lost in a good book so he definitely called to me lol!

I started my A2 card by adding 2 different patterned papers to the front. I added a strip of yellow to help divide the patterns a little. Next, I die cut a large tag from some blue patterned paper and created a little beach scene by adding a small amount of white cardstock to act as the sea foam along with some Kraft cardstock to act as the sand. I die cut a palm tree and added that to my tag as well. Next was the really fun part! I stamped that little Pool Piggie, and his beach towel, with some Memento Tuxedo black Ink and colored them in with my Copic markers. Once I had both images colored, I did a bit of fussy cutting and added them to my tag. I stamped a sentiment from the Hello Friend Tortoise stamp set with some Black Versafine Ink, trimmed it down and added it to my tag, tucking it under the palm just a bit. I added my tag to my card front and completed the look with some yellow twine, enamel shaped shells and some white Nuvo drops. 


 I think this turned out so cute!!

Copic Colors Used:
--Piggy: E50, R30, R32--
--Swim Trunks: YG01, YG03, YR02, YR04--
--Book: E40, E41, BG000, BG01. BG02--
--Sunglasses: YG03, C4, C6--
--Towel: Y11, Y13, Y15, Y18, YG03, BG02--

Thank you so much for stopping by today!
I appreciate it so much!
I hope you have a great crafty day!
~Stacey~

Find Stacey on Instagram: @staceyscreativecorner


Sunday, April 11, 2021

Is Summer Here Yet?

Hi everyone! It’s Jeannie (InsideoutJeans) on the blog today with Gerda Steiner Design’s stamp set named, Pool Piggies. Yes, I know it's a summery set but I'm just looking forward to the lazy days of summer.


I also was inspired by my friend Amanda, who created a fun ocean view and I wanted to pull out a technique that I've used before to create the ocean. She used copic markers but I'm using distress inks here because they are just cheaper to use. I inked up a card panel using various brown and blue distress inks. Since they are water reactive, I took a water brush pen and created wavy lines and it picked up the ink color, moving it around a bit. 


Then, I took a white pen from Pear Blossom Press' Essential Gel Pens and added white lines to the ocean to emphasize waves. To bring it up a notch, I also pulled out some white gouache and added them to the white lines. 


I just love how it looks and creates an almost realistic look to the beach! 


Thanks for stopping by today and I hope you get inspired to create. Come back again soon for more inspiration and ideas! Happy Crafting! 


Monday, May 11, 2020

Pool Piggies


Hi everyone! It’s Jeannie (InsideoutJeans) on the blog today with Gerda Steiner Design’s stamp set named, Pool Piggies. I know it's not quite summer yet, but I really just wanted to use this fun set. I cannot wait until we can go outside and really soak up the sun. 


I stamped out all the images from the Pool Piggies stamp set and colored them up using alcohol markers. I fussy cut them out so they would be ready for whatever card I wanted to create. 

Lately, I've been really into slimline cards and I used a slimline die to cut the card base and then also the windows. The three windows was PERFECT for this card because I had three little piggies to fill up the windows.


I used distress oxide inks to blend up a background and added some water splatter. I stamped the sentiment "Enjoy the Summer" at the very bottom. To add a little bit more to the card base, I just added black lines to give it a bit of interest. 

A very simple but fun card. Thanks for stopping by today and I hope you get inspired to create. Come back again soon for more inspiration and ideas! Happy Crafting! 


Thursday, August 24, 2017

Guest designer - Pool piggies by Larissa Walgemoed (Part 4)

Hello everyone, it is Larissa with a another post on the Gerda Steiner designs blog. Today is my last post with a card made with the Pool piggies. I really had fun making these 4 cards with the Pool piggies. Thanks so much Gerda and Macy for asking me as a guestdesigner!


My last card is a shakercard. A pool piggie has to be in a swimming pool on a pool ring. For this card I stamped a piggie and the poolring from the stampset Pool piggies from Gerda Steiner designs. I have coloured the images with my Polychromos pencils and then I fussy cut the images. I adhered them on top of each other with foamtape.


From white cardstock I cut a rectangle panel with a square hole in it with the Crea-nest-lies XXL 44 & 50 from Crealies. I adhered a piece of plastic sheet behind the window. On a piece of cardstock I made a background with the following colours of distress ink: Tumbled glass, Broken china, Salty ocean and Mermaid lagoon distress ink. Then I went over the background again with Mermaid lagoon distress ink and the Curved lines stencil from Create a smile. This way I got a pretty water background. I adhered foamtape on the white panel and filled my shaker with Sparkling clear sequins 3mm from Pretty pink posh and Blue sequins from Witte boekhandel (a Dutch store). I adhered the white panel on a red card. The sentiment is from the set Pool piggies from Gerda Steiner designs and I stamped it below the shakerpart. Then I adhered the piggy onto the swimming pool and my card is done. 


*********************************************************************************
STAMP: Pool piggies from Gerda Steiner designs
COLORING MEDIUM: Polychromos pencils, distress inks
PAPER: White and red cs
INK: Versafine onyx black, Tumbled glass, Broken china, Salty ocean and Mermaid lagoon distress ink. 
DIES: Crea-nest-lies XXL 44 & 50 from Crealies. 
ACCESSORIES: Curved lines stencil from Create a smile, Blue sequins from Witte boekhandel, Sparkling clear sequins 3mm from Pretty pink posh

Thursday, August 17, 2017

Guest designer - Pool piggies by Larissa Walgemoed (Part 3)

Hello everyone, it is Larissa with a another post on the Gerda Steiner designs blog. So happy to be back again today! Today I am showing you my thirth card that I made with the cute Pool piggies!


Today's card is my favorite from the set of cards that I made with the Pool piggies from Gerda Steiner designs. It was a lot of work, but I love the end result. I made a nice summer scene with the help of the pool piggies and a cut file from the Silhouette store. I really had fun making this card!
I started with stamping the female piggies and the beachball from the stamp set Pool piggies from Gerda Steiner designs and then I coloured all images with my Polychromos pencils, the black glaze pen and the Clear Spectrum noir sparkle pen and then I fussy cut the images. With a white gelpen I have drawn little dots on the bikini and the swimming suit. I have cut a large square from white cardstock with the Crea-nest-lies XXL 50 from Crealies. I made a background on it with distress inks. On the bottom of the sqaure I used Peeled paint and for the sky I used Tumbled glass and Broken china.


Then I used the silhouette and the cutting file Miss Kate bear in pool from Miss Kate cuttables to cut a swimming pool, a sun, 2 palm trees, a couple of clouds and water droplets for my scene. I have coloured all these parts with distress ink. For the swimming pool I used the colours Picked raspberry and festive berries. The sun is coloured with Mustard seed, Wild honey and Spiced marmelade. The water parts are coloured with Salty ocean ink. I have coloured the palm trees with Vintage photo, Ground espresso and Peeled paint. On the clouds I used a little bit of Tumbled glass ink. I adhered all these parts together with the piggies on the sqaure. Some pieces are adhered directly on the sqaure and for other parts I used foamtape and that way I have gotte a nice little summer scene. I adhered the sqaure with foamtape on a white card. I applied glossy accents on the sun and the sunglasses. Once I know who is going to get this card, I will stamp my sentiment on the inside of the card. Next week I will be posting card 4 from this collection.


*********************************************************************************
STAMP: Pool piggies from Gerda Steiner designs
SILHOUETTE CUTTING FILE: Miss Kate bear in pool from Miss Kate cuttables
COLORING MEDIUM: Polychromos pencils, Distress inks
PAPER: White cs
INK: Mustard seed, Wild honey, Spiced marmelade, Peeled paint, Salty ocean, Mermaid lagoon, Vintage photo, Ground espresso, Picked raspeberry, Festive berries, Tumbled glass, Broken china distress inks. 
DIES: Crea-nest-lies XXL 50 from Crealies
ACCESSORIES:Black glaze pen, Clear Spectrum noir sparkle pen, Glossy accents, white gelpen. 

Thursday, August 10, 2017

Guest designer - Pool piggies by Larissa Walgemoed (Part 2)

Hi everyone, it is Larissa with a another post on the Gerda Steiner designs blog. So happy to be back again today! Today I am showing you another card that I made with the cute Pool piggies!


My card from today is a pretty easy one, but because of all the colouring I had to do, it took a while to finish. On a piece of white cardstock I stamped a couple of sunbathing piggies from tehe stamp set Pool piggies from Gerda Steiner designs and then I masked the piggies and stamped the bath towels. I have coloured all images with my Polychromos pencils. I have used many bright happy colours to give the card a nice siummer feeling. I have die-cut the cardstock with the Crea-nest-lies XXL 52 from Crealies and then I adhered the rectangle with foamtape on a kraft card. On a piece of black cardstock I stamped the sentiment with Versamark ink and then I embossed it with white embossingpowder. I have cut the sentiment into a banner shape and then I added faux stitching with a white gelpen.


A little close-up detail....


*********************************************************************************
STAMP: Pool piggies from Gerda Steiner designs
COLORING MEDIUM: Polychromos pencils
PAPER: White and black cs, Kraft card
INK: Versamark ink, Versafine onyx black
DIES: Crea-nest-lies XXL 52 from Crealies
ACCESSORIES: White embossingpowder, white gelpen.Guest designer - Pool piggies by Larissa Walgemoed (Part 1)

Thursday, August 3, 2017

Guest designer - Pool piggies by Larissa Walgemoed (Part 1)


Hi everyone, it is Larissa with a new post on the Gerda Steiner designs blog. So happy to be here today! Today I am showing you a card that I made with the cute Pool piggies! Aren't these piggies very cute?


My card is a spinnercard. I stamped the air matress and the reading piggy from the set
Pool piggies from Gerda Steiner designs twice and then I coloured all 4 images with my Polychromos pencils. The air matress had almost the same shape on both sides, so I could stick the images together on both back sides of the image. I adhered some fishing thread between the both images. I have adhered a piggy on each side of the matress images. On a aheet of white cardstock I stamped a stripey background with the Pinstripe from My favorite things with real red ink from Stampin up. I die-cut a hole and a square from the striped paper with the Crea-nestlies XXL 33 & 34 from Crealies. I used the circle dies again to cut a circle frame from red cardstock and to cut a aperture in the front panel of a red card. I adhered the fishing thread above and below the aperture and then I adhered the striped paper and the circle frame then on the front of the card. Now you can spin the image and if you let the image go, it will spin really hard.


Now you can turn the image a couple of times and when you let the image ago, it will spin really hard.


Inside the card I adhered a square shape of watercolor paper. I made a wavy background on it with Derwent inktense blocks. I stamped a couple of fish from the stampset Lucky duck from Gerda Steiner designs and coloured those with my Polychromos pencils. I adhered them on the background, so it just looks like the piggy is floating in a sea. ;)


*********************************************************************************
STAMP: Pool piggies and Lucky duck from Gerda Steiner designs, Pinstripe from My favorite things
COLORING MEDIUM: Polychromos pencils, Derwent inktense blocks
PAPER: White and red cs, watercolour paper
INK: Versafine onyx black, Real red ink from Stampin up
DIES: Crea-nestlies XXL 33 & 34 from Crealies
ACCESSORIES: Black glaze pen, Fishing thread


Thursday, June 22, 2017

Guest Designer - Two Cards & Two Videos by Therese Calvird!

Hi there,
I'm Therese from www.lostinpaper.com  and I am so excited to share two cards and two videos today.  My first design features a sweet stamp set called Coffeesaurus and can you tell just how happy he is to be part of the 2017 Summer Coffee Lovers Blog Hop!   Head on over to find out how you can WIN!
I filmed as I created so you could watch the process.

I kept the design fun and simple and used a sentiment from Hedgehog with Sign so that I could use this as an all occasion card, who knows when you are going to need a coffee drinking dinosaur, right?


For my second design I wanted to make it look like this little Pool Piggie was in a swimming pool and I thought it would be fun to make an easy Circle Slider card.


The sentiment for this set came from the Go Wild stamp set


and I have a video here showing you how this came together.


Hope you have enjoyed both of my cards and videos today!  Have a great and crafty day, Hugs,

Wednesday, June 21, 2017

Guest Designer Pri - i love us

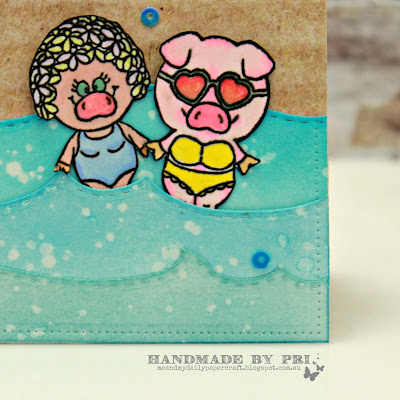
Hello...Pri here guest designing for Gerda Steiner Designs today...and I'm sharing yet another creation that I have made using the Pool Piggies stamp set...I guess I was on a roll when I was creating cards with this stamp set...loved every minute..!!

Me And My Daily Papercraft Blog - Handmade By Pri

The card base of my card is made from a blue textured cardstock card base... and I have used plain white cardstock cut to size for the top layer...I used the waves WRMK next level embossing folder to emboss this top layer and then sponged in some blue distress inks to give it a watery feel....I have used salty ocean,tumbles glass and blueprint sketch shades here..I have also splattered some water and white acrylic paint on this layer...

Using my alphabet dies and a heart die,I die cut the sentiment from glitter cardstock and layered it with white craft foam and adhered it at the top left of my card..

Me And My Daily Papercraft Blog - Handmade By Pri

On a separate piece of white cardstock,I stamped the piggies and two float mats and coloured them in and cut them out...I adhered one piggy on each of the mat and used some craft foam underneath before adhering them to the card...

To embellish my card,I have used clear sequins in various sizes on which I have adhered some tiny dark blue rhinestones as well...

Me And My Daily Papercraft Blog - Handmade By Pri

I'm so glad you stopped by the blog today...if you'd like to purchase the Pool Piggies stamp set and/or matching dies please head over to the Gerda Steiner Designs online store...you'll find many more stamps,dies and digi's there..

Cheers,
Pri

Saturday, June 17, 2017

Neon Piggies.

 Hi Everyone,

Its Hazel from Didos Designs here with some super cute Pool Piggies today. 

I felt that they needed a real summer feel so used lots of neon card for this square pop up box creation. (Especially since its done nothing but rain here in Scotland the last week!!!) 
Here are the piggies at different angles. 

You can get the dies for the piggies as well to save you the time for fussy cutting. They are here. 

I have coloured my piggies with promarkers and have used a variety of die cuts for the summer beach feel.

Thanks for dropping by today,

Hazel.

Thursday, June 15, 2017

Guest Designer Pri - Cards For Dad & Brother Using Pool Piggies Stamp Set

Hello..Pri here today and I am sharing two male cards today using the newly released and super cute Pool Piggies stamp set...the main image in both my cards is the same but I have used them in very different settings...

Me And My Daily Papercraft Blog - Handmade By Pri

My first card shows dad laying on a mat and reading a book...enjoying the summer and the sun and catching up on his reading probably...

I started with a plain white card base and cut the top layer to size using a Neenah speckled cardstock called stardust white...I then die cut a bright green cardstock using hillside border die as well as a couple of meadow borders using two different shades of green and adhered  then to the top layer...

Then using a cloud stencil and some blue ink,I sponged in lightly to create the cloudy sky...I stamped the sentiment using blue ink and then ran the whole top layer through my Cuttlebug using a large stitched rectangle die..

On a separate piece of cardstock,I stamped and coloured in the mat and daddy pig and cut them out before placing them on the card front...

To embellish my card I simply added a few silver star sequins...

Me And My Daily Papercraft Blog - Handmade By Pri

The second card I have made is for the best brother in the world...and I repeat stamped the life-ring/lifebuoy to create the background for it...

I chose a light blue card base for this card and a watercolour cardstock for the top layer...I used Versamark ink to stamp the images and heat embossed them using white embossing powder...

First I covered the larger sections with blue watercolour and then coloured in the life-rings using watercolour pens and a water brush...once the top layer was completely dry,I adhered it to the card front...

I stamped the sentiment on white cardstock using purple dye ink and die cut it and then adhered some craft foam behind it before placing it on the card...

Finally using some more craft foam I added the stamped and coloured in images of the life-ring and brother piggy...

Me And My Daily Papercraft Blog - Handmade By Pri

To buy this stamp set or choose from many other awesome stamps,dies and digi's you can go straight to the online shop - Gerda Steiner Designs Shop

Thanks for your visit today...Have a wonderful day ahead..!!

Pri

Saturday, June 10, 2017

Guest Designer Pri - Piggies On The Beach

Hello...Hope you're having a great day....Pri here as a guest designer today with two summer cards that I have made using the Pool Piggies stamp set...if you follow Gerda Steiner Designs on social media then you must have seen a lot of cute summery cards 'floating around' recently...(pun intended)..

Me And My Daily Papercraft Blog - Handmade By Pri
For me summers means time to head to the beach as much as possible so the cards I'm sharing today have a beach theme...and looking through my DSP stash,I found a paper I had never used before and was perfect for the background of this card...

I die cut three strips of watercolor cardstock using wave border dies and then sponged in three different shades of Distress inks on them...I have used salty ocean,tumbled glass and broken china shades here...I also splattered a bit of water on these strips for a bit of interest..

I layered and adhered these waves to the printed DSP and used a pierced rectangle die to create a neat top layer...I stamped the sentiment using Versamark ink and heat embossed it with white embossing powder...also I added a die cut sun and cloud to my card

Me And My Daily Papercraft Blog - Handmade By Pri

On a separate piece of cardstock,I stamped the two cute piggie friends and coloured then before cutting them out and placing them between the waves...finally,I adhered the top layer to a kraft cardstock card base and added a few tiny blue sequins to embellish my card...

Me And My Daily Papercraft Blog - Handmade By Pri

Now my second card is a simple and quick one...I used a top folded white card base for this one and a white top layer as well...I have lightly sponged in some Distress inks on this top layer to create the background..I have used tumbled glass and twisted citron shades..

I cut a strip of watercolour cardstock and added a couple of blue shades from my Gansai Tambi watercolors and while wet,I covered it with cling wrap and set it aside to dry...I learnt this technique from a recent post by Jennifer McGuire...once dry,I die cut this panel using a wave border die and adhered it to the top layer...I then used a stitched rectangle die to cut off the excess from the top layer...

Me And My Daily Papercraft Blog - Handmade By Pri

I die cut the word happy from a shimmery orange cardstock and stamped the word happy on a strip of the same paper and placed them on the card...I added the piggies on the card and added a few Nuvo drops to embellish my card..

Me And My Daily Papercraft Blog - Handmade By Pri

Thank you for stopping by today...you can go to the Gerda Steiner Designs online shop if you'd like to purchase this stamp set and/or matching dies...and many more...!!

Cheers,
Pri

Wednesday, June 7, 2017

Peek a Boo Piggies.

 Hi Everyone,

Its Hazel (Didos) here from Didos Designs here as a Guest Designer for Gerda and Macy again.  I have a slightly different card to share with you today.  I think the little piggies on it are playing peek a boo!!! 
 I have used the brilliant Pool Piggies 4 x 6 Stamp Set for this card. The Stamped Elements are all from the set. 
 You can also get the dies from the store so you dont have to fussy cut your piggies and their accessories. They are available HERE!
Peek a Boo, They look like Little Synchronized Swimmers.

I got the idea for the card from online. Its called a Magic Reveal Spinner card.  

My Piggies and their beach balls are all coloured with Promarker Alcohol Pens.

Thanks for dropping by today, I hope you enjoyed the card I have created.

Hazel. 


Tuesday, June 6, 2017

Meet me Poolside

Hi there,

it's Tanja here and as promised I have another creation using the Gerda Steiner Designs Pool Piggies for you:


  • color one of the sweet Gerda Steiner Designs Pool Piggies with ZIG Clean Color Real Brush Pens and a damp watercolor brush
  • add Distress Paint (Brushed Pewter) to her heart-shaped sunglasses
  • cut out a stitched panel from watercolor paper and create a background with Prima Marketing Color Bloom Spray (Summer Sky)
  • cut out another slightly larger stitched panel from patterned paper from the Doodlebug Design Fun in the Sun 6x6 paper pad
  • stamp the sentiment from the Market Street Stamps set Chillaxin' with Versafine (Majestic Blue)

I hope you got inspired.

Yours,


Friday, June 2, 2017

Pool Piggies Shaker Tag - Guest Design Paper Creations by Mindy

Welcome back! 

It's Mindy from Paper Creations by Mindy and I'm Guest Designing today with the new Pool Piggies set. It is super adorable!! Today I have a cute shaker tag AND a video to share! 

I decided to try using some foam instead of foam tape for my shaker window and I love how it worked out! Be sure to check out the video to see the full process.


Foam
Foam Squares
Xpress It Cardstock
Copics
Bathing Suit - YG09-06-03
Pig - BV00-RV04-02-00
Hooves - N6-5-4

Here's the video!