Sunday, March 13, 2022

Easter Kitten

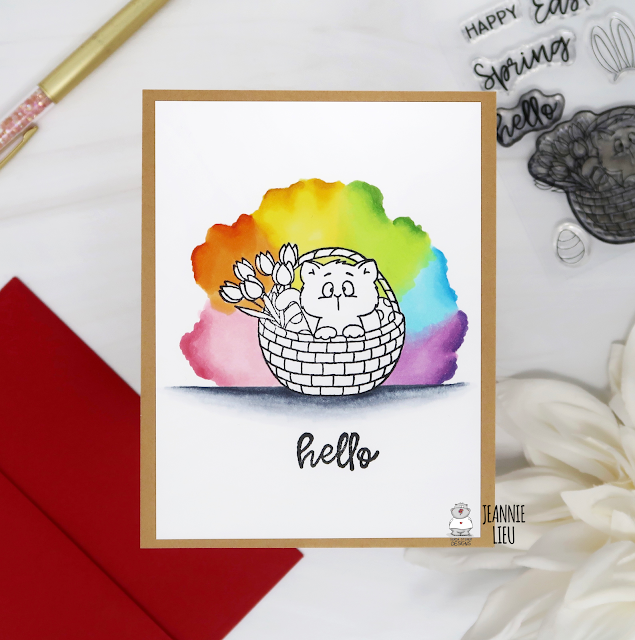
Hi everyone! It’s Jeannie (InsideoutJeans) on the blog today with Gerda Steiner Design’s stamp set named, Easter Kitten. This was a freebie at the beginning of the month with purchase, did you snag one up?  


I wanted to share an idea with you for a super simple but fun card, where you don't even need to color up the image. I stamped the Easter Kitten right in the middle of an A2 card. All the color comes from the background, which I used copic markers to add a rainbow paint splash right behind the image. 


I also wanted to ground the image, so I used a cool gray to blend out a ground right underneath the kitten's basket. To finish off the card, I stamped the "hello" sentiment under the basket. It's a very simple card but I love it. 

Thanks for stopping by today and I hope you get inspired to create. Come back again soon for more inspiration and ideas! Happy Crafting! 


Friday, March 11, 2022

Bug me anytime by Noga Shefer

Hi crafty friends,  Noga  here and I am so happy to share with you another project for Gerda Steiner Designs today.


My card featuring the adorable  Ladybugs - 4x6 Clear Stamp and Ladybugs - Dies.
This set is must have!!

To make this card I die cut an oval window die out of white cardstock. 
I ink blended the background on Bristol smooth cardstock using kitsch flamingo distress oxide ink  and splashed it with water and glued it under the white window cover.

Next I colored the sweet images using copic markers and  glued it to my panel with foam tape for dimension.
Next I stamped a greeting from this stamp set using black ink.

For a final touch, I added pink sequins.

I hope you enjoy the card I created and feel inspired to create!

Thanks for stopping by,


Wednesday, March 9, 2022

You’ve Got Happy Mail!

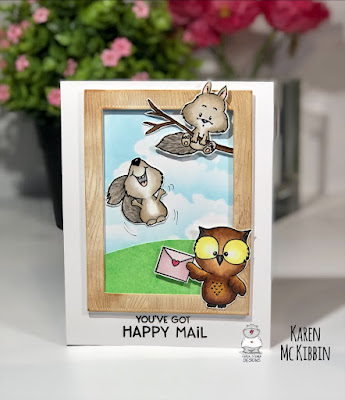
Hello and welcome back, it’s Karen here today.  I've got a card today that features the Owl My Love and Happy Fall stamp sets from Gerda Steiner Designs, because who doesn't love happy mail?!  Here's a picture of my card.


I used Copic markers to colour in all the images and then fussy cut them out.  I die cut 4 of the wooden frames from a Hero Arts die called Wood Frame.  I used some Distress Ink in Vintage Photo to ink blend on the top frame, and then glued the layers together.

From the inside section of one of the frames, I inked up a grassy green colour, spritzed it with water and blotted up some of the ink with a paper towel.  Once it was dry, I freestyle cut a grassy hill.  

On the card front, I stamped and clear heat embossed the sentiment (which is from the Owl My Love set) below where the frame would sit. Next, I masked off the area outside where the frame would go, and used a cloud stencil (Cloud Edger  from Colorful Life Designs) to create the sky.  I then glued the frame around the inked area.  And finally, I adhered the images with glue and foam tape as needed.  I love that squirrel that is jumping for joy!

Thank you so much for stopping by and I hope you’re having a great day.