Showing posts with label How Are Ewe. Show all posts

Monday, May 2, 2016

Stamped Critter Background

Hey everyone! It's Wiebke here! I'm a little late today, but excited as always to show you my card for this monday! :)


What about creating your own patterned background? It is so easy and fun to create! I stamped all of these cute critters and elements on a piece of watercolor paper (Versafine works very well with water). Then I looked for a few beautiful Distress Inks to color my elements. When you put several layers of water on each other, you'll get that messy watercolor look. I also splashed some waterdroplets on it plus some white ink splashes. A few lighter dots add more interest to your card! :)
Oh and I like to use black sentiments - specially on a colorful background! (there might be a comma  missing between "birthday" and "awesome"... )


The stamp sets, which I used: Just SentimentsHappy HoppyLucky DuckHow are Ewe

I hope you like it! Have a great day!


Monday, April 4, 2016

Critter Birthday Party - Coloring on Craft Paper

Hey everyone! It's Wiebke here! And I want to share a card with you using several cute Gerda Steiner Designs Critters and a piece of craft paper :)

First of all, I created several masks for the critters and gifts standing in the front row. That way, you can stamp the others perfectly behind. After that, I colored them out with Polychromo pencils and went over the surface with baby oil. You'll get a darker, but well blended effect.


These are the stamp sets, which I used:

Happy Hoppy | Howl Are You | Lucky Duck | Monster Party How are Ewe | Happy Fall


Have a great day!


Monday, August 24, 2015

Guest Designer Laura Sterckx

Hello everyone! I am Laura Sterckx from www.makingcardsisfun.com and I'm happy to be a guest designer this month. In today's post I am using the How are Awe set.


If you're a lover of quick and easy cards, then you're going to love this! For this card I started out with a piece of patterned paper from the Up in the Clouds collection from Pinkfresh Studio. I got the kit a couple of months ago and didn't realize that all the papers and stickers are sold out almost everywhere. I'm sorry about that! However, if you're looking for something similar check out the papers from their Happy Things collection. I love stitched edges so I used the largest die cut from the Large Stitched Rectangles set from Lawn Fawn to die cut the patterned paper.


Isn't that sheep adorable? I colored him with Copic markers. For this fur I used an N0 marker along with a colorless blender. Then for his face I used E0000E51 and a bit of R11 for a blush on his cheeks. Finally I used N4 and N6 for the hooves. I wanted the sheep to stand out a bit more so I adhered him onto a die cut tag from Pretty Pink Posh. As you can see there's a slight blue shadow on the edges of the tag. I simply used a BG11 Copic marker for that along with the colorless blender.

Some people call me the queen of sequins. I love that and I am truly honored! :) So of course I embellished my card with some sequins from The Ton and Pretty Pink Posh. Stickers aren't just for kids so I used a sticker sheet from Pinkfresh Studio to add a sentiment and rainbow to the card.

That's it! :) Thanks so much for stopping by! 

Wednesday, August 5, 2015

Hello there!

Hello friends, its Chitra here with a card for you using the new clear stamp set called Happy Fall. I am seriously in love with the super cute squirrels in this set, they all are sooooo adorable... Love it!!! Super excited to share my card with you all!!!


For my card I took a stitched rectangle panel from a white cardstock and stamped all the itty bitty images in the set using memento rich cocoa ink and colored them using Prisma colored pencils. Then I took Crafters Companion ultra smooth white cardstock and stamped the squirrel first using memento black ink and masked it to stamp the wood block for the squirrel to stand on. I colored the wood block using Prisma and rest of the scene using Copics. The butterflies are from How are Ewe Stamp set and the sentiment is from Heavy Friends stamp set. I used a circle die to die-cut it out and then popped it using foam adhesive and flesh adhered the main panel on Recollections 110lb white cardstock.
Here is a close up..


That's all from me today, I hope you liked my card. Can't wait to share more cards using this sweet set with you all...
Thanks for stopping by and have an amazing day!!!

Hugs,
Chitra

Monday, August 3, 2015

Video: Have A Splash

Hi crafters! Today I'm back with a bright and cheerful card featuring some clear stamps. My main point of interest here is the colorful background that helps to set off the stamped images.


As you can see, this is easily accomplished by blending some the distress inks. If you don't have distress inks, you can try your regular dye inks; maybe even pigment inks. After all, Laura Bassen makes them work all the time. Distress inks will blend the easiest, though, because that's what they are made for. And if you remember your color theory from school, you can even control which colors you can create by blending them together. For example, the pink and yellow resultant orange and the yellow and teal resulted in green.


And of course I had to add a few sequins by Pretty Pink Posh for additional sparkle. The rest of the card is very clean and that ensures that my critters and the background are the stars of the show.

Thanks for stopping by! I hope you have a great day!

Wednesday, July 29, 2015

Great Times Pass Fast!

"MUMMY!! IT'S OVER~~~" Have you heard of this phrase? If you have, YES... it's been One great fulfilling year on Gerda Steiner Design Team and the owner has given me countless opportunities to share my creations and it's also a privilege to work with the rest of the members on this team! Made many new friends, know many new people in this industry and pushed my limits! My Design Team time is up now. Before i go, let me share one last card on this blog with you!

 photo _MG_9011.jpg


I am still very crazy over "How Are Ewe" clear stamp set. For this card, i stamped the sheep, ducks, party hat and butterfly from the stamp set. Coloured them with copies and used a circle die cut to cut a circle frame. Used my ink dauber with Squeezed Lemonade and Dried Marigold distress ink to sponge the top. This is an easier way than blending in circles because i am too lazy to find a waste paper to lay on my table before inking.

I used my Hero Arts Woodgrain rubber stamp and versamark to stamp on Black cardstock. Next, i dust Clear Perfect Pearls onto the black cardstock. I used clear water to spritz from a far a few times to make the perfect pearls stick onto the versa mark impression. This way, the perfect pearl shimmer will not go anywhere! "Birthday" sentiment is a die cut by Avery Elle and i filled in the word "Happy" using my white Signo Gel Pen.


 photo _MG_9012.jpg

Here's a closer look! Look at the shimmer on the woodgrain! And how the sheep can look so cute in dark pink!

I hope to see you somewhere else soon and do follow me on instagram or Facebook to see other creations i make using GSD stamps in future!

Friday, July 24, 2015

Thank Ewe Card Using the How Are Ewe Stamp Set


Aloha Guys!
This is Joyce from enjoyscrappin2.com and today I'm excited to share this card I made using the How Are Ewe stamp set.  Gerda always comes up with super adorable images that can be used for many different occasions!  I made a simple background for my sheep today and I used copic markers to color in my sheep.  I hope you enjoyed this card and thank you so much for stopping by.


Thursday, July 23, 2015

Using Felt to Add Texture to the Sheep from How Are Ewe


Hello crafty friends! It's Jess from JessCrafts.com. Today I am sharing a card using the awesome How Are Ewe stamp set. I wanted to give this sheep some texture so I stamped him on some felt. For more on how I made the felt work check out the video below.


I just adore Gerda's critters and love seeing how people add texture and dimension to them. Since I'm always up for a new idea: What is your favorite way to give critters texture and make them look more realistic?


Thanks for stopping by and sharing your thoughts!

Monday, July 20, 2015

Daydreaming with Inktense Pencils

Hi, my crafty friends! Today I'm featuring the new Gerda Steiner Designs clear stamp set "How Are EWE?".  The following video shows you how I color with Inktense pencils:


As you can see, and I'm saying this as somebody who has not a lot of experience with Inktense pencils but is still experimenting, the trick is to work in layers. And also to only use very little of the pencil. As the name implies, the colors are very intense and can go a long way. If you want to make sure that you have room for your highlights, only apply a little color, and then build up from there.


I also hand drew the border and intentionally made it a little bit quirky because I find that can be more interesting than straight ruler lines. And of course I had to add some sequins to the card; a little bit of bling can never hurt :-)

Thanks for stopping by today and for watching! If you liked the video, please subscribe to my YouTube channel and leave me a thumbs up. I really appreciate it!

Thursday, July 16, 2015

Ewe are awesome!

Hello everyone!


This is Wiebke and I'm super duper excited for my very first post for Gerda Steiner Designs!
The sheep blog hop is now nearly one week ago, but we're all still fascinated by this awesome new stamp set. I created a card for you today with some veeeeery colorful sheep. I had this one coral colored sheep laying on my desk for about a week and thought "why not giving him some futuristic colored friends"?!


I made a soft looking watercolor background with lots of water splashes. After that, I cut out a piece of Vellum to place my sheep on. That way, you can see the colors of the background behind, but in a more soft way to be letting the main focus on the sheep. I stamped the sentiment on a light and dark grey cardstock and to embellish that scene a little, I decided to glue down some white flower sequins. 


And that's it from me today :) Hope you liked it and see you soon!

Wednesday, July 15, 2015

Ewe Are Sweet

Hello friends, Its Chitra here to share a card with you all!!
Hope you all enjoyed the new "How are Ewe" stamp release blog hop!! So many beautiful cards samples were made from our amazing DT!!!
I have another card using the same stamp set for you all...


I stamped the image on Crafter's Companion ultra smooth white cardstock and colored using Copics and Prisma Colored pencils, I used stippling technique with my Copics on the sheep's body and added some grass for Mr. cutie to stand on. Then I matted the colored image using foam dots onto the design paper from DCWV. I added some hearts to around the sentiment for a nice pop of color...
Here is a close up...


Hope you liked my card.
Have a great day, thanks for stopping by!!

Hugs,
Chitra

Saturday, July 11, 2015

Miss You Day & Night


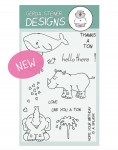
HELLO THERE! Madey here and it is my turn to takeover the blog today! If you don't already know, we are currently having a blog hop to show you what the latest stamp set going to look like! Since i am on the creative drive, i made an additional 2 cards using the same stamp but in different "weather".

 photo _MG_9006.jpg
I stamp the lying down bunny on white cardstock and coloured it using Copic markers. Fussy cut it out and lay in on my grass diecuts. I linked the background with Squeezed Lemonade Distress Ink and MFT Sunburst Stencil. I wanted to create more layers because the whole card was looking a little flat, so i added a stitched cloud border die to mute the sunburst. Next, i stamped the "MISS YOU" sentiment on a piece of vellum but i had difficulty finding a way to hide the glue/pop dots. So i added another 2 smaller cloud and a felt heart shape sticker on top of the sentiment piece to hide the pop dots behind. Vellums are always nice to use, but i always have difficulty hiding the glue spots. Ok, so this sums up my making of the Miss You Day Card.

 photo _MG_9007.jpg
Moving on to the Miss You Night Card. I used embossing paste to run over a starry sky stencil on a piece of watercolour paper. After the paste is dried, i brushed a layer of water over it and used my Zig Clean Color Real Brush to added watercolours. I used mainly dark blues, purples and a slight tint of pink to create the night sky. Instead of fussy cutting out the bunny, i used a circle die cut to cut it out. Then i used my sponge dabbers to lightly dab on some Tumbled Glass and Seedless Preserves ink on the top edge. I ended off with stamping the stars, also provided in the new release stamp set, using a dark blue ink pad to create more starry skies for the bunny to gaze at. Lastly, the rest of the card is the same as the above Miss You Day Card.

Anyway, hope i had inspired you to do something Day and Night with your stamp set. Do share with us by tagging us on instagram (#gerdasteinerdesigns) or visiting us on our Facebook Page. :)