Showing posts with label Nerdy Easter Bunny Stamp Set. Show all posts

Sunday, April 2, 2017

Happy Easter card

Hello everyone

Alexandra here today sharing an Easter card that I made using Nerdy Easter bunny stamp set .


For this card I stamped some floral images and the grass from the same stamp set on watercolor paper and embossed then using white embossing powder and Versa Mark ink.
Then I colored the using Stabilo markers to colored them .


After that I colored the bunny using Spectrum Noir Alcohol Markers. Adhered it to the main panel and the stamped the sentiment. Added some sequins and my card was done!

Thank you so much for stopping by! Have a lovely day!


Friday, March 10, 2017

Happy Easter

Hello everyone!

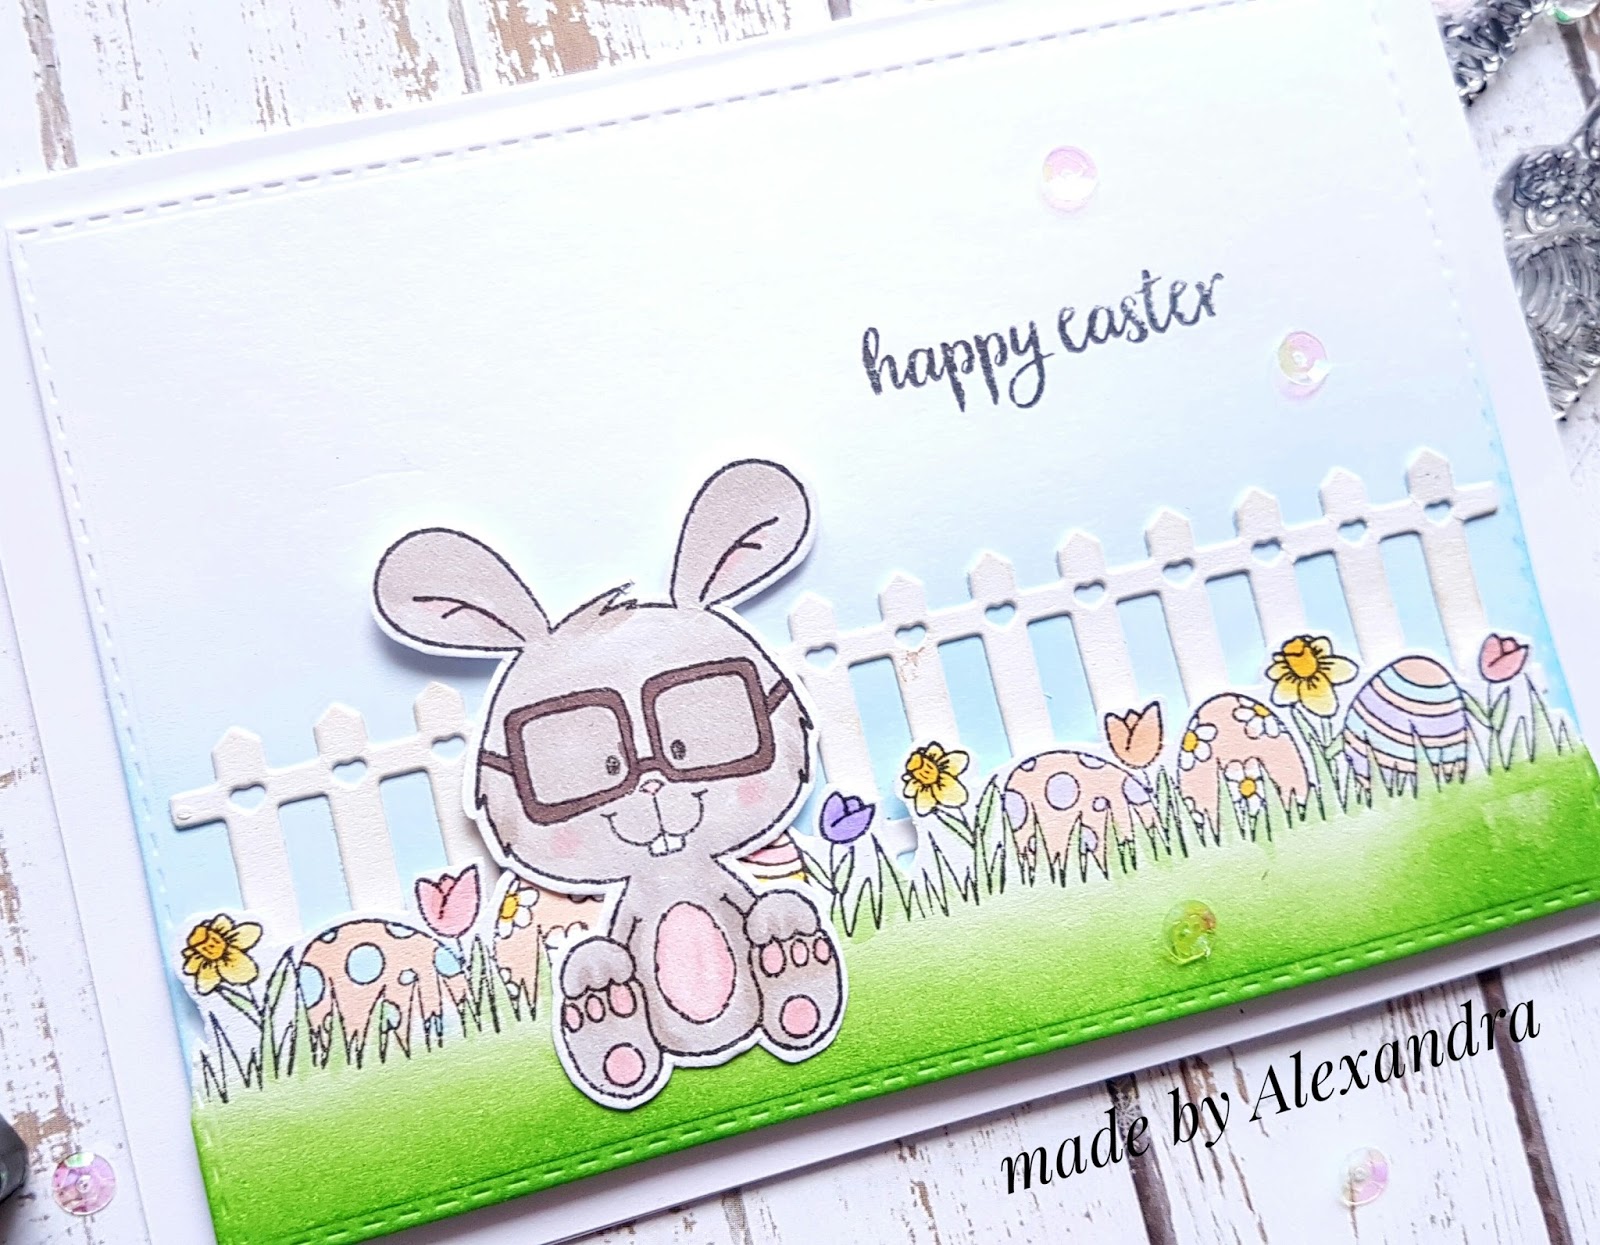
Alexandra here from made by Alexandra sharing a card that I made using Nerdy Easter Bunny stamp set


To start the card I die cut a panel for my background and the using Distress inks I started ink blending using a light hand to create the sky.

After that I stamped the grass border from the same stamp set and started coloring using Spectrum Noir Alcohol Markers, the fussy cut the grass border.


I felt like the card needed something else so I die cut a fence and added behind the grass, colored the bunny and adhered him as well .

Final step was to stamp the sentiment and add some sequins and adhere the background panel to the card base using foam tape!

Thank you so much for stopping by ! Have a lovely day!

Wednesday, March 8, 2017

Guest Design - Congratulations

Hello....It's Pri here today from Me And My Daily Papercraft blog sharing another guest design card that I have made using the Nerdy Easter Bunny stamp set..unlike the colourful card I made last week,this time I wanted to try something different using the cute bunny image and decided to make a shaker snow globe...

Me And My Daily Papercraft Blog - Handmade Card by Pri

On a plain white card base,I chose a white top layer and embossed it using a stars embossing folder...for a bit of effect,I dipped all four edges in metallic gold paint and carefully kept it aside to dry...

I then assembled all the elements for the shaker snow globe....the base of the snow globe has been die cut using gold foil cardstock and then the middle layer has been die cut from craft foam...I have added the coloured in and cut out image of the bunny and a lot of star sequins before adhering the acetate layer....

For the top layer of the snow globe I stamped the snow globe image using Versamark ink and then heat embossed it with gold embossing powder...I also splattered a bit of gold paint on this before die cutting it and adhering it at the top of the acetate layer..

I stamped and heat embossed the sentiment as well and placed it on the snow globe and then adhered the whole piece on the center of the card...

Thanks for visiting today...Have a lovely day..!!

Cheers,
Pri


Wednesday, March 1, 2017

The Nerdy Easter Bunny Wishes You A Happy Easter..!!

Hello everyone...this is Pri here from Me And My Daily Papercraft guest deigning for Gerda Steiner Designs today....and I'm sharing a colourful Easter card that I have made using the brand new Nerdy Easter Bunny stamp set...


I have used a plain white card base and cut watercolour paper for the top layer same size as the card front....I then created the background using Peacock Feather,Salty Ocean,Mermaid Lagoon & Blueprint Sketch distress inks...

I stamped the border stamp on four 3/4'' strips of white cardstock ,coloured them in using Prismacolor and Derwent watercolor pencils and then adhered them onto the top layer...using a large stitched rectangle die, I die cut the top layer and adhered it to the card base...

The border stamp is only about 6.5cms but has been created so wonderfully that you are able to repeat stamp and create longer borders from it...and that's what I have done here...

On a separate piece of cardstock,I stamped the nerdy bunny and the speech bubble with the sentiment and coloured them in using Spectrum Noir markers....and finally I cut them out and placed them onto the card using some craft foam for a bit of dimension...

I have used a few clear sequins to embellish this card...

Thank you for stopping by today...Hope you will have a great day ahead...Happy crafting..!!

Pri