Sunday, December 30, 2018

What's On The Table Birthday Card with Karla


Hello friends! Karla back today with a fun and interactive birthday card featuring the adorable kitty from the What's On The Table digital stamp and all her awesome accessories! I love that there are so many ways you can use this stamp.


I decided to use a Flip Slider die to add these cute birthday accessories onto. That's one of the great things about digi stamps - you can resize them to customize your project. You could even print out the yummy cupcake in a large size and have it as a main focal image!


I coloured in the stamps with Copics and Prismacolor Markers, both alcohol based and then added gel pens for highlights. 


I cut the Happy Birthday diecut from four layers of cardstock, using a glittery blue for the top layer. This gives a nice thick appearance. The pretty paper from Paige Evans Turn The Page collection compliments the images and I think this would be great for an adult or kids card! You could even use this awesome flower vase for Mother's Day!


I added some stamped happy birthday sentiments and popped up the adorable birthday hat. A Sizzix rectangle diecut adds interest to the top of the card.


Here's a look at a video with the pull tab in motion with all the cute images-


I had so much fun making this card! I hope you'll check out the sweet What's On The Table digital stamp, and I can't wait to see what you make with it!!

Hugs,
Karla

Saturday, December 29, 2018

Sending you BIG hugs!

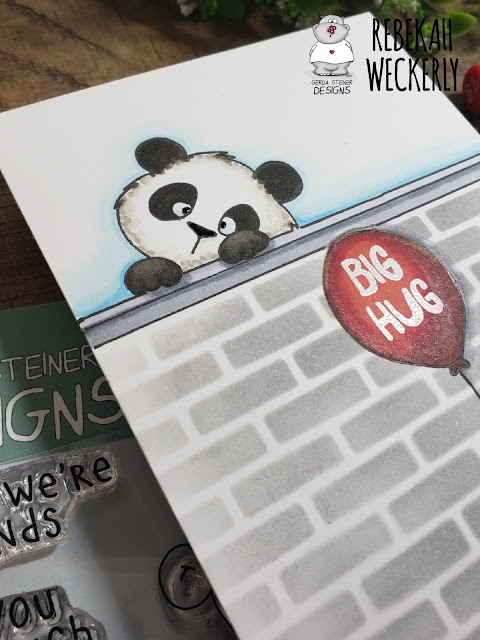
Hi, all! Rebekah here with you this evening showing you a super long, not your average sized card using the Lovely Pandas Stamp Set.

These little bears had me in love at first sight! There are so many creative ways you can use this set and really let my imagination take over with this card!


I wanted it to look like the litte panda with the balloon was sending a 'big hug' to the panda at the top of the wall.


This card measures 4 1/4 x 8 1/2. First I stamped the panda holding the balloon. I covered the balloon with a Post-it note before inking so I could stamp it at the top of the wall. I drew the ballon strings to meet using a think black marker. Then I stenciled the wall using Hickory Smoke Distress Oxide Ink. I was sure to mask over the bear and the balloon. I drew in a ledge at the top of the brick stencil and a base at the bottom.


Each of the panda images and the balloon are colored with Copic markers. I added extra detail with colored pencils.

I stamped the Big Hug sentiment inside the balloon with Versamark Ink and then heat embossed with white powder!

I love the way this card turned out! I an even more excited to see what YOU make with this set! Be sure to share your creations!

A Winter Thanks!

Howdy everyone!  I’m Ally and today I’m going to share wintry thank you card to send to someone special for that wonderful holiday gift.

I’m working with the two penguins from the “Dancing Penguins” digital stamp collection.  These 2 penguins are also accompanied by a sweet little decorated tree, some Christmas decorations and a variety of different packages.

Now… grab a cup of your favorite beverage and join me at my desk…
https://www.youtube.com/watch?v=p6-kpiK5Ss8&t=1s

And here’s another quick look at our two waddling friends…

Thanks for joining me today!  I hope you have an amazing 2019!

For more inspiration, please check out my blog: Your Memories with Ally

~ Ally ~

Friday, December 28, 2018

Dachshunds Shaker Card

Hi!  Marilyn from One Stamping Fool here and I hope you had a great Christmas with family, joy, hugs and of course turkey!
Today's card is my third and final guest spot at Gerda Steiner Designs and again I am using the cute Dachshunds clear stamp set... man, I still can't spell that at all without looking it up!  There is also a coordinating die set for this clear stamp set but I don't have it so I brought out my trusty scissors and this little guy was so easy to fussy cut because the lines are fairly straight and not jagged or complicated.  There's some cute balls and party hats with the set so I coloured some and added them to the sequins in the shaker. This is such a cute set - there's four different Dachshund images, a balloon, ball and party hat plus two sentiments.  They are all super cute but my favourite is undoubtedly this one with the flying ears.
Thanks for dropping by and have a Happy New Year and all the best in 2019!
Copics:
Pup (AKA Rambo) - E39, E37, E35, E33
Collar - R39, R32
Supplies:
Dies - Scalloped circle, the patterned paper circle was done with two nested circle dies.
Paper - Maja Designs
Misc - Sequins, foam dots to raise the back of the dog

Thursday, December 27, 2018

Fun winter card with Kaja

Hi there,
It's Kaja from Kajcyika crafts here with you today with a cute card!

Take a look:
This time I decided to use the stamp set called Happy fall, but I made a winter card with it. I started out by ink blending. I used two distress oxide inks - Cracked pistaccio and Broken china.

I masked off the top and the bottom of my card base, so I got the ink blended area only in the center.. For the bottom edge I tear the paper and used that as a mask and for the top one I used a normal post it note sticky.
Then, I stamped out the two squirrels and colored them in using alcohol markers. I placed one on the left hand side, towards the top and one in the middle of the ground.

I added a lovely kite to the squirrel that is standing and draw in it's string using black marker. Then I used a gray markers to add some shadow under the squirrel's feet.

The last thing I added was the sentiment that reads 'Yippeeh!!!'. I stamped it out in black on a white card stock.

Thank you so much for joining me!
Kaja

Tuesday, December 25, 2018

Merry and bright with decorating penguin

Hi, Margreet here.
With this card I want to wish you all a Merry Christmas.
I created this X-mas card with the sweet digital stamp 'Decorating Penguin' from Gerda Steiner Designs
I started with printing the sweet image.
Then I colored it with Copics and decorated the tree with rhinestones.
I searched in my stack and found a die which could be used as a tree.
I attached a piece of DP with trees on white cardstock and put the die cut on top of it.
 Enjoy your day!
xxx Margreet


Monday, December 24, 2018

Decorating Penguin

Hi Everyone,  Melissa here.


For today's card I have used the 'Decorating Penguin' digital stamp.

The image has been printed onto Copic X-Press It blending card and coloured with Copic Markers.  Trim to size.  Draw a border around the image using a Copic Multi Liner pen.
The base card is a piece of printed paper.
Adhere image to base card.


I hope you have a great day
xxx

Sending you warm thoughts!


Hello and Merry Christmas Eve Crafty Friends!  Tina here from Cards and Coffee Time, I hope your Christmas Eve is wonderful and filled with Love, Laughter and Happiness!  Today I am sharing a fun thinking of you card with the Smell like Christmas stamp set along with the coordinating dies.  Such a "sweet" stamp, pun intended!  I created a delicious winter card with the yummy cookies, hot cocoa and the adorable mouse:)


You can watch how I created this card down below.  Time to grab your coffee....or hot cocoa and let's get to crafting!  Thanks so much for stopping by!  Wishing you a beautiful day and a Very Merry Christmas!  Hugs, Tina


Project Tutorial Below.


Sunday, December 23, 2018

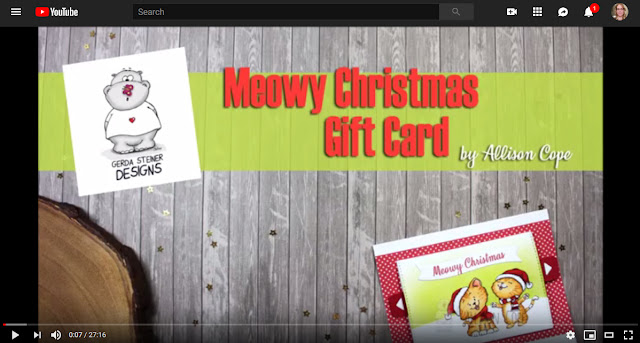
Meowy Christmas Gift Card

Hello everyone!  We're so close to Christmas and I don't know about you but I always have that one final person I have to buy for.

This year I had one last card to send out to a Secret Sister and so I decided to print out the adorable Three Carol Cats and get creating.

Join me at my crafty desk for some creative fun...

https://www.youtube.com/watch?v=TamWOg2bAf8&feature=youtu.be


Here's another quick look at the gift card with the panels pulled out...


And here's a picture with the Copic Marker chart for all you coloring enthusiasts!

Thank you for joining me today! 

Wishing you a very Merry Christmas and a fantastic 2019 from snowy Alberta!

~ Allison Cope ~

Saturday, December 22, 2018

Sweet Panda xoxo

Hello friends! I'm back today to share my last card for the year.
This time I'm using the new stamp set called Lovely Pandas. These little pandas are so adorable!


This is a clean and simple design that was so easy to achieve. First, I die cut a heart from the white panel.
I ink blended the background to go behind the heart using distress ink and propped up the panel using foam tape. I put this onto a kraft coloured panel.
The panda was coloured using Copic markers and cut out using a Scan n Cut. The sentiment was stamped in the white space underneath and to finish, the Panda was adhered using foam tape and that completes the card.

Wishing you all a wonderful and safe holiday season and a happy and prosperous 2019!

Catherine x


Friday, December 21, 2018

A Koala Christmas!


Happy Friday! Cathy here with one last card to share for the year. I had so much fun with this one and used one of my very favorite Gerda Steiner stamps. This little koala didn’t want to miss out on the Christmas festivities!


I’ve combined stamps from 3 different Gerda Steiner sets on this and used a no-line coloring technique with Copics. The Santa hat is from the Carol Puppies stamp set and was the perfect size and shape for the koala. Both the Carol Puppies and Carol Kittens sets have quite a few sizes and shapes of Santa hats that would fit nearly any of the Gerda Steiner animal stamps.


I’ve added a string of lights to the eucalyptus tree using the tiny lightbulb from the Balancing Mouse stamp set and drew the string with a colored pencil.

My very favorite adorable koala is from the You’re Koalafied stamp set.


I colored and fussy cut the ornament from the Balancing Mouse set and added it to a few die-cut leaves that almost looked like eucalyptus. The sentiments are also from the Balancing Mouse set.


I hope you enjoyed my card today and it inspires you to mix and match your stamps.

Happy Holidays and I’ll be back in the New Year!

See you soon!


Cathy 

Thursday, December 20, 2018

Santa Paws

Hello Friends!

Tanya here with another fun holiday card idea for you!
This week I'll be sharing some fun gift card holders using the Carol Kitten stamp set, out of the designs I made I chose two to share with you!


For these little envelopes I used the Neenah solar white 110 Lb paper. I cut it into a 5 1/2" x 5 1/2" square. Then I used my We R Memory Keepers envelope punch board to make the envelope. To do that I lined one side of the paper up to 2 3/8" and did the first punch and score there. After that first punch I just rotated each side, lining the scored line on the envelope to the little score guide near the punch button and did the same on the rest of the sides.


After that I used a TomBow dot adhesive along the two little flaps to adhere the bottom to create the closing of the envelope leaving the top open for the card to slip into.


I used a mixture of Zig markers and Tim Holtz distressed inks as well as a water pen to color the kitten cut out, then added a little shimmer to the kitty's hat with the wink of stella pen.  I then used some foam dots to attach the kitty to the front of the envelope and finished off with little music notes around the kitty.


For the second envelope, I quickly stamped the music notes all over the square paper to add a fun background to it before scoring it. I then cut out a second piece of paper to create a slip to go over the envelope with the words "Joy to the world." And there you have it, two simple and easy gift card holder! I hope you all enjoyed these as much as I did! Merry Christmas and Happy holidays!

XOXO
Tanya


Tuesday, December 18, 2018

Guest Designer Video - More Thank Pie - Jessie Banks

Hey everyone! Jessie Banks with you today for my first guest post! I am super thrilled to get to play with some awesome Gerda Steiner stamps!


I had so much fun with this More Than Pie stamp set! I think its ever so adorable!

I, of course, have a process video for you!


Thanks so much for stopping by,
Merry Christmas and Happy Holidays to you all!
Hugs,
Jessie Banks

Monday, December 17, 2018

First Christmas....!!

Hi everyone...

It's Ashlee here with you today and I have a card to share with you that I made using the super sweet stamp "Baby boy christmas"....

It's a fairly simple card really but I think it makes the image the absolute focal point of the card. 


First I coloured the background with some distress ink "Festive berries" and added some "Black soot" around the edges. I spritzed it with water for a splotchy effect, I just love the result you get when you do this technique!! 

Using the sentiment included in the stamp set I heat embossed it with some WOW white embossing powder.....

The image I coloured with Copics, cut it out and mounted it to the card with a double layer of foam tape for some nice dimension. 

To finish off the card some pretty sequins. 
There you have an easy christmas card perfect for a new baby's first christmas.

Merry Christmas everyone and a happy new year, stay safe... 
I will be back in the new year with some more Gerda Steiner inspiration for you all!!

Hugs Ashlee 

Sunday, December 16, 2018

Fa la-la-la Llamas

Hi Everyone,  Melissa here.


For today's card I have used the 'Fa la-la-la Llamas' digital stamp.

The images have been printed onto Copic X-Press blending card and coloured with Copic Markers.  They have been fussy cut and glitter added with Glossy Accents.  Set aside to dry.
The base card has been made using Copic Various Ink and set to dry.
Cut a polaroid die from white card stock.  Adhere Llamas to the insert of the frame.  Adhere this to the dry base card.
The sentiment has been stamped onto a piece of white card and cut to size.  Adhere this to the base card using foam tape.
Adhere enamel dots to card.


I hope you have a great day
xxx

Saturday, December 15, 2018

[Video] Sketch inspired card with Kaja

Hi there,
It's Kaja from Kajcyika crafts and today I made a cute card using the Deck the halls stamp set. :)

Take a look:
It's not unusual to have a creative block from time to time and today I will share some advise what to do if it happenes to you. I love sketches so my inspiration hunt starts with them. 

Watch the video to find out more about the sketch I used today and how I made this card:

Hope that you feel inspired and that you will join some challenges in the future!

Hugs,
Kaja

Friday, December 14, 2018

VIDEO - Winter Shaker Card with Laura

Winter Shaker Card feat Gerda Steiner Designs

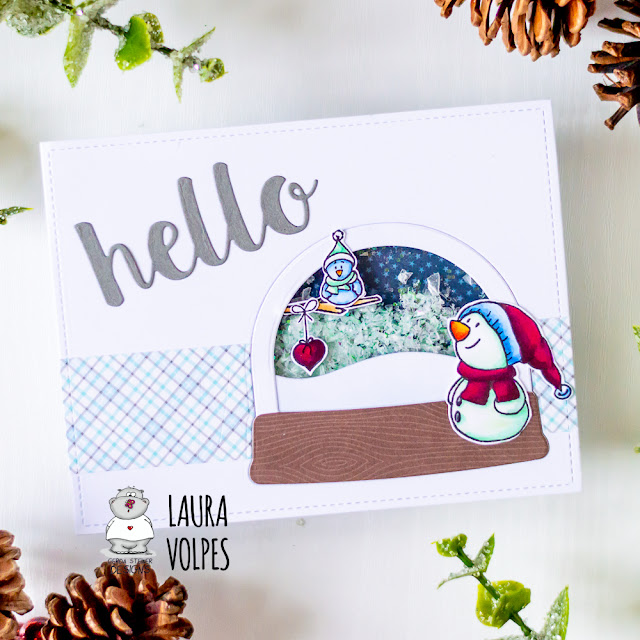
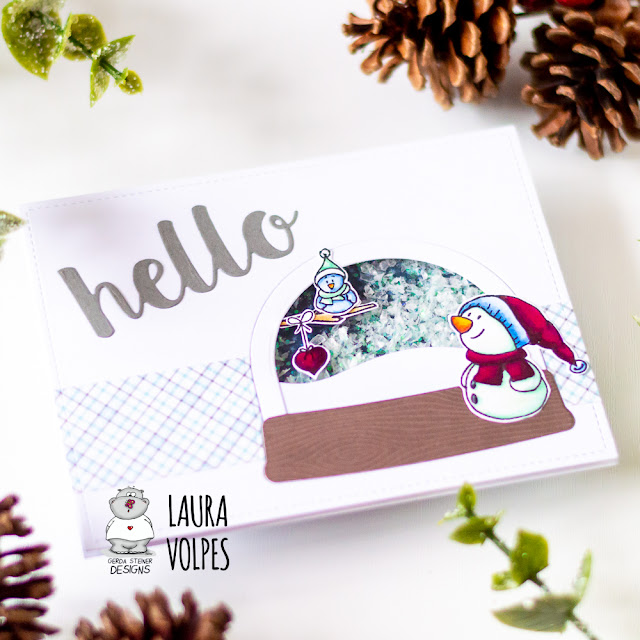
Hi everyone! It's Laura here and today I am back with a post and a video in which I will show you how to create a snow globe shaker card. I chose the sentiment so that this could be a card good for any occasion, but you can easily switch that and turn this into a winter birthday card, for example.

The stamp set I used today is the Gerda Steiner Designs Snowman Friends stamp set.
I stamped the images on Neenah Solar White 110lb cardstock with Scrapbook.com Premium Hybrid Black ink and I colored them with my Spectrum Noir markers. There are also coordinating dies available for this set, and I will link them down below in case you are interested. I don't have them, though, so I cut the images with my EK success Cutterbee scissors.
Here is a color chart for you as a reference, in case you'd like to reproduce this card.


Winter Spectrum Noir Markers Color Combination

I then moved on to the shaker. I die cut some white cardstock with the Lawn Fawn Large Stitched Rectangle Stackables, and created an opening with the Lawn Fawn Ready Set Snow Shaker Add-on dies. Before die cutting the shaker window I adhered a strip of patterned paper from the Lawn Fawn Perfectly Plaid Winter paper pad.

Winter Shaker Card feat Gerda Steiner Designs 3

I then used more dies from the dies in Ready Set Snow Shaker Add-on set and patterned papers by Lawn Fawn to create the snow globe. For the base of the snow globe I used papers from the Knock on Wood paper pad, and for the sky I used the Beachside paper pad. All the other elements are die cut from white cardstock.
To add interest to the snow hill, I added some shading with a Ranger Blending Brush. I took the brush that I normally used for my blue Distress Oxides and used whatever ink was left on the bristles to shade the bottom of the hill.

Winter Shaker Card feat Gerda Steiner Designs 2

For the inside of the shaker I used some Faux Snow and some Studio Katia Chunky Glitter, and I really love the look! Finally, for the sentiment I die cut the word hello from the MFT Hello There Die-Namics out of white cardstock and I glued it to the top left of my card front.

Winter Shaker Card feat Gerda Steiner Designs 3


I also decorated the inside of my card with one more snowman from the Gerda Steiner Designs Snowman Friends and with a sentiment from the Foxes stamp set, which I stamped with Memento Ink in London Fog.
I also created a video showing you how to create this easy winter shaker card, you can watch it down below!
And if you like it, don't forget to subscribe to my channel for more inspiration!


And that's it for today! I really hope you enjoyed the post and the video, and I hope I inspired you to create with the Gerda Steiner Designs Snowman Friends Stamp Set.

Thank you all so much for stopping by, and have a great day!

Laura

Thursday, December 13, 2018

Joy

Hi, Margreet here from Margreets-scrapcards.


I created a X-mas card with the sweet digital stamp Santa with a Sign
from Gerda Steiner Designs
Stamped the image and colored it with Copics, die cut it and attached it with foam on design papers.
Added Flowersoft on the fur parts.
The sentiment is made with a Sizzix cutting stencil.
It was fun creating with this lovely Santa. Hope you like it.


xxx Margreet

Dachshunds

Hi there, Marilyn here and I hope all is well with you.
Today's card is my second post as guest designer with Gerda Steiner Designs and I was lucky enough to be given the cute Dachshunds clear stamp set to use.  Love these pups, especially the one with the flying ears... I keep looking at those ears and smiling.  Then I try to spell 'dachshunds' and have to look it up every time!  
There is a Dachshunds coordinating die set for these dogs but I do not have it so I used scissors to cut around the ones in the windows and the one chasing his tail is stamped onto the card front.  After masking the two stamped dogs, I covered them with a piece of paper and the splatter was done with an old toothbrush and diluted Frayed Burlap distress ink.  Enamel dots were added and the card is finished!
Have a great week!
Copics:
Dogs - E37, E35, E33, E31
Supplies:
Stamps - Dachshunds
Misc -  Frayed Burlap distress ink, enamel dots, stitched square dies

Wednesday, December 12, 2018

Little Christmas gift bag


Hi there! This is Rana again:)
I am sharing today my small gift bag using Up on the house top stamp set, I started with a piece of vellum and cut two pieces each are 10" * 5" then I measured 4" to be my actual bag's size and folded the rest each 1/2" to make the top.
Then I took the three little gift stamp from the stamp set and using versa mark ink and gold 
embossing powder to emboss the back side of my bag 


For the bags sides I cut a 13" * 1,75" piece of vellum and Embossed it also like the Foto 
               

the front side is just blended with distress oxide inks (stormy sky, chipped sap, black soot) and some embossed white dots to be like a snow.
Then started the fun part, stamping  and coloring all these adorable images and assembling my bag together to be ready for Christmas.
I hope you enjoyed with my post and have a nice day 

Rana