I hope you enjoy the card I created and feel inspired to create!
Friday, April 29, 2022
What's up by Noga Shefer
I hope you enjoy the card I created and feel inspired to create!
 Hi :) My name is Noga. I live in Israel, married to Yaniv and have two cute boys and a dog. In the morning I work in marketing in our nursery and at night I create cards. This is my therapy :)
Tuesday, April 26, 2022
Sending You Showers of Love
Hi there,
- stamp one of the hedgehogs from the Gerda Steiner Designs Cheerful Hedgehog set with Lawn Fawn Jet Black
- color the image with Spectrum Noir Triblend Markers
- add extra shading with Faber-Castell Polychromos pencils and highlights with a white gel pen
- stamp the sentiment from the same set with Versafine Onyx Black
- create a shaker element using a heart die, acetate and double-sided foam adhesive
- fill the shaker elements with confetti and clay hearts
- create a background for the shaker element with Distress Ink Stormy Sky and the My Favorite Things Micro Cloud Edges stencil
- add strips of red cardstock to the left and right side of the panel before adhering it to a cardbase
I hope you got inspired.
Sunday, April 24, 2022
Scene Card -- Featuring Pigeons!
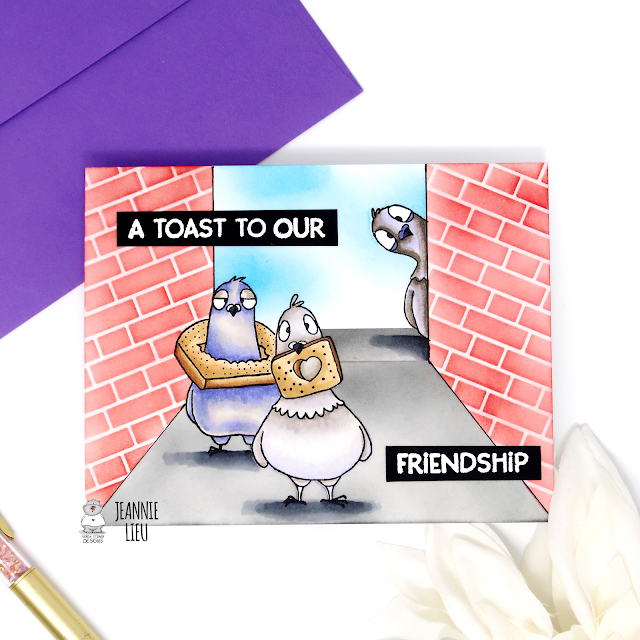
Hi everyone! It’s Jeannie (InsideoutJeans) on the blog today with Gerda Steiner Design’s stamp set named, Pigeons and A Toast to You. Yes -- the last card was also featuring these birdies but I couldn't help myself. I live in San Francisco and they are not my favorite at all BUT Gerda's fun illustration of them just sucked me in.
I did what I do best with her images and that's to create a scene card. You definitely can find them anywhere but I thought it would be fun to stick them in an alley hunting for food, especially since both Pigeons and A Toast to You stamp sets have a bird with toast. I did think it'd be funny to have the one with a cocked head peeking in to check out what they are doing.
Thanks for stopping by today and I hope you get inspired to create. Come back again soon for more inspiration and ideas! Happy Crafting!
Totally crushing it....!!
Hey friends...
I have a card to share today using a bunch of cute tiny little mice from The Nutcracker set by Gerda Steiner designs!!
I wanted to use this stamp set to create a card that wasn't for Christmas so I coloured up their little dresses in pink and put them in a dancing scene....
Friday, April 22, 2022
A toast to you - with toast ;-)
Hello, my dears,
Today it's my turn - Alma - and I want to raise a toast to you!
I fell in love when I saw the funny pigeon from the A toast to you - 3x4 Clear Stamp Set.
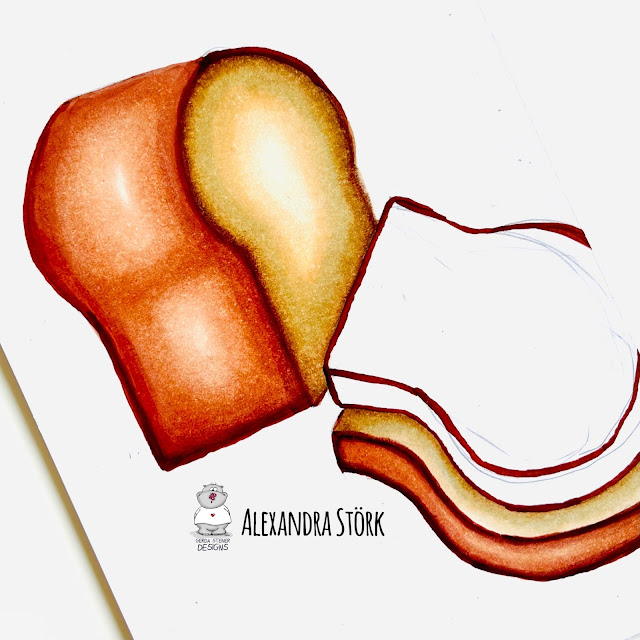
And yes... the pigeon should get a lot more toast! So I decided to draw a bread in the background with my Copics.
It's not so hard! Today I'll show you how to do it.
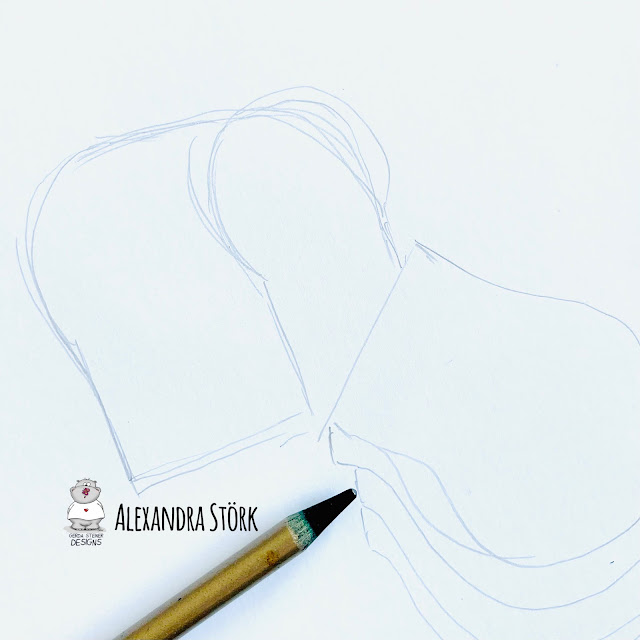
1.) Draw a very, very rough sketch with a pencil, you can then paint over it with the Copics. It is only used for "rough" arrangement. Of course you can also draw more precisely.
2.) Find a lighter and darker Copics color combination. The most important thing is that you work with shading. I opted for a darker Copic combo for the outer edge of the bread. I chose the following color combinations: E18 - E17 - E15 - E13 - E11
The following tones have been selected for the inside of the bread: E57 - E55 - E53 - E51 - E50
The shades harmonize very well together, as you can see.
3.) When you have finished coloring the bread, you can sketch a plate around it with a pencil. I colored it in the colors W5 - W3 - W2 - W1 - W0 - W00
4.) At the end you can set small highlights with dots of the same color tones and a white gel pen. This gives the bread more liveliness and structure.
5.) Now all you have to do is stamp and color the motif. I colored the plumage of the pigeon with B99 - B95 - B93 - B32 - B000 - B0000.
6.) At the end I stamped the text with the stamping tool. Complete!
Can't wait to see your "toasts"!
Tuesday, April 19, 2022
A Toast to You
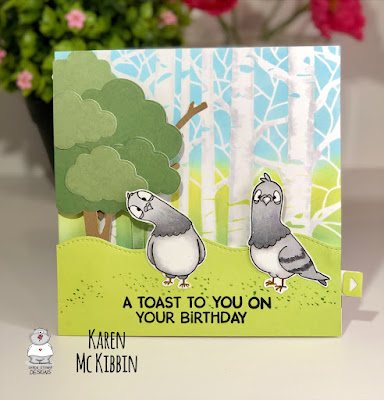
Hello and welcome, it’s Karen here today. I’ve got another pigeon card today featuring the new Pigeons stamp set from Gerda Steiner Designs. Here’s a look at my card and since it’s an interactive one, there’s a shot of before, and after, you pull the tab (this is a 5 1/2” square card).
 Hello and welcome! I am a retired physiotherapist, wife and mother of four sons, and live in Calgary, Canada. Card making has been my favourite hobby for several years now and I have become passionately obsessed with it. I hope to share my cardmaking passion with you through this blog.
Currently on design teams for:
Craft Consortium Ltd, Paper Rose Studio and Whimsy Stamps Video Team.
Sunday, April 17, 2022
Friend's like you....!!
Hey friends...
I have a notecard for inspiration for you today featuring a cute little worm from the Gerda Steiner Garden critter stamp set....
Tuesday, April 12, 2022
Happy Easter
- stamp one of the bunnies from the Gerda Steiner Designs Easter Bunnies set with Lawn Fawn Jet Black
- color the image with Spectrum Noir Triblend Markers, add extra shading with Faber-Castell Polychromos pencils and highlights with a white gel pen
- cut out a Clearly Besotted Stamps Rounded Tag from kraft cardstock and add a grass border
- embellish the tag with a ribbon bow
- create a backdrop using strips of colored and kraft cardstock
- finish the card with a patterned paper sentiment strip
Sunday, April 10, 2022
Colorful Pigeons
Hi everyone! It’s Jeannie (InsideoutJeans) on the blog today with Gerda Steiner Design’s stamp set named, Pigeons. Normally, I stick with the typical colors of animals when I color but I'm personally not a fan of pigeons in general. I live in a big city and they are always around.
I googled to see if there were pigeons which aren't just grey or white and there are actually colorful pigeons. I decided to color the images in this stamp set using all the pigeons and I picked a different color for each. I also wanted to play with heavier shadows so I did use about 4 copic markers for each pigeon. Since they are all standing away from each, I didn't need to do any masking.
Once I colored them up, I added a sign for the sentiment because I didn't want it just floating since I did add "ground" underneath their feet. Although I don't love pigeons, I'm pretty happy with how this card came out!Friday, April 8, 2022
Have a treat!
Hi to all,
today I want to show you my card with the cute new 4x6 Clear Stamp Set "What´s up".
I have three cats and they are ALWAYS hungry - like the animals of this stamp set! So cute! I stamped the motifs and colored them with Copic Markers. Then I stamped the sentiment.
Then I cut the motifs out and added them with 3d glue on the card. I stamped the food bowls. My highlights are the speech bubbles with the bone and the fish. So I think the critters are unsatisfied with the boring dried animal food in front of them :-D
Hugs
Alma
Tuesday, April 5, 2022
Pigeon Trouble
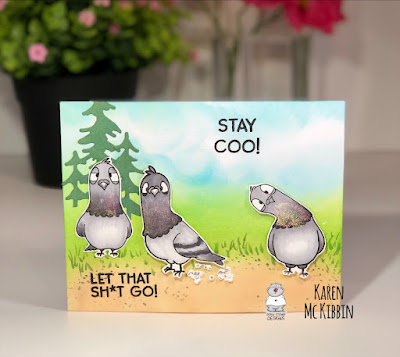
Hello and welcome back, it’s Karen here again. Today I’ve got a card featuring a new stamp set by Gerda Steiner Designs called “Pigeons”. There are five pigeons in this set, and you just know they all have fun, expressive faces! Here’s a look at the card I made.
 Hello and welcome! I am a retired physiotherapist, wife and mother of four sons, and live in Calgary, Canada. Card making has been my favourite hobby for several years now and I have become passionately obsessed with it. I hope to share my cardmaking passion with you through this blog.
Currently on design teams for:
Craft Consortium Ltd, Paper Rose Studio and Whimsy Stamps Video Team.
Easter Kitten
Hi there,
- stamp the cute little kitten from the Gerda Steiner Designs Easter Kitten set and three eggs from the Gerda Steiner Designs Peeking Easter Friends set with Lawn Fawn Jet Black
- color the images with Spectrum Noir Triblend Markers
- add extra shading with Faber-Castell Polychromos pencils and highlights with a white gel pen
- create a backdrop from patterned paper and Neenah Desert Storm kraft cardstock
Friday, April 1, 2022
Happy Easter by Noga Shefer
 Hi :) My name is Noga. I live in Israel, married to Yaniv and have two cute boys and a dog. In the morning I work in marketing in our nursery and at night I create cards. This is my therapy :)




.JPG)



.JPG)
