The grass was created by blending spun suger distress oxide ink.
Sunday, November 29, 2020
Your The Best by Noga Shefer
The grass was created by blending spun suger distress oxide ink.
 Hi :) My name is Noga. I live in Israel, married to Yaniv and have two cute boys and a dog. In the morning I work in marketing in our nursery and at night I create cards. This is my therapy :)
Friday, November 27, 2020
Guest Design - Deck the halls by Izzy Scrap
Thursday, November 26, 2020
Happy holiday penguins....!!
Hi friends...
Ashlee here today, I hope you are all well and getting prepped for that busy Christmas season!!
I have a new card to share with you using one of the brand new sets "Happy holiday penguin"...
Tuesday, November 24, 2020
Decorating penguin - Larissa
Hi everyone, I am Larissa from Car-d-elicious and today it is my turn again to post a project on the blog from Gerda Steiner designs. This time I have made a christmas card.
On my card I have used the digital stamp Decorating penguin from Gerda Steiner designs. I have coloured the image with my Polychromos pencils and the black glaze pen. I have fussy cut the image. With the Crea-nest-lies XXL 34 from Crealies I have fussy cut a square from red cardstock and I glued it on a white card with foamtape. With a circle die from the set Crea-nest-lies XXL 21 from Crealies I hvae drawn a circle on the red square with a white gelpen. I have left a little space open for my sentiment. I have stamped the sentiment (happy holidays) from the stampset Prettige feestdagen etc. (DTCS025) from Nellie Snellen with versamark ink on the card and then I embossed the sentiment with white embossingpowder. I have glued the image with foamtape on the card. I have die-cut a couple of tiny stars from white cardstock with the Star confetti die from Alexandra Renke and glued those in the circle.
Monday, November 23, 2020
Happy Fall Fox
Hi there,
it's Tanja here and I created this Pop-up Fall Card using the Gerda Steiner Designs Foxes and Happy Fall stamp sets:
- stamp the adorable little fox from the Gerda Steiner Designs Foxes set with Lawn Fawn Crunchy Leaf
- mask the fox and stamp the wreath from the same set with that same brown ink
- color the images with Spectrum Noir Triblend Markers
- use patterned paper to create a band to wrap around the card
- for the inside of the card cut out the letters F, A, L, and another L from kraft cardstock with the help of the Altenew Caps Bold die set
- cover the letters slightly offset with patterned paper
- create a background using the My favorite Things Whimsical Woodgrain Backdrop, Versamark and WOW! Bright White Super Fine embossing powder
- create a kraft pop up backdrop and ink up its edges with Distress Ink Gathered Twigs
- stamp the Happy from the Gerda Steiner Designs Happy Fall set with Versamark onto a strip of kraft cardstock and heat-emboss it with WOW! Bright White Super Fine embossing powder
Saturday, November 21, 2020
Have a howly-jowly Christmas
 Ik heet Margreet en ben al 53 jaar gelukkig getrouwd met Joop. We hebben 1 dochter, Femke, en zij is getrouwd met Paul. Veel plezier op mijn blog. Ik waardeer het zeer als je een berichtje achterlaat!
Thursday, November 19, 2020
Hedgehog with Gifts
Hi everyone! It’s Jeannie (InsideoutJeans) on the blog today with Gerda Steiner Design’s stamp set named, Hedgehog with Gifts. I wanted to take a break from the holiday cards, so this set was perfect for a simple thank you card.
I placed the gift right in the middle since I thought if the hedgehogs were holding the gift, it took away from the two of them since it's rather large. I also created a mini slimline envelope using a die that matched the card. I just thought it was so perfect!
Thanks for stopping by today and I hope you get inspired to create. Come back again soon for more inspiration and ideas! Happy Crafting!
Tuesday, November 17, 2020
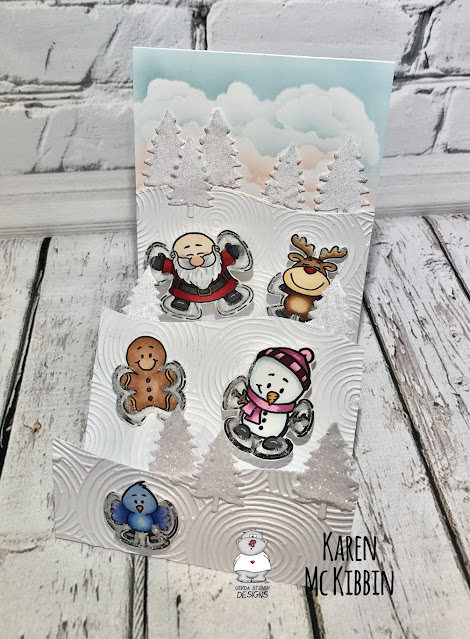
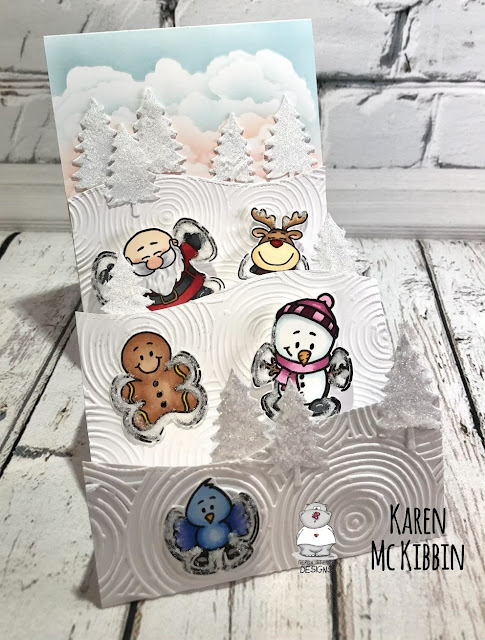
Stepped Up Snow Angels
Happy Wednesday everyone, it’s Karen here today. I’ve got a step card to share with you that features the Snow Angel stamp set. How much fun is it that these guys are making snow angels!
Now, at the end of this post, I’ve also got another Reindeer and a Tree card that I have just made a video for and had posted on Instagram. I told Gerda I would use a different stamp set this week, but honestly, I just couldn’t stop playing with those reindeer! So I’m sneaking it in here to share with you, so don’t tell Gerda! *wink, wink*
So here’s my Snow Angel card...
I wanted my card to look like the characters were out on some snowy hillsides on a frosty day, so I chose to make a step card. If you’ve never made one before, they are very easy to do and I’ve got a video made for you to see how I did it. To watch the video, PLEASE CLICK HERE.
 Hello and welcome! I am a retired physiotherapist, wife and mother of four sons, and live in Calgary, Canada. Card making has been my favourite hobby for several years now and I have become passionately obsessed with it. I hope to share my cardmaking passion with you through this blog.
Currently on design teams for:
Craft Consortium Ltd, Paper Rose Studio and Whimsy Stamps Video Team.
Friday, November 13, 2020
It's time for cake....!!
Hello my friends...
Ashlee here today and I have a super fun glow in the dark underwater scene card to share with you featuring the awesome stamp set "Big bite"....
Tuesday, November 10, 2020
Snowman and birds - Let it snow! - Larissa
Hi everyone, I am Larissa from Car-d-elicious and today I am posting a new project on the blog from Gerda Steiner designs. This time I have made a card for my Memory dex.
On the card I have used the digital stamp Snowman and birds from Gerda Steiner designs. With a black fineliner I have drawn the snowhills a bit longer, so they have the perfect size for my card. Then I have coloured the image with my Polychromos pencils and the black glaze pen. I have die-cut the bottom part of the image with the Stencil SL120 from Studio light and then I have fussy cut the upper part of the image. I used the same die to cut a card for my memory dex from blue shimmer cardstock. I have glued the image with foamtape on the blue card. I have stamped a sentiment from the stampset Handletter - text x-mas small (130501/1812) from Craft emotions with Versamark ink on the card and then I embossed it with white embossingpowder. Then I added snow on the card with white sticker dots. I applied Clear sparkle embossing glitter (WS15r) from Wow on parts of the image to give it some extra sparkle. :)
Sunday, November 8, 2020
Happy Holiday Penguin
Hi everyone! It’s Jeannie (InsideoutJeans) on the blog today with Gerda Steiner Design’s stamp set named, Happy Holiday Penguin and oh my goodness, is it not the most adorable set ever?!
For the background, I used a bunch of distress inks to create a galaxy backbround. When I finished with that, I used a snowy die cut to cut out a piece of white paper. I also mimicked the colors of the penguins into the Holidays sentiment to really add the rainbow effect to the card.
Thanks for stopping by today and I hope you get inspired to create. Come back again soon for more inspiration and ideas! Happy Crafting!
Saturday, November 7, 2020
Merry Christmas and A Happy New Year by Noga Shefer

The sky was created by blending tumbled glass distress oxide ink,I spired some water onto it and soaked it up with paper towel.
 Hi :) My name is Noga. I live in Israel, married to Yaniv and have two cute boys and a dog. In the morning I work in marketing in our nursery and at night I create cards. This is my therapy :)


