Showing posts with label Pumpkin Bear. Show all posts

Wednesday, November 1, 2023

Hello Pumpkin!

 Hi everyone!

Stacey with you today, stopping by to share a mini slimline card that I created using the Pumpkin Mouse stamp set, along with a sentiment from the Pumpkin Bear stamp set. 

Here is a look at the card that I created:


I created my mini slimline card base by cutting a 6" square piece of Kraft cardstock in half so that it measured 3"x 6". I die cut a scalloped rectangle from some more kraft cardstock, inked around the perimeter with some distress ink and adhered it to my card front. I used another die to cut out my plaid patterned paper and added some Kraft stripes to one side. I stamped my images from the Pumpkin Mouse stamp set, masking the little mouse so that it was all one piece, onto some white cardstock and colored it in with my Copic markers. I fussy cut it out and popped it up onto my card with some foam tape for a little dimension. I stamped my greeting from the Pumpkin Bear set onto a piece of white cardstock, inked the edges, tied a twine bow and popped it up with more foam tape. I completed my card with a small enamel heart and some white gel pen accents. I think that little mouse is too cute in his little sweater!


Copic Colors Used:

--Mouse: E40, E41, E42, E43, E44, R20, R00
--Sweater: BG93, G94, G99
--Cup: E33, E37, E42
--Pumpkins: YR21, YR24, YR27, E33, E37
--Apple: R22, R24, R27, G94, G99, E37
--Pear: Y11, Y21, YR23, E37
--Mushrooms: E43, E41, R24, R39

Thank you so much for stopping by today!

I appreciate it so much!
I hope you have a great crafty day!

Find Stacey on Instagram: @staceyscreativecorner

Tuesday, October 25, 2022

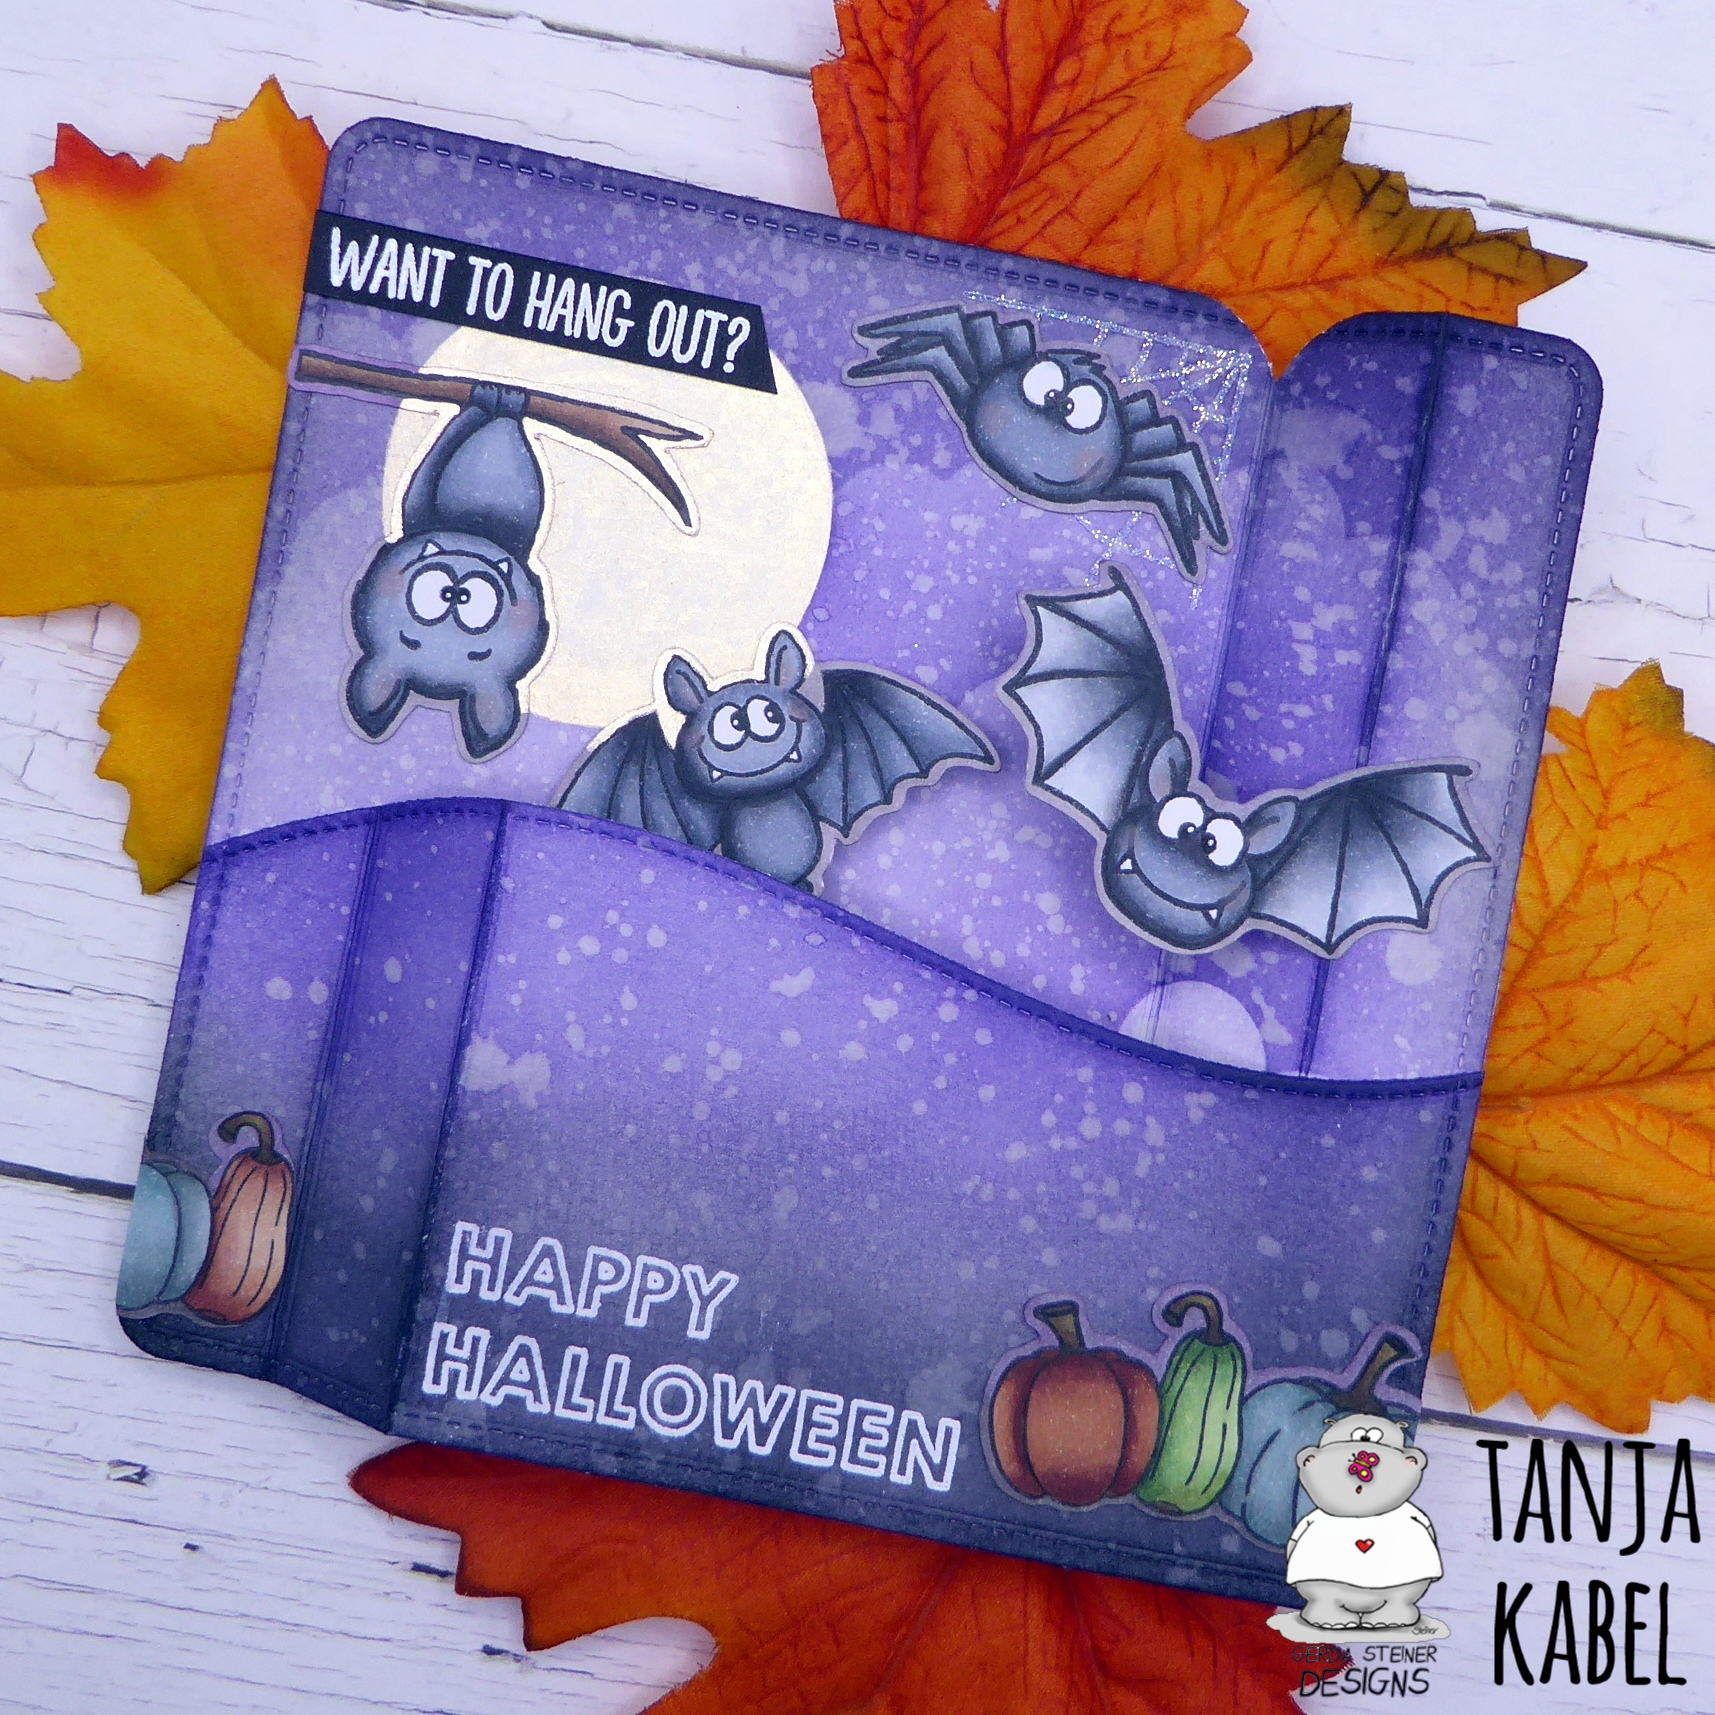
Want to Hang Out?

Hi there,

it's Tanja here and I created this Halloween Peek-a-Boo Pop-up Card using the Gerda Steiner Designs Bats and the Gerda Steiner Designs Pumpkin Bear stamp sets:


  • stamp the bats and the spider from the Gerda Steiner Designs Bats set and the pumpkins from the Gerda Steiner Designs Pumpkin Bear set with Lawn Fawn Jet Black
  • color the images with Spectrum Noir Triblend Markers and add extra shading with Faber-Castell Polychromos pencils
  • cut out the parts needed from the Lawn Fawn Pee-a-Boo Pop-up die set
  • add a moon mask and color the background with Distress Inks (Black Soot, Villainous Purple) and the moon with Finetec Mica Watercolor in Moon Gold
  • stamp the spider web from the same set with white pigment ink and heat-emboss it with WOW! Clear Sparkle embossing powder
  • stamp the sentiment with Versamark and heat-emboss it with WOW! Bright White Super Fine embossing powder
  • the other sentiment is from the Lawn Fawn Fangtastic Friends set and also stamped with Versamark and heat-embossed with WOW! Bright White Super Fine embossing powder


I hope you got inspired.

Hugs,


Tuesday, September 21, 2021

Pumpkin bear - Larissa


Hi everyone, I am Larissa from Car-d-elicious and today it is my turn again to post a card on the blog from Gerda Steiner designs. Today I am showing a card that I have made with the cute bear from the clear stamp set Pumpkin bear from Gerda Steiner designs. I have coloured the bear with my Polychromos pencils, a black glaze pen and a white gelpen. I have fussy cut the image. With the white gelpen I have added dots on the scarf from the bear. 


On a white card I have glued a layer of dark brown paper and then I added a layer of plaid paper from the Perfectly plaid Fall petite paper pack (retired) from Lawn fawn. I have cut a circle from the dark brown paper wit the Crea-nest-lies XXL 33 from Crealies. From the same dark brown paper I also have cut a strip with the Strips met stiklijn (CLmix12) from Crealies. On the strip I have stamped a sentiment from the set So much to say (retired) from Clearly besotted with Versamark ink and then I embossed it with white embossingpowder.  I have glued the strip on the card and then I added the circle with foamtape. I have used foamtape to glue the bear on the card. With the Crea-nest-lies XXL 59 from Crealies I have cut a little banner from dark brown cardstock and after I glued it on the card. I have added a little flower that I have cut from the plaid paper with the Layered floral die set (Die047-j) from Impression obsession. I have decorated the flower with a brown diamond painting gem.


*********************************************************************************
STAMP: Pumpkin bear from Gerda Steiner designs, So much to say (retired) from Clearly besotted
COLORING MEDIUM: Polychromos pencils
PAPER: White and dark brown cs, Perfectly plaid Fall petite paper pack (retired) from Lawn fawn
INK: Versafne clair nocturne, Versamark ink
DIES: Crea-nest-lies XXL 33 and 59 from Crealies, Strips with stitchline (CLmix12) from Crealies, Layered floral die set (Die047-j) from Impression obsession
ACCESSORIES: Black glaze pen, white gelpen, Brown Diamond painting dot, White embossingpowder

I am a participant in the Gerda Steiner designs Affiliate Programme. This means that if you click on one of my links and subsequently make a purchase, I will receive a small commission of store credit, at no extra cost to you.

Thursday, October 22, 2020

Fall Scene with Pumpkin Bear


 Happy Thursday Crafty Friends!!

Cathy here today with a Fall scene card featuring the adorable Pumpkin Bear stamps!

This is a pretty simple scene to create. I cut a piece of white cardstock 3 3/4" x 5" and inked an Autumn sky using Ripe Persimmon, Scattered Straw, Tattered Rose and Antique Linen distress inks with a sun ray stencil from my stash.

I die-cut a few hillsides and inked them with Shabby Shutters distress ink and then colored up a fence and tree die-cuts with Copic markers.

The leaves are starting to turn here and nights are getting chillier, so I'm definitely in the Fall mood!

Hope you're having a wonderful crafty week!

Sunday, September 27, 2020

Fall Pumpkin Bear

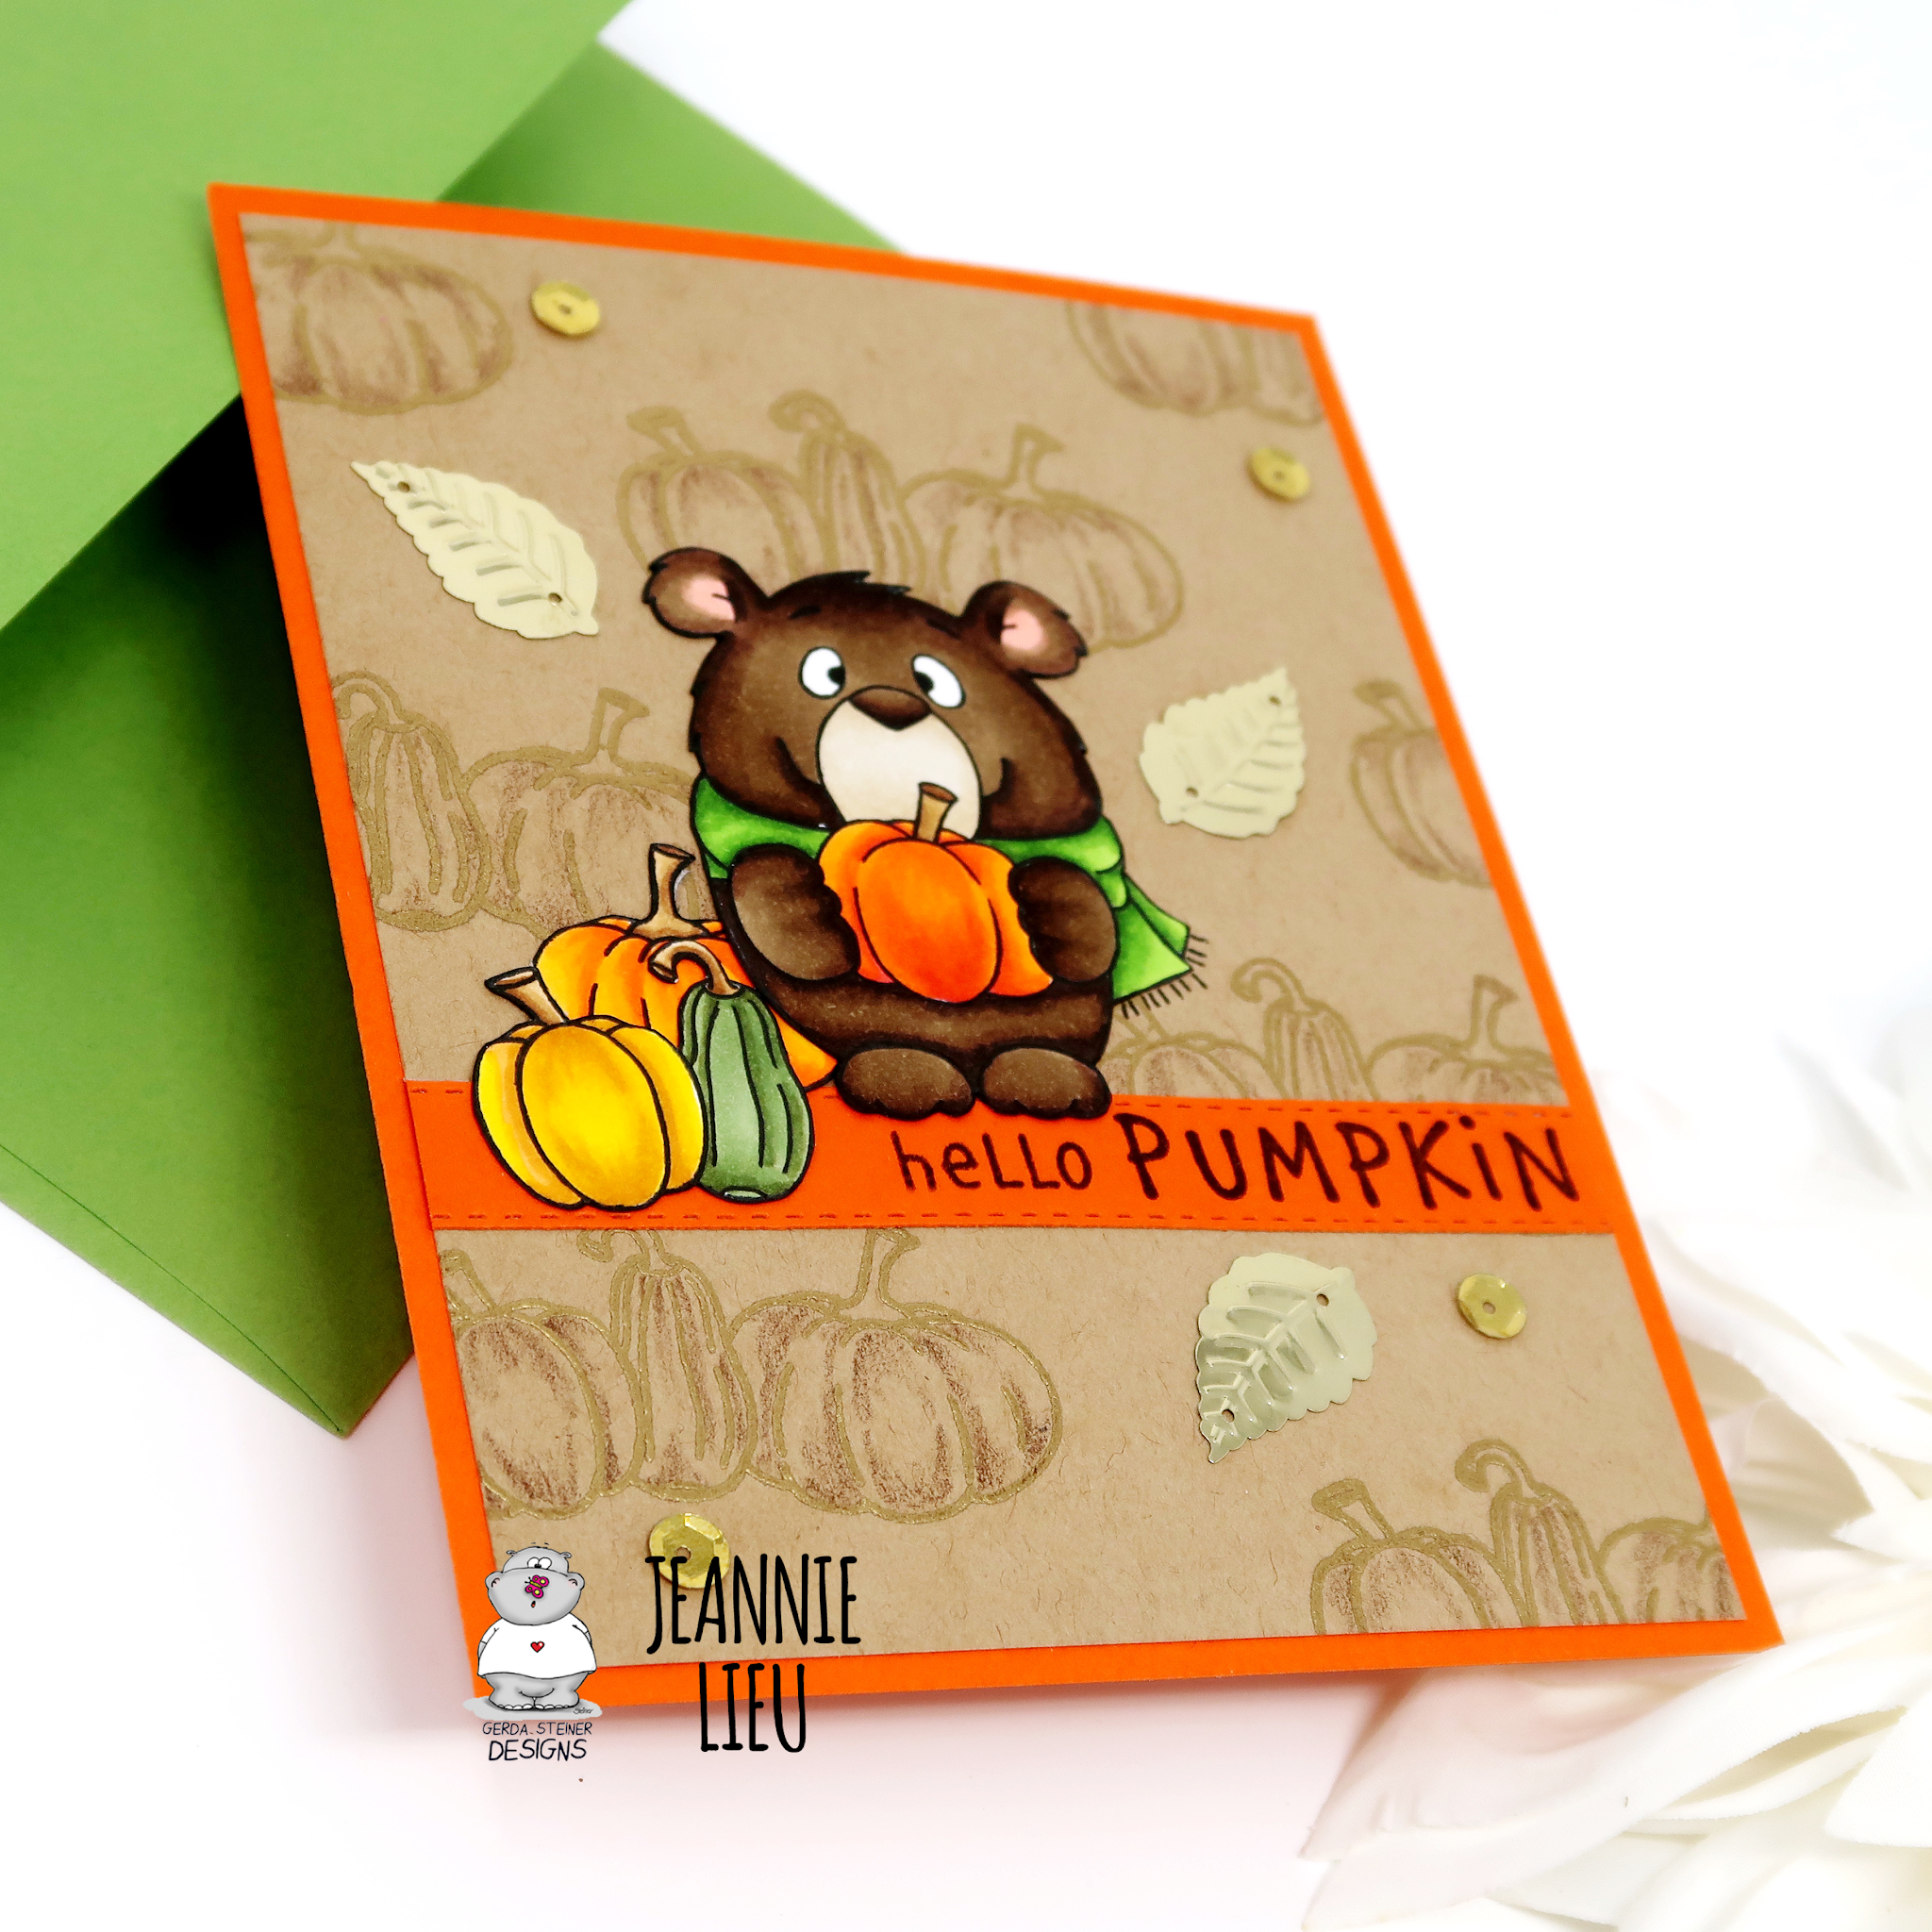
Hi everyone! It’s Jeannie (InsideoutJeans) on the blog today with Gerda Steiner Design’s stamp set named, Pumpkin Bear. This is a 3x4 stamp set that I love for Fall. It has the little bear holding a pumpkin along with a cluster of pumpkins. 


I started off with this card by stamping the cluster of pumpkins using watermark ink and heat embossing with gold powder to create a background card panel on kraft cardstock. To add a bit of dimension to the background, I used a brown colored pencil to add a bit of shading. 


I stamped both images and colored them in. I trimmed down my background panel down and matted it on orange cardstock. Using a matching strip of the same orange cardstock, I stamped the sentiment from this set on it. 


To finish off the card, I pulled out these leafy embellishments and sequins to match the gold embossing powder. It also helped to fill the empty space on the card panel. 


Thanks for stopping by today and I hope you get inspired to create. Come back again soon for more inspiration and ideas! Happy Crafting! 


Friday, October 11, 2019

Hello Pumpkin!


Happy Friday everyone! It's Cathy here sharing a simple card today using the cute new Pumpkin Bear stamps!

Teal is my favorite color, so how happy was I when  I turned to Pinterest for a little color scheme inspiration and found a fabulous photo of Fairytale and Jarrahdale pumpkins! I didn't know teal pumpkins actually exist in nature!

Super simple design on this card which I started by die-cutting the white background panel and inking a stencil with Scattered Straw and Fossilized Amber distress inks. Next, I heat embossed the sentiment from the set.

I then die-cut a strip of patterned paper using the same die and adhered it to the panel. I wrapped a piece of twine around the panel, tied a little bow and matted the panel on a teal cardstock.


I stamped the bear image and masked it before stamping the pumpkins. I colored them all with Copics and fussy cut them out. Since it's nearly impossible to fussy cut the fringe on the scarf, I cut the fringe off and glued some black embroidery floss to the back of the scarf and trimmed it down.

To add a little dimension, I used foam adhesive to glue the bear and pumpkins to the card front.

Hope you have a fantastic weekend and I'll see you again soon!


Wednesday, October 9, 2019

Happy Thanksgiving with the Pumpkin Bear


Hello and Happy Wednesday to You!  Tina here from Cards & Coffee Time with another fun project using the oh so adorable Pumpkin Bear Stamp Set .  Okay….today as I grabbed my copic markers I originally was going to color the sweet bear scarf  blue and the pumpkins traditionally orange.  Maybe it was lack of coffee but I thought it would be fun to do a flop-a-rooie and switch the colors.  Blue pumpkins??  Yes and I just love the way it turned out!!  What do you think?? Something a bit different:)  I am always trying to think outside the box, sometimes it goes great and sometimes it doesn't, but I like to give it a go anyway:)  I hope you like it!


You can watch how I created this card down below, just Click on the Pumpkin Bear Tutorial:)   Thanks so much for stopping by!  Have a great week!  Crafty Hugs, Tina


Friday, September 27, 2019

BOO!


Happy Friday everyone! It's Cathy here sharing some funny spookiness today using the adorable new Ghosts stamps!

These are hands down my favorite ghost stamps out there! They are just too cute and what's even better about this stamp set? They come with birthday sentiments that are perfect with their expressions. Love that can you use these for October birthdays along with Halloween.


I couldn't wait to create a funny little scene with them. I've cut a panel for the background from watercolor cardstock and masked the moon with a die-cut circle before inking the night sky with Broken China, Chipped Sapphire, Dusty Concord and Black Soot Distress inks. I spritzed a little Perfect Pearls mixed with water to add a few stars and sparkle.

I added craters to the moon with a paintbrush and watered down Hickory Smoke Distress ink and used a bat stencil with black modeling paste for some texture and dimension.


I die-cut a Tim Holtz Gothic Gate and heat embossed it with clear embossing powder to give it a metallic shine. I've also die-cut the "BOO" sentiment with a Tim Holtz Sizzix die and colored it with Copics to match the witch hats on those mischievous little ghosts.

They really look like they've scared their friend! Look how pale he is!


I Copic colored all of the images and fussy cut them out, but there are also coordinating dies to this stamp set available in the shop. The pumpkins are from the brand new Pumpkin Bear stamps. I love how easy it is to mix and match Gerda Steiner stamps!

Hope you all have a fabulous crafty weekend and see you again soon!

Saturday, September 21, 2019

Pumpkin Bear


Hi everyone! It’s Jeannie (InsideoutJeans) on the blog today with one of Gerda Steiner Designs’ newer release items with the amazing stamp set named, Pumpkin Bear. This is a smaller stamp set, but oh so adorable!


Lately, I've been really into scene cards and this was totally perfect for it. When I saw it, I felt all the autumn vibes with the red, orange, and yellows! Since this is a smaller set, I pulled an additional stamp set to help me out. Fall in Love is the perfect compliment to this card because I wanted to add a tree to the scene.


I went ahead and stamped out all the images from the set. I did minimal masking but I wanted the little bear to be in a pumpkin patch, where he decided on a pumpkin, so I added pumpkins everywhere. Once I colored in all the images, I really needed to set the scene by creating the ground. My coloring was very minimal, even though it looks like I spent a lot of time creating it. If you look closely, I used a dotting method with a lot of different colors. I kept the darker colors right under where images needed to be grounded (tree, pumpkins, bear) and worked my way out.


To finish off the sentiment, I stamped one of the ones from the set and added the little leaves around it. It really finished off the card and filled in the white space.

I love how this card turned out and am just in love with the colors and autumn vibes.

Thanks for stopping by! Come back again soon for some more inspiration and ideas! 

Tuesday, October 11, 2016

Fall Greetings

Hi there,

it's Tanja here and I would like to show you this adorable Fall Card using one of the new Gerda Steiner Designs Digital Stamps:

  • color the Gerda Steiner Designs Pumpkin Bear which is still available as part of the Gerda Steiner Designs Digital Stamp Bundle September with Delta and Touch Twin Brush Markers
  • add Glossy Accents to the pumpkin for extra dimension
  • cut out a stitched panel from Neenah Desert Storm kraft cardstock and create a background with the help of the My Favorite Things Whimsical Woodgrain stamp and Avery Elle Pigment Ink (Kraft)
  • cut out a wreath, leaves and berries from brown, green and red felt and adhere the pieces to the background panel
  • stamp the sentiment from Karten-Kunst Capri Herbstgrüße with Versafine (Vintage Sepia)
  • adhere the panel to a dark kraft cardbase

I hope you got inpsired.

Yours,